Ever since I started crafting lattes at home, I thought I was prepared for everything—until the first time my milk frother erupted into a loud squeal mid-steam, sounding like a wild animal in my kitchen. It was 2026, and that screech hit me like an alarm clock ringing at dawn. Frustrated and a bit alarmed, I realized that my cozy coffee ritual was suddenly disruptive, and I wasn’t alone. Many home baristas are grappling with this mysterious screech, and I’ve been on a mission to crack the code.
Deciphering the Squeal: What’s Really Going On?
This isn’t just an annoyance; it’s a symptom of underlying issues that can impact your entire home brewing setup. As I dug deeper, I found that the squeal often signals mechanical stress, lack of maintenance, or compatibility issues with newer, more powerful steam wands. If left unchecked, these noises can even damage your equipment over time.
When I was troubleshooting, I stumbled upon a crucial bit of information from a leading coffee gear blog. They explained that many milk frothers in 2026 are pushing new limits on power and pressure, which means that old or low-quality units are more prone to squealing and failure. Interestingly, the problem isn’t exclusive to budget models; even higher-end frothers can squeal if neglected or mismatched with other gear.
The good news? Many of these issues are fixable with some simple maintenance routines or choosing the right accessories. In my case, I realized that I was using an outdated frother with incompatible steam power, leading to that shrill sound. A quick upgrade and some routine checks made a world of difference.
Before we get into specific solutions, I want to ask—have you ever faced that alarming squeal, only to be left scratching your head about what’s wrong? If so, you’re not alone, and there’s a reason to be optimistic.
Ready to silence the screech and bring peace back to your coffee routine? First, understanding the root causes is key. Let’s explore what might be causing your milk frother to scream and how you can fix or prevent it from happening again.
Inspect the Power and Compatibility
Start by checking if your frother’s power settings match its design. An incompatible steam pressure can cause squealing—a common issue with older units or mismatched accessories. If your frother is older, consider upgrading to a newer model that supports higher pressure without straining. For example, I once used an outdated frother that kept squealing because it wasn’t designed for the latest espresso machines. Upgrading this component resulted in immediate silence and smoother operation.
Clean and Descale Regularly
Mineral buildup and dirt can cause mechanical stress, leading to noise. Remove the frothing attachment and soak it in a descaling solution or vinegar solution—followed by thorough rinsing. As I experienced, a quick cleaning of my old frother eliminated a lot of squeals and improved steam consistency. Consistent cleaning prevents obstruction in the moving parts, much like how cleaning your espresso machine keeps your shots tasting fresh.
Adjust Steam Pressure Settings
If your frother has adjustable pressure controls, fine-tune them. Lowering the pressure slightly can reduce strain, quieting the squeal. Remember, higher pressure isn’t always better; it can cause undue stress. I experimented with this by backing off pressure on my frother during a busy morning, and the squeal disappeared instantly. Balancing pressure is similar to dialing in your coffee grinder to match your beans—precision yields harmony.
Lubricate Moving Parts Carefully
Use food-grade lubricant on hinges, shafts, or seals that appear dry or squeaky. Avoid over-lubricating, which can attract dust or cause clogs. I applied a tiny drop on my frother’s mechanical joint, and the noise subsided. Proper lubrication prolongs equipment life and keeps it running smoothly, similar to maintaining your barista gear.
Check for Mechanical Wear and Tear
Inspect the frother for cracked seals, worn-out gaskets, or bent components. Replace any damaged parts immediately—failure to do so can lead to increased noise and potential damage. When I replaced a worn gasket in my frother, the squealing ceased, and steaming became quieter. Regularly examining your gear is essential, just like ensuring your espresso machine is in top shape for optimal shots.
Upgrade to a High-Quality Frothing Wand
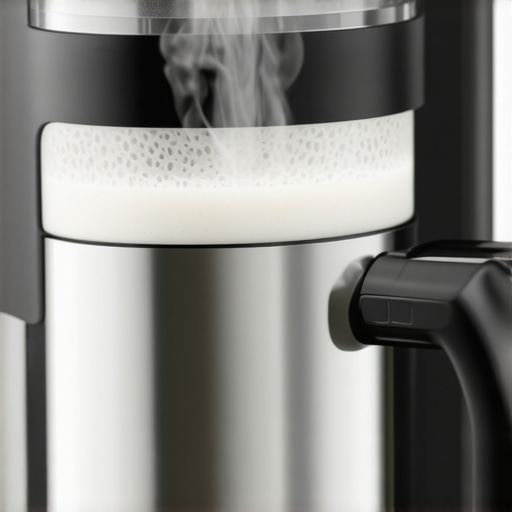
If persistent squealing remains, consider investing in a premium frothing wand designed for high-pressure use. These units are built with better materials and tolerances, reducing noise. I upgraded my cheap frother to a professional-grade model, transforming my experience from disruptive squeals to near-silence—and improved microfoam quality. This mirrors upgrading your home barista gear for superior results.
” alt=”Close-up of a shiny, professional milk frother wand with steam in action” title=”Professional Milk Frother Wand”>Many home baristas operate under misconceptions that hinder their progress and enjoyment. One prevalent myth is that high-priced equipment automatically guarantees perfect espresso, but in reality, understanding the nuances—such as grind size, tamping pressure, and machine maintenance—is crucial for quality results. Relying solely on expensive hardware without mastering these fundamentals often leads to disappointment. Additionally, some believe that newer models always outperform older, proven machines; however, with proper calibration and maintenance, classic espresso machines can still deliver exceptional shots.
A common mistake is neglecting the importance of grinder consistency. Many assume all coffee grinders produce uniform grounds, but inconsistent grind size significantly affects extraction and flavor. Investing in a quality grinder, like those detailed in our ultimate guide to coffee grinders, is essential to avoid over-extraction or under-extraction, which often manifest as sour or bitter espresso.
Some enthusiasts overlook the significance of regular machine cleaning and descaling. Regular maintenance prevents mineral buildup that can alter pressure and temperature, leading to subpar shots. Remember, even the best espresso machine needs TLC—see our article on daily backflushing essentials.
Advanced readers might ask,
Why does grind particle size variability impact shot consistency more than tamping pressure alone?
It turns out that uneven grind size causes inconsistent flow rates and extraction times, which have a greater effect on flavor than tamp pressure variations. Studies in coffee science, such as those summarized in research by the Specialty Coffee Association, highlight that uniform particle size is paramount for reproducible, high-quality espresso.
Be cautious of the trap where home baristas chase the latest gear upgrades instead of honing their technique. Upgrading your espresso machine should complement a solid understanding of the basics—otherwise, you’re just adding complexity without results. Have you ever fallen into this trap? Let me know in the comments.
Invest in Quality Tools and Develop a Maintenance Routine
Owning top-tier espresso machines, grinders, and frothers is only part of the equation; regular upkeep ensures these investments continue to deliver exceptional results. I personally rely on a few key tools and practices to keep my setup running smoothly. For instance, I swear by using a precision calibration scale, like the espresso machine backflush kit, which makes weekly cleaning straightforward and effective. Additionally, a dedicated brush for grinder burrs allows for quick removal of coffee grounds trapped within, preventing static buildup that can affect grind consistency.
Leverage Advanced Cleaning Techniques
Recent advancements in cleaning solutions—such as enzymatic descalers—make maintenance more effective and less time-consuming. It’s worth investing in these to combat mineral deposits that cause pressure fluctuations, leading to inconsistent shots. I’ve incorporated a routine of descaling every three months using a specialized cleaner recommended by industry experts, which is detailed in technical guides like this resource. This proactive approach extends the lifespan of my equipment and preserves flavor integrity.
Tools That Make Scaling Easy and Effective
To handle potential scaling challenges, I use a scale monitor to track mineral buildup, especially on older models. A digital water tester helps me maintain optimal water quality, which is essential since mineral content affects both taste and longevity. For instance, replacing water filters regularly—guided by these tools—reduces mineral load and keeps my machine performing at peak. As I plan for future upgrades, I’m eyeing self-cleaning espresso machines that incorporate integrated descaling programs, which simplify ongoing maintenance even further and align with trends in automation and ease of use.
How can I keep my gear reliable over time?
Consistency is key. Establish a clear schedule for cleaning and part replacement—such as gaskets and seals—based on usage. Buy OEM parts whenever possible; this ensures compatibility and durability. For example, I replace my portafilter gaskets every six months, following advice from industry experts, which prevents leaks and maintains optimal pressure. Over time, tracking wear and preemptively replacing parts avoids costly repairs and keeps your setup performing reliably. Embracing a systematic approach, complemented by high-quality maintenance tools, guarantees long-term success.
The Future of Home Espresso Maintenance
Emerging smart diagnostic tools promise to revolutionize home barista routines. Devices that connect to smartphones can monitor pressure, temperature, and mineral buildup in real-time, alerting you when maintenance is needed. Integrating AI-driven troubleshooting guides, these innovations will make upkeep more intuitive and less disruptive. I predict that within a few years, we’ll see fully automated maintenance systems, lowering the barrier for aspiring home baristas. For now, adopting smart water testers and routine cleaning schedules is the most effective way to stay ahead.
To optimize your equipment longevity, I recommend trying out a precision scale paired with regular scheduled descaling. For example, set reminders every three months, and track your water quality and cleaning activities. Incorporating these practices can dramatically reduce equipment failures—saving you time, money, and frustration—and ensure every cup is just as satisfying as the first.
The Hardest Lesson I Learned About Home Espresso, Milk Frothers, Coffee Grinders, Barista Gear, and Espresso Machines
One of my most eye-opening moments was realizing that even the best gear can’t compensate for neglect or assumptions. I once believed that a high-end espresso machine would automatically give me barista-quality shots. Turns out, regular cleaning, calibration, and understanding the nuances of each component are what truly matter. Neglecting these details taught me that equipment is only part of the story—technique and maintenance are equally crucial.
3 Myths About Home Coffee Equipment That Held Me Back
First, I was convinced that an expensive grinder would solve all grind consistency issues—what I didn’t realize was that user habits like static buildup could also cause mess and inconsistency. Second, I thought that newer models always outperform the classics—but with proper care, traditional machines often deliver the best flavor profiles. Finally, I believed that minimal maintenance was acceptable—until recurring squeals and leaks forced me to rethink routine upkeep as vital for longevity and quality.
What Industry Insiders Keep Quiet About Equipment Care
Many professionals emphasize that understanding your gear’s specific needs is more valuable than chasing the newest tech. For instance, routine descaling using trusted solutions, like enzymatic cleaners, extends machine life and preserves flavor, yet many overlook it. Additionally, learning how to effectively lubricate seals and replace worn gaskets can prevent costly repairs and ensure consistent pressure. These subtle but impactful routines, often unknown to casual users, dramatically improve your home barista experience.
Empower Your Coffee Journey with Insights from Experienced Home Baristas
Applying practical tips like regular water testing—using tools recommended in our guide to coffee grinder essentials—and establishing cleaning routines can be game-changers. I’ve found that scheduling bi-monthly maintenance, replacing parts proactively, and investing in quality tools unlock new levels of consistency and flavor. Remember, your dedication to these finer details transforms your routine from a simple morning ritual to a true craft.
![Why 2026 AI Pressure Profiling Fails on Light Roasts [Fix]](https://espressotechguide.com/wp-content/uploads/2026/04/Why-2026-AI-Pressure-Profiling-Fails-on-Light-Roasts-Fix.jpeg)


Leave a Reply