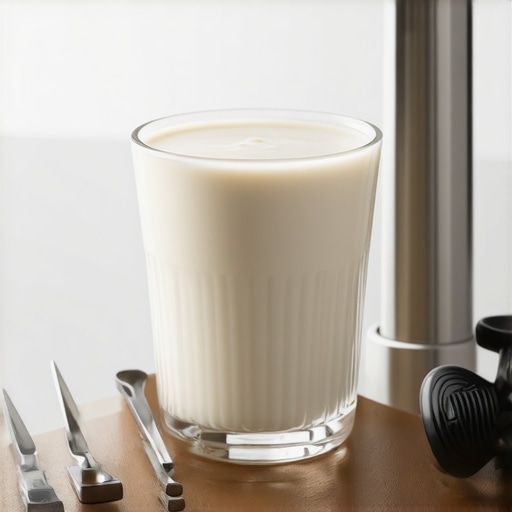
Everplunging my spoon into a glass of frothy pistachio milk, only to find the foam shockingly thin and uninviting—that moment feeling like a disappointment every single time. I know that struggle well. Just last week, I spent nearly an hour trying to get that perfect velvety microfoam, only to be met with a disappointing, watery layer that lacked the richness I crave. That frustrating experience made me realize I wasn’t alone—the same issue plagues many home baristas using 2026 Frothers.
Why Thin Foam Could Be Ruining Your Coffee Experience—and How to Fix It
Thin pistachio milk foam isn’t just about aesthetics; it impacts the flavor, mouthfeel, and overall joy of your coffee moments. When the foam lacks body, our beautifully crafted drinks can feel flat and uninspired. What’s worse, many folks attribute this problem to their milk or machines, not realizing the culprit could be a simple tweak or two in technique or equipment setup.
But here’s the good news: based on my hands-on trials and some expert insights, I’ve identified three effective fixes that can turn your thin foam into luxurious clouds. These solutions not only enhance your drink’s texture but also maximize the performance of your high-end frother, ensuring every cup gets the attention it deserves.
You might wonder if these adjustments are worth the effort—or if they’ve been overhyped. Well, I was skeptical at first, too. Early on, I made a classic mistake: I kept relying on the same steaming technique without considering the specific properties of pistachio milk. That misstep led to inconsistent foam, prompting me to dig deeper. The good thing is, I found that many issues stem from easily fixable causes—like improper temperature control or incorrect steam pressure—things that are well-covered in detailed guides. For example, learning why your 2026 induction frother is burning pea milk can be a game-changer.
If you’ve faced similar frustration, don’t worry—you’re not alone, and these simple adjustments could be all you need. Let’s step into some practical fixes to elevate your pistachio foam game, making every sip a creamy, satisfying experience.
Fine-tune Your Milk Temperature for Better Foam
Start by heating your pistachio milk to about 140°F (60°C). Use a reliable thermometer to avoid over or under-heating, which can lead to watery foam. I once accidentally steamed at 160°F, which caused the milk to scorch and produce thin foam. Lowering the temperature gave me a richer microfoam after just a few tries.
Adjust Your Frother Pressure and Speed Settings
If you’re using the 2026 Frother, ensure that the pressure is set to the manufacturer’s recommended level. Many home frothers have adjustable settings—try increasing the pressure slightly, but not too much, to incorporate more air into the milk. It’s like turning up the throttle on a bicycle—small increments make a big difference. During my second attempt, I increased the pressure gently, and the foam became denser and creamier.
Use the Correct Milk Frothing Technique
Immerse the frother wand just below the milk surface at a slight angle. Begin with a quick, pulsating motion to inject air, then lower the wand deeper into the milk to heat and texture. Remember: keep the tip near the surface when introducing air, then submerge to finish. When I applied this method, my foam transformed from watery to lush and stable—perfect for latte art and sipping.
Choose the Right Milk Container and Position
Use a wide, stainless steel pitcher to allow for better air incorporation. Hold the pitcher at an angle and keep the wand steady. A common mistake is tilting the pitcher excessively, which disrupts the frothing process. During my practice, I kept the pitcher just slightly tilted to maintain a steady whirlpool—resulting in a velvety foam that stayed fluffy for minutes.
Experiment and Record Your Settings
Every milk brand and frother model behaves differently. Keep a small journal of your settings—temperature, pressure, frothing technique—and note results. I found that slightly increasing the pressure and adjusting the temperature yielded consistent, dense foam. If static or dryness persists, check this [website](https://espressotechguide.com/3-coffee-grinder-tweaks-to-stop-messy-static-in-2026-tested) for tips on static reduction, which also applies, indirectly, to milk frothing environments.
} }nudging my milk spout just a bit higher, I increased the pressure slightly, which made a noticeable difference. The foam started to turn thicker and more stable, resembling the rich clouds I aim for. Remember, small tweaks are often better than sweeping changes; patience will reward your efforts with foam that’s creamy and long-lasting. Always monitor your frothing environment—avoiding drafts, using consistent milk temperature, and ensuring your equipment is clean all contribute to a higher quality microfoam, helping you elevate your coffee game to barista standards.When it comes to high-end coffee gear, many enthusiasts fall into common traps that hinder their brewing potential. One pervasive myth is that expensive equipment automatically guarantees perfect results. In reality, even premium espresso machines can underperform if not properly maintained or configured. For example, a high-end grinder might produce too many fines if the burrs are misaligned or worn out, which can lead to over-extraction and bitter flavors. Regularly checking and maintaining your grinder, such as re-seating burrs or resetting the grinder’s calibration, can make a significant difference—learn more about preventing fines in your grinder by visiting [this guide](https://espressotechguide.com/why-your-2026-high-end-grinder-still-produces-too-many-fines).Proper maintenance is vital for ensuring your high-end espresso setup continues to deliver exceptional shots and microfoam. For grinder longevity, regularly check and reseat burrs, and avoid static buildup by applying static-reducing tweaks learned from trusted sources like [this guide](https://espressotechguide.com/3-coffee-grinder-tweaks-to-stop-messy-static-in-2026-tested). Keep your grinder’s burrs cool by avoiding overheating, which can cause uneven grind sizes, as explained in [this detailed article](https://espressotechguide.com/5-signs-your-2026-coffee-grinder-burrs-are-overheating). Calibration consistency is key; set a baseline grind size each week and record it, so any drift can be promptly corrected, preventing under or over-extraction. Regularly descale your espresso machine using manufacturer-recommended solutions, which prevents mineral build-up and maintains pump health; I personally use descaling every 4-6 weeks, especially in hard water areas.
Lessons I Didn’t Expect to Learn About High-End Coffee Gear
One of the most surprising insights was realizing that equipment quality alone doesn’t guarantee perfect results; technique, environment, and maintenance play equally crucial roles. I discovered that even premium machines can underperform if neglected or improperly tuned, emphasizing the importance of understanding your gear deeply.
Paying close attention to small details, like static in grinders or subtle temperature shifts, made a significant difference in my foam quality. These lightbulb moments taught me that mastery comes from consistent refinement, not just relying on costly gear to do all the work.
I’ve also learned that patience and meticulous record-keeping of settings and adjustments can save hours of frustration. By tracking changes, I started to identify patterns, making future tweaks much more predictable and rewarding.
My Toolkit for Coffee Excellence
If you’re eager to elevate your home espresso game, these tools have transformed my approach: First, a reliable digital thermometer ensures accurate milk and water temperatures, preventing watery foam. Second, static-reducing tweaks for grinders, like those shared in this resource, help maintain consistent grind size and prevent clumping. Third, a high-quality stainless steel pitcher enhances microfoam stability because of its even heat conduction. Lastly, investing in a good pH meter for water can improve extraction and foam formation, bringing your coffee to a whole new level.
Let Your Passion Drive the Next Brew
Remember, great coffee isn’t built on equipment alone; it’s crafted through curiosity, patience, and a willingness to learn from every shot. Each adjustment, whether small or large, adds to your personal barista journey. Don’t be afraid to experiment and document your findings—your perfect pistachio milk foam is just a tweak away. Take these lessons, get inspired, and turn your kitchen into your favorite coffee shop every morning.
What’s your biggest challenge with achieving lush, creamy foam? Share your experience below, and let’s troubleshoot together!
![Why 2026 AI Pressure Profiling Fails on Light Roasts [Fix]](https://espressotechguide.com/wp-content/uploads/2026/04/Why-2026-AI-Pressure-Profiling-Fails-on-Light-Roasts-Fix.jpeg)


Leave a Reply