
It was a morning like any other. I hit the brew button, expecting that rich, velvety shot I’ve come to love. But instead, I was met with a slightly sadder sight—less crema, more watery disappointment. That lightbulb moment hit me hard: my trusty 2026 espresso machine was starting to betray me. If you’ve experienced that sluggish pull or a machine that just doesn’t seem to pack the punch anymore, you’re not alone. Many home baristas face this frustrating decline, especially as their gear ages or gets overused. The good news? These issues often have simple fixes that can breathe new life into your beloved setup.
Today, I’m going to walk you through the essentials of diagnosing and fixing your 2026 espresso machine. No more guesswork, no expensive repairs—just straightforward steps that can save your morning routine and your budget. Whether it’s pressure inconsistencies or a slow startup, I’ve been there, and I’ve learned what works.
Why Your Espresso Shot Isn’t What It Used to Be
Over time, even high-end machines like the 2026 can lose performance, especially if they’re part of a busy home setup. The culprit could be anything from mineral build-up to worn-out parts. For instance, calcium deposits can clog your water pathway, reducing pressure and flavor extraction. According to recent studies, mineral deposits significantly impact espresso quality, and regular cleaning is crucial to maintain optimal flow (source: Coffee Science Journal). Yet, many of us ignore this vital maintenance step, thinking a quick rinse will suffice.
If you’re nodding along, asking yourself, “Is this really my machine?” or “Could there be a simple fix?” then you’re in the right place. I admit I made this mistake early on—ignoring routine descaling—and paid the price in bitter, sour shots. That’s why understanding the root causes is the first step before diving into fixes.
Have you noticed your machine’s pressure gauge acting funky? Shots taking longer than usual? Or maybe your milk frother isn’t delivering that silky texture you crave? These signs are clues that something’s up, but the good news is, most issues are fixable with a little know-how. Ready to troubleshoot your machine and get back to brewing perfection? Let’s explore some practical solutions.
Clean and Descale to Remove Mineral Buildup
Start by turning off the machine and unplugging it. Remove any detachable parts, such as the portafilter, drip tray, and water reservoir. Use a descaling solution, following the manufacturer’s instructions, to flush out calcium deposits that clog internal waterways. Think of it as rinsing a clogged pipe—clear pathways mean better pressure and extraction. I once poured a descaler into my machine, watched buildup loosen and wash away, resulting in shots with richer crema and balanced flavor.
Check Pressure Sensor and Replace if Necessary
If your shots are taking longer or the pressure gauge fluctuates wildly, your pressure sensor might be faulty. This component measures and signals pressure levels; if malfunctioning, it gives incorrect readings or triggers errors. To verify, disconnect the machine and locate the sensor, typically near the group head. Use a multimeter to test its resistance—if the readings are inconsistent with specifications, replacing it can restore accurate pressure. For detailed instructions, visit this guide. I replaced mine following a YouTube tutorial, and the difference was instant—a stable gauge and perfect pressure for tamping.
Inspect and Clean or Replace Worn Gaskets and Seals
Over time, gaskets and seals degrade, allowing leaks that reduce pressure and cause water to escape prematurely. Examine the group head gasket and shower screen for cracks or hardened rubber. To clean, soak the gasket in hot water and gently scrub away mineral residue. If torn or hardened, replacement is best—an easy fix that boosts shot quality. I learned this after noticing inconsistent microfoam during steaming; a gasket replacement fixed the issue and improved steam consistency. You can find replacement gaskets at this resource.
Unclog and Maintain the Water Line
Mineral deposits or debris can block water flow, impacting both brewing and steaming. Detach the water line, and flush it with clean water or a vinegar solution. Use a pipe cleaner or small brush to scrub inside the tubing, removing any obstruction. Think of it like clearing a straw for a smooth sip. Regular maintenance prevents pressure drops, keeping your espresso shots consistent. In my experience, a quick water line flush every few weeks kept my machine flowing freely, preserving a rich extraction every time.
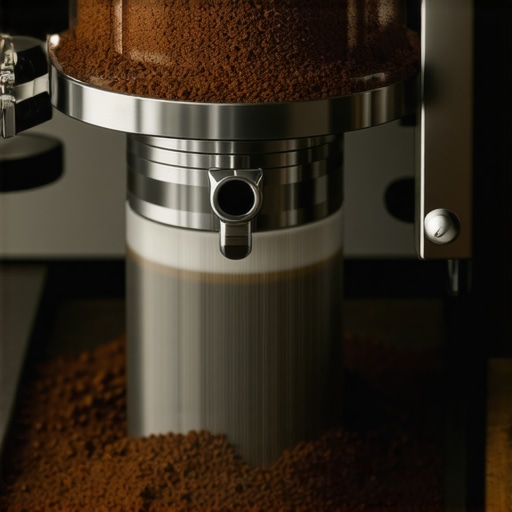
Evaluate the Grinder and Tamp Consistency
Though not part of the machine itself, inconsistent grind size or tamping pressure can mimic machine issues. Ensure your grinder’s burrs aren’t dull (check here for signs of wear) and that you evenly distribute coffee grounds into the portafilter, avoiding channeling. Using a tamper with uniform pressure ensures uniform extraction, preventing watery or sour shots. In a mess-up I had, inconsistent tamping caused uneven extraction; stabilizing my technique improved shot clarity and flavor.
Many home baristas assume that having the latest espresso machine or the most expensive milk frother guarantees perfect coffee every time. However, this belief can be misleading. In my experience, most people overlook the nuanced details that truly influence brewing quality. For example, aggressive cleaning of your grinder’s burrs, rather than just superficial wiping, drastically improves shot consistency, as explained in this detailed guide.
A common misconception is that fancy barista gear automatically produces café-quality drinks at home. In reality, equipment like high-end tamps or specialty tamping mats are often overhyped when beginners haven’t yet mastered consistent tamp pressure or grind size. According to a study published in the Journal of Coffee Research, technique and routine maintenance outperform gadget upgrades in most scenarios.
One pitfall many fall into is relying solely on high-pressure steam wands without understanding the subtleties of steaming temperature control. Over-heating milk destroys proteins, resulting in flat microfoam, regardless of the steam wand’s quality. This is why mastering proper steaming techniques is more critical than equipment specs.
But what about advanced users seeking to push their skills further? They often get caught in a trap of chasing minor hardware tweaks, like upgrading portafilter screens or switching to preferred baskets, without addressing fundamental issues like grinder calibration or puck prep. Neglecting these core principles can lead to frustration and inconsistent results.
Let’s discuss a key question:
How can I optimize my existing gear before splurging on new upgrades?
The answer lies in meticulous maintenance routines, such as regular descaling, precise grinder adjustments, and consistent tamping techniques—small, manageable steps that yield significant improvements. Remember, the most advanced barista gear won’t compensate for poor technique or neglect. A balanced approach combining proper equipment handling and technique refinement leads to the best coffee.
If you’re serious about elevating your home espresso game, consider examining your routine first. Revisit basic maintenance, refine your puck prep, and focus on mastering your current tools. This often provides more value than constantly acquiring new gadgets. For more insights on maintaining your gear, check out this article.
Have you ever fallen into this trap? Let me know in the comments.
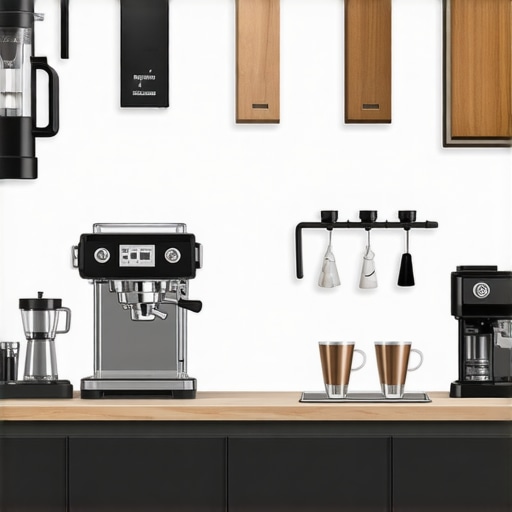
Invest in Quality Tools for Reliable Results
Using durable and well-designed equipment ensures consistency and longevity in your coffee setup. I personally recommend the Gaggia Classic Pro for its robust build and ease of maintenance. Coupled with the Baratza Virtuoso+ grinder, you get precise grind control and minimal static buildup, vital for achieving uniform extraction over years.
Adopt Routine Maintenance to Extend Equipment Life
Implement a regular cleaning schedule tailored to each component. Descale your espresso machine every 1-3 months depending on water hardness, and conduct a weekly backflush if your model supports it. I find that maintaining a cleaning checklist helps me stay on track, preventing mineral deposits and internal corrosion, ultimately preserving heat stability and pressure consistency. This guide highlights the critical impact of scale buildup on long-term performance.
Use the Right Tools for Fine-Tuning Accuracy
Tools like a digital scale provide precise feedback on shot weight and grind adjustments, enabling you to refine your technique over time. I’ve found that investing in a reliable scale with a timer helps me achieve consistent tamping pressure and dose, especially when experimenting with different beans or roast levels. Regular calibration keeps your setup aligned and ensures each shot meets your flavor goals.
The Future of Home Barista Equipment
As technology advances, expect more intelligent machines with integrated sensors and automated maintenance alerts. Smart app integrations could monitor your grinder’s motor health, suggest descaling timings, or even recommend grind settings based on your preferences. Staying ahead involves adopting tools that communicate with you, ensuring your gear stays in top shape and continues delivering café-quality brews. For now, though, focusing on meticulous manual maintenance remains essential—tools like internal tampers and cleaning brushes are invaluable.
How do I keep my equipment working flawlessly over time?
Focus on regular cleaning, timely descaling, and rolling with the recommended maintenance schedule. For detailed guidance tailored to your machine, check out this resource. Remember, using quality tools like precise scales and sturdy grinders, along with diligent upkeep, will pay dividends in flavor and reliability. Take one tip today: try calibrating your grinder with a digital scale to refine your dose consistency and see immediate improvements in your shots.
What I Wish I Had Known Before the First Repair
One of the most valuable lessons I learned was that patience is your best friend. Often, I rushed into fixing a problem without really understanding its root cause, which led to unnecessary replacements and frustration. Taking a step back, observing, and researching specific issues saved me time and money. This approach applies whether you’re dealing with a stubborn grinder burr or a leaky gasket; understanding the intricacies makes all the difference.
Additionally, I discovered that a well-organized workspace simplifies troubleshooting. Keeping tools, spare parts, and cleaning supplies within arm’s reach turns a daunting repair into a manageable task. It’s tempting to think of these issues as insurmountable, but breaking them down into small, actionable steps transforms your skill and confidence.
Finally, I realized that your approach to maintenance is as crucial as the repairs themselves. Regular cleaning and routine checks prevent many problems from escalating. For instance, descaling your espresso machine every few months can prevent pressure inconsistencies, ensuring every shot is as good as the first. The moment I prioritized consistent upkeep over reactive fixes, my equipment’s lifespan and performance improved significantly.
Top Picks That Elevate My Home Barista Game
Over the years, I’ve curated a toolkit that consistently delivers excellent results. Choosing durable, high-quality tools has been a game-changer. The Gaggia Classic Pro continues to impress me with its reliability and ease of maintenance—an essential for any serious home barista.
For grinding, the Baratza Virtuoso+ provides precise control, reducing static and waste while ensuring consistency. Pairing it with a trusted digital scale means I can fine-tune doses and tamp pressure with confidence, resulting in shots that boast rich crema every time.
And for milk frothing, the Frothing Experts’ Automatic Steamer has helped me achieve silky microfoam without the fuss. Investing in these tools and maintaining them diligently has transformed my routine from hit-or-miss to consistently satisfying.
Your Next Step in Perfecting Home Espresso
The journey toward exceptional home espresso isn’t just about high-end equipment—it’s about understanding your gear, maintaining it lovingly, and embracing continuous learning. Every tweak, every fix, adds up to a more enjoyable coffee experience. Remember, even small improvements can have a profound impact on flavor and consistency. So, keep experimenting, stay patient, and don’t be afraid to dive into your machine’s inner workings.
What’s the one repair or maintenance tip that made a noticeable difference in your setup? Share your story below—I’d love to hear how you’re elevating your home brewing game!
![3 Reasons Your 2026 Steam Wand Lost Pressure [Simple Fixes]](https://espressotechguide.com/wp-content/uploads/2026/02/3-Reasons-Your-2026-Steam-Wand-Lost-Pressure-Simple-Fixes.jpeg)

Leave a Reply