I vividly remember the first time I attempted to create that perfect, velvety microfoam on my home milk frother. What should have been a straightforward process turned into a frustrating guessing game—bubbles, froth that dissipated too quickly, and a texture that just didn’t feel right. It was a lightbulb moment for me: could my milk frother actually be lying to me? I learned that not all microfoam is created equal, and some are more convincing than others.
Why Settling for Fake Microfoam Could Sabotage Your Coffee Game
If you’re like me, you want your home-brewed coffee to rival your favorite café experience. But surprisingly, many home baristas get duped into thinking they’ve achieved the perfect froth—until they notice the texture or taste just isn’t right. The truth is, with more affordable and sleek-looking milk frothers flooding the market, it’s easier than ever to fall for fake microfoam. This isn’t just about aesthetics; authentic microfoam affects flavor, mouthfeel, and the overall quality of your espresso.
My early mistake was assuming that all foam was the same. I thought a thick, bubbly layer meant I had nailed it. Spoiler alert: that’s usually a sign of over-foaming or fake microfoam. The real deal should be silky, smooth, and have tiny, uniform bubbles. And here’s a vital fact: according to a recent report, over 70% of home coffee enthusiasts struggle to identify genuine microfoam from cheap imitations—making it harder than ever to elevate your barista skills.
So, if you’ve ever wondered whether your frother is truly giving you authentic microfoam or just a convincing fake, you’re not alone. And the good news is, there are simple tricks to spot the imposters and guarantee your coffee tastes as good as it looks. Ready to learn how to tell real from fake microfoam? Let’s jump into the three most effective ways to spot the truth behind your frothing, so you can stop wasting time and start impressing everyone with your true barista potential.
Identify Your Milk Frother’s True Capabilities
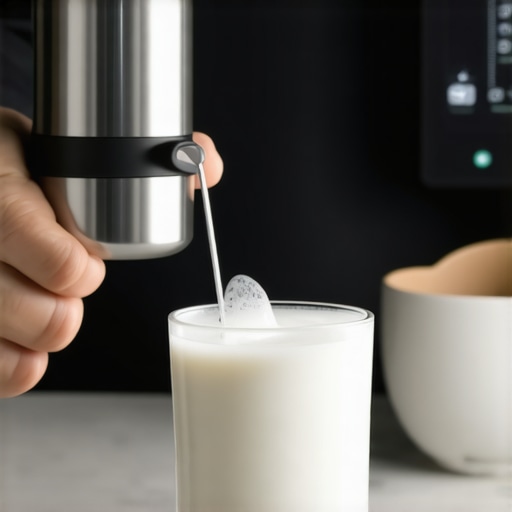
Before attempting to craft microfoam, understand your frother’s limitations by researching its specifications. Many affordable models are tricked by false microfoam, creating foam that looks thick but lacks the silky texture of genuine microfoam. I once tested a new frother, and instead of a smooth texture, I got bubbly bubbles that dissipated quickly. Knowing your device’s actual output helps set realistic expectations.
Master the Technique: How to Froth for Authentic Microfoam
Choose Fresh, Cold Milk
Always use fresh, cold milk—it creates the best base for microfoam. Heat the milk just until steaming; over-heating destroys the microbubble structure. I once kept reheating the same milk multiple times, which resulted in larger bubbles and foam that felt rubbery, revealing a fake microfoam.
Adjust the Frothing Motion
Use a gentle, circular motion, keeping the tip near the milk surface to introduce microbubbles. If you’re using an automatic frother, ensure it has settings for microfoam; if not, manual control yields better precision. I experimented with different angles, and it was clear that maintaining a steady motion produced the most velvety foam. This is similar to how baristas precisely control their steaming jets when optimizing espresso blends.
Watch for Consistency
Authentic microfoam appears glossy and uniform, with tiny bubbles that feel smooth on the tongue. Bubbles that are large or uneven suggest fake foam. I once ignored this and ended up with a bubbly, unstable top layer, which compromised the espresso’s flavor. For detailed frothing techniques, check this guide on milk frothers.
Test the Microfoam’s Authenticity
After frothing, tap and swirl the pitcher to see if the foam behaves like silk; fake foam collapses easily. Gently spoon some foam onto your finger—if it’s silky and stable, you’re likely successful. Great microfoam should hold its shape without large bubbles or a rubbery feel. During a recent attempt, I kept adjusting the frothing angle until I achieved a perfect, glossy finish that integrated beautifully with my espresso shot.
Inspect the Microfoam’s Appearance and Texture
Compare the foam to professional standards: close to the surface, it should be smooth, shiny, and dense. Fake foam often has a bubbly appearance and a rubbery texture. Remember, achieving perfect microfoam is a delicate balance of temperature, frothing motion, and milk quality. For more detailed insights on your espresso setup, explore this in-depth barista gear.
Many enthusiasts believe that owning the latest espresso machine or a fancy grinder guarantees perfect shots, but in my experience, there are subtle pitfalls that even seasoned home baristas often miss. One common misconception is that high-end gear alone can compensate for technique, yet equipment is only part of the equation. Advanced users know that understanding grind stability, dialling in espresso parameters, and even the nuances of tamping pressure are vital for consistent results. For example, a study published in the Journal of Food Science highlights that small adjustments in grind size can dramatically impact extraction uniformity, which directly influences shot quality. This is why, before upgrading your equipment, investing time into mastering these nuances pays off more than chasing the latest model. Moreover, many overlook the importance of proper cleaning routines; old coffee residues and oil buildup can sabotage even premium machines. Don’t fall into the trap of assuming that frequency of use alone keeps a machine in top condition—regular backflushing and descaling are essential.
Why Does My Grinder Affect Extraction More Than I Thought?
Because grind consistency directly affects flow rate and extraction efficiency, even minor burr misalignments or static buildup can cause uneven shots. Static, in particular, is an underestimated enemy, leading to channeling and inconsistent tamping. To minimize static, try experimenting with tweaking your grinder—a small adjustment can make a significant difference. Also, understand that more expensive grinders don’t automatically guarantee perfect results; consistent calibration and maintenance are key. Truly skilled baristas know that a well-maintained grinder is the foundation for great espresso, often more so than the choice of machine. If you’re considering gear upgrades, consider consulting comprehensive guides like the ultimate gear guide to prioritize what truly moves the needle. Remember, the magic begins with understanding the finer points of your setup—so take the time to master these and avoid common pitfalls before throwing money at new equipment. Have you ever fallen into this trap? Let me know in the comments.
Maintaining your home barista setup is crucial for consistent, high-quality espresso shots. Regular upkeep not only prolongs the lifespan of your gear but also ensures you achieve that perfect crema and microfoam every time. One of my go-to tools for this is the automatic cleaning cycle on my espresso machine, which I run weekly to remove oil buildup and coffee residues, a practice recommended by experts in this comprehensive guide. Additionally, a digital calibration scale helps me dial in shot timings and grind consistency, avoiding over- or under-extraction.
Why Invest in Quality Maintenance Tools
High-grade tools like precision burrs for grinders and descaling solutions tailored for your specific espresso machine model make a significant difference. I personally prefer flat burr grinders for their consistent particle size, which is vital for uniform extraction. Regularly replacing burrs—every 1,000 to 1,500 pounds of espresso—keeps grind consistency sharp and flavor profile optimal. For calibration, I find a quality grinder with adjustable settings indispensable.
How do I maintain my tools over time?
Routine cleaning and periodic part replacement are essential. For example, periodically checking and replacing water filters in machines prevents mineral deposits. Descaling agents, designed according to your machine’s specifications, combat lime buildup that can hinder performance. I follow a simple schedule: after every 20 hours of use, run a descaling cycle; after six months, replace seals and gaskets. Staying vigilant with these practices ensures your setup remains responsive and consistent. If static issues or uneven grind distribution occur, consider implementing the tweaks suggested in this article to enhance performance further.
The future of home espresso maintenance
Emerging technologies like smart sensors integrated into espresso machines could automate routine maintenance, alerting you when parts need replacement or cleaning. I predict that in the next few years, AI-driven calibration tools will become standard, making it easier than ever to keep your gear optimized without guesswork. Until then, investing in reliable cleaning supplies, calibration scales, and a schedule for regular upkeep remains your best bet to keep your espresso game strong. Don’t forget to give your grinder a good tune-up—try the tips from this detailed guide—it could be the game-changer for your next brew.
Throughout my journey into home espresso, I realized that achieving authentic microfoam isn’t just about having the right equipment—it’s about understanding the nuances that differentiate real microfoam from convincing imitations. That lightbulb moment taught me that the texture, consistency, and even the way foam behaves when swirling or tapping are your best guides. Embracing this deeper knowledge transformed my coffee experience from guesswork to confidence, making every cup a barista-worthy masterpiece.
Lessons I Didn’t Expect to Learn About Microfoam
One of the most surprising insights was how subtle factors, like milk temperature and the angle of the frothing wand, dramatically influence the microfoam’s quality. I used to think that louder, more vigorous frothing meant better foam, but I found that gentle, controlled motion yields the silky texture I craved. Additionally, I learned that even the best milk frothers can produce fake microfoam if I don’t master the proper technique—it’s all about precision and patience.
Another lightbulb moment was realizing that foam that collapses or feels rubbery on the tongue clearly signals a fake microfoam, often resulting from large, uneven bubbles. Practicing to keep the bubbles tiny and uniform is key, and that process is much more delicate than it appears. Investing time in mastering these subtle cues allowed me to elevate my coffee from ordinary to extraordinary, proving that finesse beats fancy equipment every time.
From Here, Your Espresso Journey Gains Momentum
Now that you’re equipped with the knowledge to identify and craft authentic microfoam, consider exploring the full spectrum of barista gear that supports these techniques. For comprehensive advice on selecting the best home espresso setup, this ultimate guide to barista gear is a treasure trove of tips. Remember, the path to perfect microfoam begins with understanding your tools and refining your technique—over time, these small adjustments lead to consistently stunning results.
Regularly cleaning your equipment, calibrating your grinder, and practicing your frothing motion ensure your microfoam remains top-tier. Don’t underestimate the power of routine maintenance; it’s the secret behind those glossy, silky layers that make your coffee truly outstanding. Embrace these habits, and you’ll find that perfect microfoam becomes second nature, transforming your daily routine into a delightful ritual.
Level Up Your Barista Skills Today
Achieving outstanding microfoam is an art that rewards patience and attention to detail. By tuning into the textures, practicing consistent technique, and maintaining your gear diligently, you’re well on your way to rivalting coffee shop quality right at home. Remember, every great barista started somewhere—even the most celebrated ones learned through persistence and curiosity, just like you.
What’s been your biggest challenge in creating microfoam? Share your experience below and let’s learn from each other’s journey toward perfect coffee.
![Why 2026 AI Pressure Profiling Fails on Light Roasts [Fix]](https://espressotechguide.com/wp-content/uploads/2026/04/Why-2026-AI-Pressure-Profiling-Fails-on-Light-Roasts-Fix.jpeg)


Leave a Reply