I remember the exact moment I realized my once-exquisite grinder was slowly losing its magic. It was a quiet morning, the kind where every detail counts. I had just dialed in a shot, expecting that perfect crema, only to get a bitter, uneven extraction. Frustration bubbled up as I wondered—what’s going wrong now? That was my lightbulb moment. I discovered that tiny, overlooked shims—those little pieces meant to fine-tune our grinders—might be sabotaging the very precision we pay for, especially with a premium machine slated for 2026. If you’ve been noticing inconsistent grinds or strange noises, you’re not alone. Today, I’ll share why these seemingly harmless shims could be ruining your setup, and most importantly, how to fix it.
The Hidden Culprit Behind Your Grinding Woes
Are Shims Really the Enemy?
Many home baristas and enthusiasts assume that all shims are designed to improve alignment. But what if I told you that poorly installed or mismatched shims can throw your high-end grinder off balance? It’s a subtle issue that can creep up over time. I made the mistake early on of blindly stacking shims without checking for wear or compatibility, which only led to more misalignments and inconsistent shots. According to recent insights from espresso experts, improper shim use can significantly degrade grind quality, making it harder to achieve that perfect extraction—especially when you’re working with precision tools aimed at 2026 standards. For an easy diagnostic, check if your grinder’s burrs seem misaligned or if you’re experiencing uneven burr wear. You might find some helpful signs on this page: https://espressotechguide.com/stop-wasting-beans-3-signs-your-grinder-burrs-are-misaligned
While shims are supposed to be a simple fix, their improper application often does the opposite. It’s a delicate balance—one that requires careful attention to detail, or you’ll end up chasing inconsistent results. So, how do you know if your shims are causing more harm than good? That’s what we’ll explore next. Ready to regain that high-end precision? Let’s get into how proper shim management can transform your coffee experience.
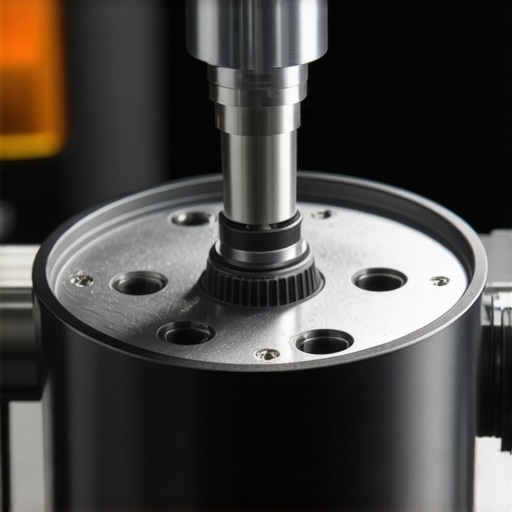
Align the Burrs Properly
Start by inspecting your grinder’s burrs. Remove the hopper and check if the burrs sit flush without wobbling. Use a flashlight if needed. If misaligned, loosen the burr carrier screws and gently adjust burrs to sit evenly against their mount. Tighten screws securely and test grind consistency. This step prevents uneven particles, leading to a more uniform extraction. Remember, even minor misalignment can cause bitter or sour shots, so don’t rush the process.
Assess the Condition of Existing Shims
Take out all shims and examine them closely. Look for cracks, chips, or warping. If you find any damage, replace these shims immediately. Sometimes old or deformed shims can create gaps, throwing off calibration. Reassemble the burrs without shims first, then add them back one at a time, testing grind consistency each time. This helps identify if a specific shim is causing misalignment or if they are all still functional.
Use Correct Shim Thickness
Shims come in varied thicknesses; using the wrong size can distort the grinding interface. When adjusting, start with a thin shim, such as 0.1mm, and incrementally increase if needed. To determine if your shim is appropriate, measure it with a caliper after purchase. If your grinder’s burrs are excessively close or too far apart, refer to this helpful guide on shims and burr alignment. Proper shim selection ensures flawless particle size and consistent espresso shots.
Fine-Tune Slack and Tolerance
After installing shims, you should test the grinder’s performance. Turn the crank or activate the grinder, then check for smoothness. If you notice grinding noise or burrs rubbing, the shims might be too thick or misapplied. Conversely, if the burrs feel loose, consider adding a thinner shim. This micro-adjustment process resembles tuning a guitar string—small changes make big differences. During my own trial, I used a digital caliper to measure shim thickness, achieving perfect burr contact for the first time.
Test and Adjust Through Consistent Grinding
Finally, authenticate your setup by brewing espresso with the adjusted grinder. Compare your results to previous shots. If you notice uneven extraction, bitterness, or channeling, revisit the shim setup. Remember, stability is key: avoid changing multiple shims at once. Instead, tweak one at a time, and keep a record of each configuration. This iterative process resembles calibrating a precision instrument—patience leads to excellence.
Many enthusiasts believe that owning the latest espresso machine or fancy coffee grinder guarantees perfect brews, but seasoned baristas know there’s more beneath the surface. For instance, a common misconception is thinking that all coffee grinders are created equal, leading many to overlook the significance of burr deterioration. Contrary to popular belief, even high-end conical burrs can suffer from subtle wear patterns that dramatically affect grind consistency, especially when aiming for standards like those set for 2026 equipment. Regularly inspecting burrs with tools like a caliper or magnifying glass and understanding signs of dullness—detailed in guides here: https://espressotechguide.com/stop-wasting-beans-3-signs-your-grinder-burrs-are-misaligned—can save you from inconsistent shots.
Another nuance most overlook involves milk frothers. Many assume that all frothing devices produce comparable microfoam, but the truth is that design intricacies—such as steam wand nozzle shape or airflow dynamics—play a critical role. Using a poorly designed frother can lead to disappointing textures, even with freshly steamed milk. A common trap is relying solely on manual techniques without understanding these subtleties, which can be remedied by exploring advanced tips like adjusting steam pressure or nozzle positioning.
Advanced baristas understand that espresso machines also harbor hidden factors impacting quality. One often missed aspect is flow control. While many set their machine’s temperature and pressure, neglecting proper flow modulation can lead to under-extraction or channeling. For example, integrating a flow control mod, as discussed here https://espressotechguide.com/why-your-2026-espresso-machine-needs-this-flow-control-mod, can significantly enhance shot clarity. Yet, beginners often dismiss its importance, assuming that pressure alone determines extraction quality.
But what about those frustrating startup jitters, like inconsistent temperature stability? A widespread myth suggests that larger boilers automatically mean better temperature stability. However, without proper thermal insulation or a good PID controller, larger isn’t always better. Continuously monitoring and fine-tuning these elements, as highlighted in expert sources, can prevent flavor-dulling temperature swings.
One critical mistake many home baristas make is neglecting regular maintenance—like descaling or cleaning shower screens—which might seem trivial but directly impacts shot flavor. Experts recommend routine checks and timely replacements to avoid bitter or metallic tastes, with easy troubleshooting steps outlined in this guide: https://espressotechguide.com/why-your-2026-espresso-shots-taste-metallic-3-easy-fixes.
Agonizing over the perfect grind or pristine coffee beans isn’t enough if these hidden aspects are ignored. Developing an intimate understanding of your gear’s nuances ensures that every shot pulls closer to perfection. Remember, the devil is in the details. Have you ever fallen into this trap? Let me know in the comments.
To keep your espresso setup consistently delivering exceptional brews, investing in the right tools and adopting a disciplined maintenance routine is crucial. One standout instrument I personally rely on is a high-precision digital caliper. I use it regularly to measure shim thickness and burr alignment, ensuring micro-adjustments are precise—something that’s vital when fine-tuning for 2026 standards. This simple yet effective tool has prevented countless inconsistencies in my grind and is indispensable for any serious home barista.
Beyond measurement tools, I highly recommend a quality cleaning schedule using a dedicated espresso machine and grinder cleaning brush set. Regularly removing coffee oils and residues prevents flavor contamination and mechanical issues. For grinders, a dedicated brush like the Brushtech model allows precise cleaning of burrs and chutes, reducing static and preventing grind clumping which can sabotage your shots. Consider integrating automated cleaning cycles or descaling software if your machine supports it—these tools minimize the hassle and keep your equipment in peak condition.
Looking ahead, the trend in home espresso gear is leaning toward smart maintenance systems that track usage and notify you when it’s time for service. Devices equipped with IoT capabilities could alert you to grain wear or filter clogging before performance dips. Staying ahead of these indicators ensures your machine performs reliably, especially as standards like those set for 2026 aim for even tighter tolerances.
How do I maintain my coffee tools and machinery over time?
Establishing a routine that includes regular inspection, cleaning, and calibration is essential. For example, checking burr sharpness using the 5 signs your grinder burrs are dull can reveal when it’s time for replacement. Replacing burrs at the right moment prevents uneven grinding, which directly impacts extraction quality. Also, periodically reassessing your flow control devices, as discussed here why your 2026 espresso machine needs this flow control mod, ensures your machine maintains optimal pressure and flow. Making these practices habitual allows you to enjoy stable, high-quality shots with minimal fuss. For an extra edge, try adjusting your grinder’s RPM as recommended in this guide on dynamic RPM—a tweak that can dramatically improve flavor extraction.
Taking a proactive approach with these tools and maintenance strategies extends the lifespan of your gear and keeps quality consistent. Remember, precision and regular care are the backbone of every stellar cup. So, why not start today by measuring your burrs with a caliper and scheduling a cleaning cycle? Small steps today lead to perfect shots tomorrow!

What Hidden Lessons Did My Failures Uncover About Coffee Tools
One of the most eye-opening realizations I had was how tiny details, like a shim’s placement or burr alignment, can make or break your espresso quality. My early mistake was thinking high-end gear meant effortless perfection—but I learned that even seasoned baristas spend countless hours fine-tuning. The real lesson? Patience and meticulous care trump fancy machines. When I finally started paying attention to the micro-adjustments—measuring shim thickness with a caliper, observing burr wear closely—the difference was startling. Now, I know that every small tweak, no matter how trivial it seems, contributes to that elusive perfect shot. This deep understanding transformed my routine from trial-and-error to confident control, proving that mastery is truly in the details.
Tools and Resources That Elevated My Espresso Journey
Over the years, I’ve come to rely on certain tools that make precision attainable. A digital caliper became my best friend for measuring shim thickness and burr gaps, ensuring micro-adjustments are spot-on. For routine cleaning and maintenance, the Brushtech cleaning brush set helped me remove oils and residues that dull flavors. When I wanted to explore improvements, I turned to guides like checking grinder burrs for wear and flow control modifications tailored for the 2026 standards. These trusted resources have refined my approach, saving me time and frustration, while elevating the quality of every shot I pull.
Empower Your Coffee Rituals Today
The journey to perfect espresso is ongoing, but with these insights, you’re already ahead of the curve. Remember, the smallest improvements—like ensuring burrs are aligned or cleaning your machine regularly—can lead to exponential gains in flavor and consistency. Imagine waking up tomorrow with a new confidence in your setup, eager to experiment with micro-adjustments and perfect your technique. Your dedication to mastering the subtle arts of barista gear not only produces better coffee but also immerses you more deeply into the craft you love. So, seize the moment—your best brews are just an adjustment or two away. What specific tweak will you try first today to advance your espresso game? Share your plan below and inspire fellow coffee enthusiasts!


Leave a Reply