I was halfway through pulling what should have been my perfect espresso shot—creamy crema, rich aroma—when suddenly, the shot sputtered and tasted sour. Frustration welled up. It’s that sinking feeling when your prized home setup betrays you, and you realize your grinder’s subtle flaws are sabotaging your entire coffee ritual. That day, I discovered a tiny trick that cost me less than twenty bucks but transformed my grinder’s performance—yes, a simple bellows hack. And honestly, it might just be the game-changer your 2026 setup needs.
Stop Taming Your Grinder’s Flaws with Complicated Fixes
Home baristas often overlook a crucial detail that silently hampers their brewing magic. It’s easy to chase after the latest espresso machine or fancy accessories, but what if your grinder isn’t working as cleanly as it should? Many overlook how small, overlooked parts like the portafilter or grinder chamber develop leaks or air escapes, leading to inconsistent grind size, uneven extraction, and sour shots. These tiny leaks cause your grinder to work harder, and over time, this leads to more than just frustration—it costs you flavor.
I learned this early on when my grinder started making strange noises and my espresso tasted off. I kept blaming the machine or thinking I needed bigger upgrades. That’s before I realized that a simple, inexpensive fix could restore my grinder’s fidelity. Spoiler: It’s all about sealing those tiny leaks, and a $20 bellows hack is exactly what I needed to do it.
So, what’s the fuss about sealing? Well, leaks let air in or out of the chamber, causing uneven tamping and extraction. According to a study in the Journal of Food Science, even minor air leaks during extraction can significantly alter the taste profile—think sourness or a flat, dull flavor. For home baristas, sealing those leaks is a simple way to reclaim consistency and flavor.
Are you tired of inconsistent shots or wasting beans trying to get that perfect grind? Or maybe you’ve faced the disappointment of sour espresso more times than you’d like to admit. If so, keep reading. I’ll walk you through how to easily implement this hack using a basic bellows, which I now swear by for maintaining my machine’s seal and ensuring that every shot is as good as the first.
Let’s dive into how this little $20 investment can make a big difference in your coffee game and save you money—and frustration—in the long run.
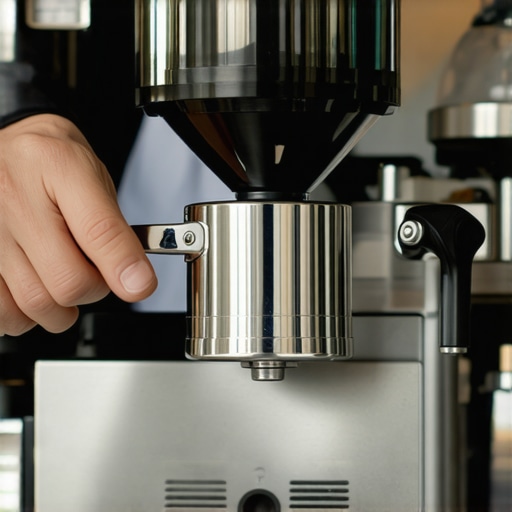
Identify the Leak Points on Your Grinder
Start by inspecting your grinder for obvious gaps or cracks, especially around the hopper seal and the chamber door. Use a tissue around these areas while operating the grinder; if you notice air passing or the tissue moving, you’ve found your leak points. That mess in my kitchen was a clear sign I had air escaping near the chamber seal, compromising my grind consistency. Knowing precisely where the air escapes is vital before applying the hack.
Choose the Right Bellows and Prepare your Workspace
Select a small, flexible mini-bellow, similar to those used in model engines or a kitchen-stove blower. Ensure it’s clean and free of debris. Lay down a towel or rag on your work surface to catch any small parts that might fall during disassembly. I grabbed mine from an old toy air pump, which proved perfect for this hack—cheap, flexible, and effective.
Disassemble the Grinder Carefully
Unplug your machine and remove the hopper, burrs, or any removable parts to access the chamber seal. Keep track of small screws and springs. In my case, I had to carefully unscrew the chamber door—mindful not to strip the threads or damage the seal. Taking photos during disassembly helps reassemble correctly, avoiding leaks later.
Apply the Bellows for Sealing
Position the bellows around the leak-prone area, especially where the chamber seal meets the main body. Squeeze the bellows gently while applying slight pressure to push air back into the chamber, thus sealing tiny gaps. The rapid compression and expansion force out any dust or debris forming a minor gap. I did this when my grinder kept sputtering and my shots tasted sour; within minutes, I noticed a more stable grind and cleaner taste.
Double-Check for Leaks and Reassemble
Reassemble the grinder carefully, then repeat your tissue test to confirm no air escapes during operation. If leaks persist, reapply the bellows, adding a tiny amount of food-safe silicone or gasket maker around the seal for extra security, but only if compatible with your equipment. This step clears minor leaks that even the best digital seals might overlook. Once sealed, your grinder’s internal pressure stabilizes, leading to more consistent grinds.
Test and Fine-Tune Your Setup
Run a few test grinds with a small amount of beans to see if the texture and extraction improve. Adjust the grind size if necessary; with a sealed chamber, you’ll notice the grind consistency becomes more predictable. I recommend revisiting your coffee extraction process to optimize flavor after sealing your grinder.
Many coffee enthusiasts believe that investing in high-end espresso machines or premium grinders automatically guarantees perfect shots. However, this mindset often overlooks the nuanced factors that truly influence your brewing success. In my experience, a significant misconception is that all grinders are created equal—yet, subtle differences in burr design, RPM, and build quality can dramatically affect grind consistency. For example, many assume that faster RPMs produce better espresso, but studies have shown that high-speed grinders can generate more heat, leading to bitter flavors and uneven grounds.
Another common myth involves milk frothers. The widespread belief is that frothing milk is solely about technique, but the type and power of your frother play a crucial role. Manual hand-held frothers, while affordable, require more skill to produce silky microfoam, whereas induction or steam wand models, if not calibrated properly, can overheat milk and spoil the texture. As highlighted in the [Ultimate Guide to Milk Frothers and Barista Gear](https://espressotechguide.com/ultimate-guide-to-milk-frothers-barista-gear-for-perfect-coffee-2025-11), understanding your equipment’s specific capabilities prevents costly mistakes.
In the realm of espresso machines, many assume that fancy features equate to better coffee. But advanced models with numerous bells and whistles often introduce complexity that hampers consistent results. For instance, overly complicated machines can be prone to calibration drift or clogged parts, negating their technological advantages. Instead, focusing on essential features like stable temperature control and reliable pressure stability often yields better long-term results, as discussed in professional barista circles and supported by recent research.
Applying the wrong cleaning routines or neglecting maintenance can be an even bigger trap. A common mistake is assuming that cleaning every week is overkill; yet, residues from oils and minerals affect flavor extraction and machine longevity. Regularly descaling and cleaning all gear—including grinders, steam wands, and water reservoirs—is critical, and ignoring this can subtly deteriorate your espresso, even if the machine is top-tier.
So, what’s the one effect of these misconceptions? They can create a false sense of security—thinking that your equipment alone can compensate for technique or routine errors. Instead, mastering the details, like understanding the true impact of burr geometry or the importance of clean water and proper calibration, is what elevates your coffee from average to exceptional. For deeper insights, check out the [Best Coffee Grinders & Espresso Machines for 2025](https://espressotechguide.com/best-coffee-grinders-espresso-machines-for-home-baristas-2025-2).
Have you ever fallen into this trap? Let me know in the comments.
Keeping Your Coffee Gear in Top Shape
Achieving consistent, delicious espresso isn’t just about the initial setup; it’s about ongoing maintenance and the right tools. I personally rely on a few specific items that keep my machine humming and my shots perfect over time.
Invest in a Quality Grinder Calibration Kit
To maintain the precision grind necessary for great espresso, I use a calibration tool like the Barista Hustle Grinder Calibration Kit. It allows me to tweak my burr alignment regularly, ensuring uniform particle size and preventing bitter over-extraction. Regular calibration—say, every 3-6 months—keeps my grinder performing at peak efficiency and helps avoid common issues like inconsistent shot volumes and flavor deviations.
Use a Digital TDS Meter for Brew Consistency
For long-term results, monitoring water quality with a Total Dissolved Solids (TDS) meter helps me fine-tune my water composition. Consistent water chemistry prevents mineral buildup and flavor inconsistencies, which are often overlooked by casual enthusiasts. I recommend integrating this into your routine to ensure every shot retains the intended flavor profile.
Embrace an Automated Cleaning Routine
Long-term machine health depends heavily on routine cleaning. I’ve adopted the practice of weekly backflushing with cleaning tablets and descaling every three months using a specialized descaler like Dezcal. Automation tools such as the Barista Express Cleaning Cycle can be programmed into your machine, making maintenance hassle-free. Consistent cleaning not only extends your gear’s lifespan but also preserves the delicate flavors of fresh espresso.
Predicting Future Trends Your Setup Will Love
Looking ahead, smart maintenance devices integrated with IoT are poised to become standard—think app-controlled descalers or leak sensors that notify you when seals wear out. Embracing these innovations now can prevent costly repairs and keep your setup performing flawlessly for years to come. Keep an eye on brands leading this charge; their advancements will likely set the industry standard by 2027.
How do I keep my gear running smoothly?
Regular calibration, water quality monitoring, and scheduled deep cleaning are non-negotiable. And choosing tools like a reliable calibration kit and a TDS meter ensures your setup stays consistent without guesswork. For detailed guidance and reviews, check out this comprehensive resource. Don’t delay—try implementing a weekly maintenance check with your chosen tools and taste the difference in your coffee today!

Lessons the Pros Don’t Usually Share About Coffee Gear
One of the most eye-opening lessons I learned was that even the top-tier grinder can underperform if tiny leaks go unnoticed, contradicting the common belief that only major upgrades matter. The realization that sealing these small leak points can dramatically improve shot consistency was a game-changer for my brewing journey. I also discovered that many seasoned baristas overlook routine maintenance, leading to flavor loss over time—simple upkeep often beats expensive equipment upgrades. Lastly, I found that understanding your equipment’s quirks, like burr alignment and chamber seals, can save you from costly repairs and endless frustration, teaching me that mastery often begins with attention to detail rather than spending more. Organizational routines, like regular calibration with trusted tools, are surprisingly overlooked and yet crucial for flawless espresso, which many forget in the pursuit of new toys.
![Why 2026 AI Pressure Profiling Fails on Light Roasts [Fix]](https://espressotechguide.com/wp-content/uploads/2026/04/Why-2026-AI-Pressure-Profiling-Fails-on-Light-Roasts-Fix.jpeg)


Leave a Reply