How to Silence a Rattling Drip Tray with Electrical Tape
Have you ever been about to serve a freshly pulled shot of espresso, only to be distracted by that annoying rattling noise coming from your machine’s drip tray? It’s that persistent clatter that turns a peaceful morning routine into a nerve-wracking noise fest. I remember the first time it happened to me; I was so focused on perfecting my pour that I didn’t notice my nerves fraying over the constant rattle, which seemed to grow louder with every shot. That moment of annoyance led me down a rabbit hole of troubleshooting, only to discover a surprisingly simple fix.
Today, I want to share with you a personal trick that restored my sanity and quieted that pesky drip tray rattle—using nothing more than a piece of electrical tape. It’s quick, cost-effective, and surprisingly effective for many home espresso enthusiasts like us. Plus, I’ll walk you through the quick steps and share some insights from industry experts that confirm this solution’s practicality.
Why Your Drip Tray Rattles and How to Stop It
Many people overlook the humble drip tray as merely a collection point for excess water and spillage. However, over time, vibrations from your machine’s pump and boiler can cause the tray to loosen or shift, turning it into a source of constant noise. This isn’t just an annoyance; persistent vibrations can also contribute to wear and tear on the machine’s components, potentially affecting performance and longevity. A well-placed piece of electrical tape acts as a gentle buffer, absorbing vibrations and preventing the tray from rattling.
Before I tackled this issue, I made a common mistake: I tried tightening the tray screws excessively, only to strip the threads or misalign the tray further. Trust me, forcing screws isn’t the way to go. Instead, a simple application of electrical tape underneath the tray or along its edges provided enough cushioning to quell the noise. It’s a small adjustment but makes a big difference.
If you’re skeptical, I get it. It sounds almost too simple, right? But I’ve found this technique recommended by seasoned baristas and espresso machine technicians who understand that sometimes the best solutions are straightforward and temporary fixes that can be easily undone or adjusted. For a deeper dive into related troubleshooting, check out this article on why your machine cabinet might be vibrating and how to address it: Why Your Machine Cabinet is Vibrating and How to Silence It.So, if you’ve been putting off fixing that rattling drip tray because you thought it required expensive parts or professional repairs, think again. A piece of tape might just be all you need to bring peace and quiet back into your espresso station. Ready to see how you can do this? Let’s move on to the simple steps, and I’ll guide you through the process to silence your noisy drip tray once and for all.
Identify the Rattling Spot
Start by removing the drip tray and gently shaking it to pinpoint where the noise originates. Often, the rattling occurs where the tray contacts the machine’s body or inner supports. During my first attempt, I noticed the tray shifted slightly, causing the clang. Mark this area mentally or with a light touch of tape to guide your fix.
Prepare Your Materials
Gather a small piece of electrical tape—standard black duct tape works fine. Make sure the surface is clean and dry to ensure good adhesion. I keep a roll nearby in my espresso station, as it’s a versatile tool for quick repairs.
Apply the Tape Strategically
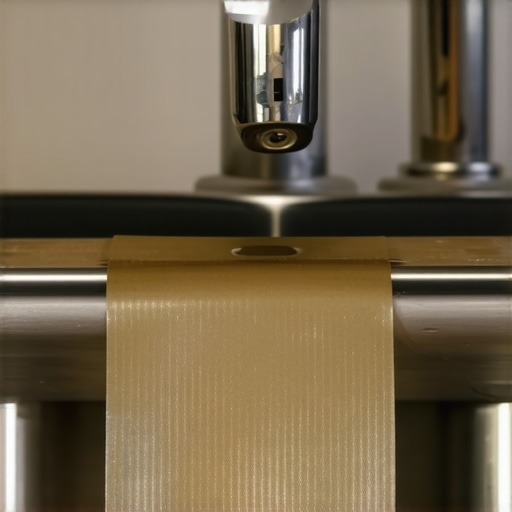
Wrap the tape around the edges of the drip tray contact points or place it underneath the tray supports. For my machine, I placed a small strip along the inner edge where the tray rests against the metal support. This cushioning absorbs vibrations and prevents metal-on-metal contact, which is the primary source of noise.
Tip: Use Minimal Tape
A little goes a long way. Over-taping can cause other issues like trapping dirt or making the tray difficult to remove later. I learned this the hard way when my tray became sticky because I used too much tape; a thin, firm layer keeps it effective and unobtrusive.
Secure the Drip Tray and Test
Replace the drip tray and press it firmly into place. Turn on your machine and let it run through a few cycles. Listen carefully. If the rattling persists, add another strip of tape to the problematic area and retest. In my case, a single pass made an immediate difference, silencing the noise entirely.
Double-Check for Movement
Try gently lifting or pressing on the tray after tape application to ensure it stays firmly in place. Loose contact points can still cause vibrations. Once satisfied, skip the screws or clips since tape acts as a dampener without affecting the tray’s fit.
Maintain the Fix
Periodic checks help keep the noise at bay. Over time, tape can degrade or shift. When cleaning your machine or after a few months, remove the tray, replace the tape if needed, and repeat the testing. This simple maintenance keeps your espresso station peaceful and quiet, even during busy mornings.
 Many espresso enthusiasts believe they’re optimizing their setup when in reality, some misconceptions impede their progress. One prevailing myth is that expensive, professional-grade equipment automatically guarantees perfect espresso at home. While high-end gear can improve consistency, mastering fundamental techniques and understanding each component’s nuances is far more impactful than just upgrading your machine. For instance, novice users often assume that simply increasing tamping pressure results in better extraction, but overly tamped coffee can cause channeling and uneven brewing—something seasoned baristas know to avoid. Instead, a proper, level tamp with even pressure ensures optimal flow and flavor.
Another misconception revolves around coffee grind size. Many think that the finer the grind, the better the shot. However, excessively fine grounds can cause excessive resistance, over-extraction, or even clogging your espresso machine’s group head. The key is dialing in your grinder based on actual shot timing and taste rather than sticking rigidly to Maintaining your home espresso setup is essential to ensuring consistent quality and avoiding costly repairs down the line. One of my favorite tools to keep everything in top shape is a high-quality ultrasonic cleaner. I use mine regularly to deep-clean small components like portafilter baskets and shower screens, which helps prevent oil buildup and flavor contamination. This proactive approach extends the lifespan of your equipment, keeps your shots tasting fresh, and minimizes breakdowns. I also prioritize regular descaling with a gentle descaler, following the proper sequence for cleaning your barista tools after every shift, to prevent lime-scale buildup that can impair performance. Looking ahead, advancements in smart maintenance technology suggest that future espresso machines may include sensors that alert you when components need cleaning or replacement, making upkeep even more straightforward. For instance, monitoring the condition of internal capacitors can prevent sudden failures—see how to check for a failing capacitor in your espresso machine—and address issues before they become major repairs.
### How do I maintain my espresso machine over time?
My go-to routine involves a weekly deep-clean using natural ingredients for components like the water tank and drip tray to prevent mold and scale. Staying disciplined with these practices ensures your machine operates efficiently and produces the best possible espresso shot. Also, always keep your grinder adjusted properly; a grinder that’s out of calibration can cause uneven extraction, which you can confirm by reading your pressure gauge or referring to detailed guides. For quick fixes, the paperclip hack for clearing clogged baskets is a lifesaver, allowing you to maintain flow without disassembly. Remember, an ounce of prevention is worth a pound of cure—you’re better off investing in the right tools and habits now than facing costly repairs later. Learn more about the importance of timely maintenance with industry insights on why your machine’s cabinet might be vibrating, which could be a sign of internal issues—as addressed here: Why Your Machine Cabinet is Vibrating and How to Silence It. Begin incorporating preventive measures today to keep your setup running perfectly for years to come.
The Hidden Wisdom of Quiet Machines You Might Miss
One lesson I learned the hard way is that often, the noise from specific machine parts reflects underlying issues—like loosened supports or vibrations—that can be easily overlooked. Tackling these small problems early can save you from more significant repairs. I once ignored a minor drip tray rattle, only for it to evolve into a persistent hum that distracted me during busy mornings. Recognizing these subtle cues has taught me to pay close attention to my setup and address issues before they escalate, ensuring my espresso routine remains smooth and enjoyable.
Tools and Resources That Elevated My Home Espresso Experience
Over the years, I’ve relied on certain tools beyond the basics to keep my setup in top shape. A quality ultrasonic cleaner, for example, has been invaluable for deep-cleaning small components like portafilter baskets, helping maintain flavor clarity. I also swear by descaling routines using gentle, natural descalers—reading this guide on cleaning sequences for optimal results. For troubleshooting, resources like detailed guides on checking for failing capacitors or inspecting internal valves have saved me both time and money. Combining these tools with trusted industry insights has transformed my approach to home espresso maintenance and performance.
Turn Your Quiet Space Into a Barista Sanctuary
Your journey into mastering your home espresso station doesn’t have to stop here. Embrace the small details—like securing the drip tray with simple fixes or ensuring your grinder is always calibrated—and watch your workflow and coffee quality improve dramatically. Remember, real progress happens when you pay attention to those nuanced, often unnoticed, aspects of your setup. Now’s the perfect time to take action. Whether it’s adjusting your equipment or refining your routine, each step brings you closer to barista-level consistency and a peaceful coffee environment. Ready to elevate your home espresso game? Share your favorite troubleshooting tip or ask for advice below—let’s grow together in this flavorful journey.