The Hidden Gasket in Your Water Tank That Is Causing the Leak
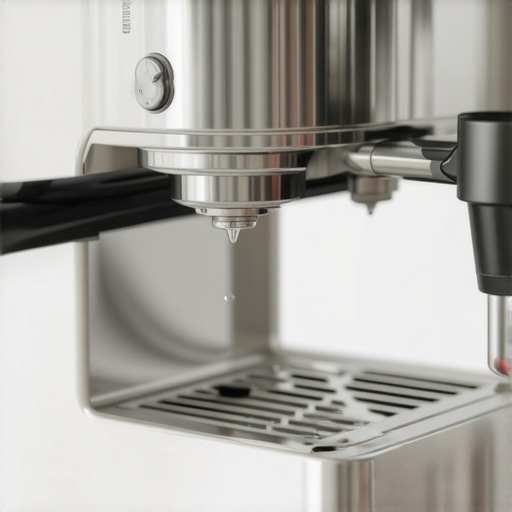
I remember the exact moment I realized my beloved espresso machine was secretly betraying me—water pooling under it, weird hissing sounds, and my shiny machine surprisingly less so. It was a slow leak, but the sneakiest kind; it seemed harmless at first, just a tiny drip after brewing, but soon, it became a full-blown puddle—spilling onto my countertop and threatening my beloved coffee routine.
That lightbulb moment led me down a rabbit hole of troubleshooting, and what I uncovered was a little-known culprit: the **hidden gasket** inside the water tank that often goes unnoticed until it’s too late. This tiny rubber ring, nestled deep within the tank’s structure, can degrade over time—cracking, shrinking, or even dislodging—causing leaks that seem to come from nowhere.
Today, I want to share with you exactly how this sneaky gasket causes water to escape, how to identify if it’s your problem, and most importantly, how to fix it without calling in a professional. If you’ve experienced similar frustrations with water pooling around your machine or sudden pressure drops during brewing, then you’re in the right place. We’re going to fix this problem step-by-step, saving you time and money—and restoring your morning brew.
Why the Hidden Gasket Could Be Wreaking Havoc in Your Kitchen
You might think, ‘My water tank looks fine. How could a gasket be causing all this trouble?’ Well, that tiny rubber ring acts like a sealant, keeping water securely within the tank and preventing leaks. Over years of use, exposure to hot water, mineral deposits, or even just regular wear and tear can cause this gasket to lose its elasticity or crack. Once compromised, water escapes through the tiny gaps, but because it’s hidden deep inside, it can be tricky to spot until a leak becomes obvious.
In my experience, the early signs were subtle—occasional drips I dismissed as normal. But as I brushed off these small issues, the leak worsened, and I almost thought my espresso machine was destined for the trash heap. That’s when I learned an important lesson: don’t ignore the little things. Replacing or resealing that gasket is often a straightforward fix that keeps your machine running smoothly.
A trusted source, CoffeeGeek, emphasizes that maintaining seals and gaskets is essential for optimal performance and longevity of espresso equipment. Neglecting these small parts can lead to bigger, more costly problems down the line.
If you’re wondering whether your leak is caused by this tiny gasket, keep reading. We’ll delve into how to check the gasket’s condition, what tools you’ll need, and how to perform a quick repair—all designed to help you keep your water tank sealed tight.
Ready to battle that sneaky leak? First, let’s look at how to identify if your gasket is the real culprit—because recognizing the problem is half the solution.
Empty the Water Tank and Prepare Your Workspace
Begin by unplugging your espresso machine and removing the water tank. Place a towel or basin underneath the machine to catch any residual water that might spill during disassembly. Think of this as preparing a clean workspace before fixing a delicate instrument—confidence and cleanliness matter.
Access the Gasket Inside the Water Tank
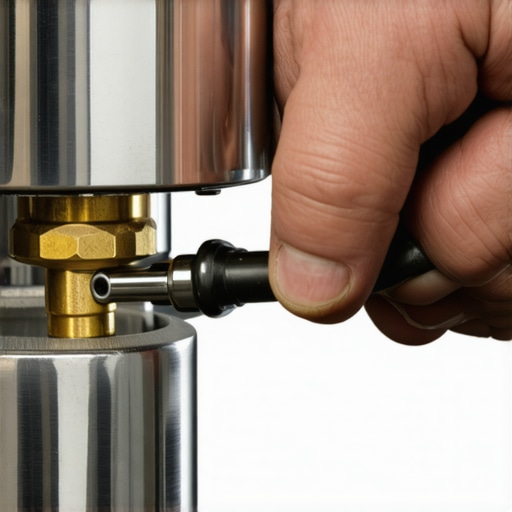
Inspect the water tank for screws or clips holding the top or side panels. Use a screwdriver to gently remove these fasteners, noting their position. Carefully separate the panels, like opening a tiny jewelry box, revealing the hidden gasket nestled around the inlet or outlet port.
Carefully Remove the Gasket
Once exposed, gently pry out the gasket using a plastic tool or fingernail. Remember, rubber gaskets are soft; applying too much force can cause tears. Think of it as removing a contact lens—gentle, steady movements prevent damage.
Assess the Gasket’s Condition
Lay the gasket on a clean surface. Check for visible cracks, shrinks, or deformations. If it appears brittle or cracked, replacement is necessary. If it’s just dirty or sticky, cleaning might suffice, as a dirty gasket can mimic leaks even when intact.
Clean the Gasket and Surrounding Area
Use a damp cloth or a soft brush to remove mineral deposits or debris from the gasket and the groove it sits in. For stubborn buildup, a mild vinegar solution can be applied, like a gentle scrub for your favorite mug. This ensures a proper seal upon reassembly.
Decide Between Cleaning or Replacing
If the gasket is damaged, order a new one matching your machine’s model. Visit the manufacturer’s website or trusted suppliers like contact us for options. Replacing the gasket is simpler than you think—just press it into the groove, making sure it sits evenly, like fitting a puzzle piece.
Reassemble and Test for Leaks
Reattach the water tank, ensuring the gasket stays in place. Secure the panels or screws, then fill the tank with water. Turn on the machine and observe closely—look for any leaks around the gasket area. If water escapes, recheck the gasket positioning or consider a new seal. Think of this as test-driving a repaired engine—confidence in the fix grows with each successful startup.
Perform a Trial Brew and Final Checks
Once no leaks are detected, run a test brew without coffee to clear out any residual debris. Double-check the connections and gasket seats, like fine-tuning a musical instrument. Regular maintenance and periodic gasket inspections help prolong your machine’s life and keep your coffee tasting perfect.
Remember, a little patience and careful handling go a long way in avoiding costly repairs. If issues persist or you’re unsure, consult a professional or reach out through contact us. Fixing that hidden gasket not only prevents leaks but ensures your mornings stay blissful—no more puddles or pressure drops.
Many enthusiasts jump into home espresso brewing armed with a basic understanding but often fall prey to misconceptions that hinder their progress. One widespread myth is that investing in the most expensive equipment guarantees perfect results, but in reality, knowledge of nuanced adjustments and proper maintenance is far more crucial. For example, enthusiasts frequently underestimate the subtle impact of grind size variations—small changes here can dramatically alter extraction quality, a fact supported by advanced barista training programs. Moreover, there’s a common trap in relying solely on high-pressure settings; some believe that higher pressure always yields better espresso, yet studies reveal that optimal extraction occurs within a specific pressure range depending on the bean and machine calibration.
Are Built-in Grinders Overhyped for Light Roast Beans?
Many assume built-in grinders are ideal for all coffee types, but light roasts—especially those with delicate flavors—often require more precise, grinder-specific adjustments than standard settings allow. The static electricity and uneven particle size produced by certain grinders can lead to inconsistent extraction, detracting from the flavor profile. For optimal results, consider investing in a dedicated grinder that allows micrometric adjustments, as recommended by coffee experts like Scott Rao. This subtle nuance often distinguishes a good cup from a great one. Additionally, improper cleaning routines—like neglecting burr alignment or failing to remove coffee oils—are frequent pitfalls that contribute to inconsistent grind quality over time. Regular maintenance, including thorough cleaning, ensures your grinder performs accurately. Remember, choosing a grinder aligned with your coffee style and maintaining it properly can elevate your brewing significantly. For more tips on selecting the best equipment, visit our guide on [choosing the perfect barista gear](https://espressotechguide.com/choosing-the-best-barista-gear-for-coffee-enthusiasts). Don’t fall into the trap of overconfidence with beginner setups—mastering the nuances, like precise tamping pressure and temperature stability, can revolutionize your home espresso experience. Want to deepen your understanding? Check out our [mastering home espresso tips](https://espressotechguide.com/mastering-the-art-of-home-espresso-tips-for-beginners). Have you ever fallen into this trap? Let me know in the comments.Maintaining your espresso setup is crucial for consistent quality and longevity. I personally swear by a few specialized tools that streamline maintenance and ensure your machine and grinder stay in top shape. One indispensable item is a **precision calibration scale**, like the Astro 9100 model, which I use daily to dial in grind and tamping pressure with accuracy down to 0.1 grams. This small investment has dramatically improved my shot consistency and helps me catch fluctuations caused by worn-out burrs or tampering issues. Additionally, I recommend investing in a **burr cleaner**—such as the GrindZ or Pallo brush—which effectively removes coffee oils and trapped debris from burrs, preventing uneven grind sizes and over-heating during operation. Regular cleaning using these tools preserves the performance of your grinder, avoiding the common pitfall of flavor degradation over time. For milk frothing and steam wand upkeep, a **steam wand cleaner kit** is invaluable. I use the Ortanza Pro model, which features a flexible brush designed to reach the most stubborn milk residues, maintaining dry vapor output and preventing bacteria buildup. Keeping a **magnetic gasket scraper** nearby also helps me quickly remove scale or buildup around the group head and portafilter, reducing downtime during busy mornings. Looking ahead, I predict that automation and smart sensors will become standard in home espresso equipment, providing real-time diagnostics and maintenance alerts—similar to how modern appliances alert you when filters or parts need replacing. To keep your gear performing flawlessly, it’s essential to establish a routine—disassemble, clean, lubricate, and reassemble—using the right tools for each step. How do I maintain my espresso gear over time? I schedule weekly deep cleans, including burr inspection with a magnifying glass, and perform preventive descaling following manufacturer guidelines. When it comes to grinders, replacing worn burrs every 300-500 kg of coffee is a smart move, as suggested by industry experts like Scott Rao. Remember, quality tools make a tangible difference—don’t skimp on cleaning brushes and calibration scales. For tips on selecting the right equipment, check out our guide on [choosing the best barista gear](https://espressotechguide.com/choosing-the-best-barista-gear-for-coffee-enthusiasts). Finally, test your machine periodically by dialing in fresh beans and adjusting your grind size to see if your routine yields stable results. I challenge you to incorporate a calibration scale into your setup this week—it’s a game-changer for home baristas aiming for professional-quality shots.
The Hardest Lesson I Learned About espresso machines,home espresso,coffee grinders,milk frothers,barista gear
Discovering that tiny gasket was a game-changer—neglecting small maintenance tasks often leads to big headaches. I realized that, just like tuning a fine instrument, regular inspections and care of seals and parts are essential for top-tier coffee brewing. That lesson taught me patience, precision, and humility—reminding me that mastery comes from attention to detail.
3 Myths About espresso machines,home espresso,coffee grinders,milk frothers,barista gear That Held Me Back
Believing that expensive gear guarantees perfect results or that minimal maintenance isn’t necessary were common misconceptions I had early on. Removing these barriers was crucial; understanding that consistent upkeep and skillful adjustment elevate even modest setups transformed my brewing experience. I found that patience in calibration and maintenance yields the best-tasting espresso every time.
What Experts Won’t Tell You About espresso machines,home espresso,coffee grinders,milk frothers,barista gear
Some of the most valuable insights I uncovered involved nuanced maintenance routines—like meticulous grinder burr cleaning and gasket replacement—often overlooked by newcomers. Experts emphasize that learning to troubleshoot and caring for your gear insulates you against costly repairs and inconsistent shots. In the end, becoming familiar with the intricacies of your setup opens doors to a true barista-level experience at home.
My Essential Toolkit for Espresso Mastery
Over years of tinkering, I’ve come to trust specific tools that keep my espresso gear performing optimally. A precision calibration scale allows me to consistently dial in grind size and tamping pressure; I recommend the Astro 9100 model for its accuracy. Burr cleaning brushes like the Pallo help maintain grinding precision, preventing flavor degradation and uneven extraction. Regularly using these tools ensures my machine stays reliable and my coffee delicious.
Books That Changed How I View Coffee Craftsmanship
Pouring over titles like Scott Rao’s “The Professional Barista’s Handbook” redefined my approach, emphasizing scientific precision and technique. These books reveal that mastering variables—temperature stability, pressure profiling, grind adjustment—is more impactful than relying solely on advanced equipment. I encourage fellow enthusiasts to invest time in learning the craft through reputable resources; it’s a game-changer.
Where to Go from Here
If you’re eager to take your espresso skills further, explore our detailed guide on [choosing the best barista gear](https://espressotechguide.com/choosing-the-best-barista-gear-for-coffee-enthusiasts) and deepen your understanding of equipment maintenance. Experiment with small adjustments, document your results, and don’t shy away from troubleshooting issues like leaks or inconsistent grind size. Remember, each step brings you closer to barista-level perfection at home.
Ignite Your Passion for Perfect Coffee Today
Your journey in mastering espresso machines or coffee gear is uniquely yours—every mistake and breakthrough helps you craft a better cup. Embrace the learning curve, invest in quality tools, and stay curious. With patience and persistence, you’ll turn your kitchen into a personal coffee lab, producing outstanding espresso that rivals cafes. So, what’s your next step in elevating your brewing game?
Do you have a specific challenge in maintaining your espresso gear or fine-tuning your shots? Share your story below—I’d love to hear how you’re progressing!