It was one of those mornings where everything that could go wrong did. I’d just finished dialing in my espresso machine, proud of my latest setup, only to be greeted by a weak, sour shot that tasted more like vinegar than coffee. Frustration bubbled up. Why was this happening? I had read so many guides insisting I needed a perfect 9 bars of pressure to brew stellar espresso, yet my results kept falling flat.
As I stared at my machine, a lightbulb flickered on—what if I’ve been chasing the wrong pressure all along? Over the years, I’ve learned a lot about what really makes great espresso, and increasingly, the focus has shifted away from classical norms like 9 bars. Instead, more baristas and home brewers are swearing by the benefits of a 6-bar setup.
In this post, I’ll share why I believe the 6-bar espresso pressure is not just a passing trend but a genuine upgrade that’s winning in 2026. We’ll explore the science behind pressure, the real-world impact on your shots, and how to adapt your gear without losing your mind. If you’ve ever battled with inconsistent extraction or wondered whether your espresso setup is holding you back, this is for you.
Why Bother Changing What It’s Always Been
For years, the espresso community has championed the 9-bar standard as gospel. It’s deeply embedded in traditional training and countless machine designs. But recent advancements, including smarter grinders and smarter brew parameters, suggest it’s time to rethink that obsession. Evidence indicates that optimal pressure can vary based on beans, grind size, and equipment—sometimes, less really is more.
Early on, I made the classic mistake of blindly following pressure guidelines without tweaking other variables. This led to unnecessary frustration and wasted beans. A key revelation came when I examined how my grinder’s static and retention issues might be impacting my pressure stability, which you can learn more about in the article on static fixes [here](https://espressotechguide.com/3-coffee-grinder-tweaks-to-stop-messy-static-in-2026-tested). The takeaway? Great espresso isn’t just about pressure; it’s about how all components harmonize.
What’s exciting is that switching to a 6-bar setup often simplifies the process, allows for more forgiving extraction, and reduces wear on the machine. It’s a change that has genuinely improved my workflow, and I’ve seen similar reports from many in the community. But, I know some skeptics are thinking: “Isn’t lower pressure going to weaken the shot?” Good question. That’s what we’ll tackle next, and I’ll share some lighting-fast tricks to make your transition seamless. Stay tuned.
Adjust Your Grinder for Consistency
Before lowering your machine’s pressure, ensure your grinder is dialed in precisely. An inconsistent grind leads to uneven extraction, regardless of pressure. Focus on achieving a uniform, medium-fine grind—think sugar consistency. Use your quality grinder and set your burrs to minimize retention. When I first tried this, I freshly sharpened my burrs, cleaned static, and adjusted grind size to a slightly coarser setting, which immediately improved my extraction.
Verify Your Grind Size
Use a burrs that are sharp and well-calibrated. Static build-up can ruin consistency, so implement the static reduction tricks. Proper grind size is the foundation; even a slight coarsening or fining can shift extraction dramatically under lower pressure. Remember: the goal is uniform particle size, like granulated sugar, not powder.
Set Up Your Pressure Safely
Most home espresso machines default to 9 bars. To switch to 6 bars, you can manually adjust the pressure limit via your machine’s control panel, or install a pressure modulator. When I first attempted this, I reduced pressure incrementally—first to 8 bars, then 7, until I hit 6—and tested the shot after each tweak. Using a pressure gauge attachment helped me dial in quickly without guesswork.
Test Extraction Time and Flow
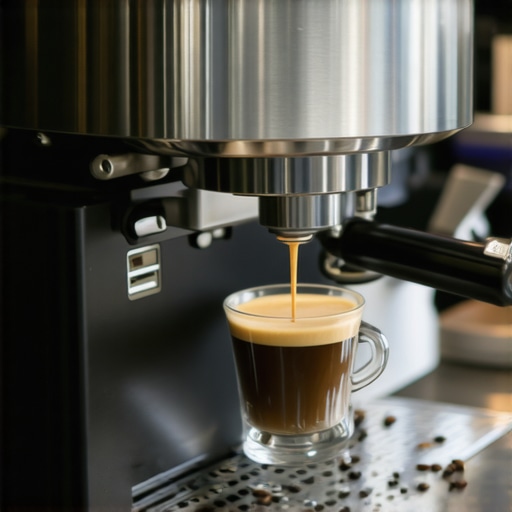
With your pressure set lower, your shot may take longer—generally 25-30 seconds for a double shot. Observe the flow: a steady, thin stream that resembles warm honey indicates good flow. If it’s too fast or slow, adjust grind size incrementally again. I remember starting with a shot that poured out like a thin stream; after fine-tuning the grind and pressure, it became a more controlled, consistent flow. This step is crucial; it confirms your setup’s harmony.
Refine Your Technique for Microdosing
Lower pressure tends to enhance clarity, but only if your puck prep is tight. Use a precision tamper and distribute coffee evenly to avoid channeling—a common pitfall. I combined a gentle tamp with a single-dose dosing funnel to reduce waste and ensure even compression, which made a noticeable difference when pressure was decreased.
Monitor and Adjust Consistently
The key to success is ongoing adjustments. Keep a record: note grind size, pressure level, shot time, and taste notes. When I started tracking these, I identified subtle patterns—like how a slightly coarser grind yielded better clarity at 6 bars. Regularly checking your equipment for wear or buildup—like cleaning your brew path—ensures long-term consistency. Making small iterative changes prevents frustration and leads to perfect shots.
When it comes to elevating your home espresso game, many enthusiasts focus on buying the latest machine or the fanciest milk frother. However, even seasoned baristas often misunderstand the subtle intricacies that truly impact coffee quality. One common myth is that high-end gear guarantees better results, but in reality, mastering the nuances—like grinder calibration and maintenance—makes all the difference. For instance, dull burrs can silently sabotage your shots, creating uneven extraction and dull flavor profiles. Regularly inspecting your grinder’s burrs and implementing simple tweaks can prevent this, as detailed in our guide on burr deterioration. Moreover, many overlook the importance of static reduction in grinders, which can lead to inconsistent dosing and channeling—an often overlooked pitfall that hampers even the best setups. Applying static-reducing tweaks transforms grind consistency, especially for micro-dosing techniques.
Another misunderstood area is milk frothing. Many think that the cost of a frother correlates directly with microfoam quality, but advanced baristas know that technique and wand control are equally critical. Achieving silky, dense microfoam isn’t about the power of the device but about mastery over steam wand positioning, as discussed in scale calibration and frothed milk techniques. Additionally, choosing a budget machine with poor thermal stability can lead to inconsistent shots. Advanced users counter this by regular backflushing and preheat routines that stabilize temperature fluctuations.
Now, here’s a question often asked by advanced brewers: How critical is pump pressure profiling in achieving barista-level shots at home? Recent studies on extraction dynamics reveal that variable pressure profiling can significantly enhance flavor complexity and body, a technique traditionally limited to commercial machines. Experts recommend experimenting with pre-infusion and ramps, guided by pressure profile adjustments to unlock deeper nuances.
Understanding these finer points is what separates a good barista from a true artisan. Are you falling for the trap of over-investing in gear without optimizing what you already have? Or perhaps you’re overlooking simple adjustments that yield dramatic improvements. Have you ever fallen into this trap? Let me know in the comments.Maintaining your espresso setup is crucial for long-term performance and effortless brewing. Regularly cleaning your machine and grinder prevents buildup that can compromise taste. I personally schedule a deep clean every 1-2 months, using a backflush routine with a cleaning solution recommended by the manufacturer, as detailed in our comprehensive guide. This routine avoids clogs and ensures consistent pressure and temperature. Additionally, regularly inspecting and replacing parts like water filters and seals keeps your machine operating at its peak. When I notice subtle changes in shot quality, I check for wear in o-rings and gaskets, referencing expert maintenance tips. Over time, elements like grinders need attention too; dull burrs will slow grinding and affect extraction. I rely on a burr replacement schedule aligned with testing signs of dullness from these tests to keep consistency. For ongoing health, I use diagnostic tools like pressure gauges and scales to detect subtle declines in performance. Going forward, smart maintenance routines will likely incorporate IoT sensors that monitor machine health in real-time, simplifying upkeep. For now, establish a routine that combines manual checks and scheduled deep cleans—your shots will thank you. Want to take your gear maintenance to the next level? Try setting up a monthly burr calibration check, and you’ll be surprised how much it improves your extraction stability. Keep your tools sharp and clean, and your coffee experience will stay top-notch.
Hidden Lessons from a Coffee Enthusiast
One of the most profound insights I stumbled upon was how much subtle adjustments, like tweaking pressure, can transform your espresso from average to exceptional. I used to believe that sticking rigidly to traditional standards, like 9 bars of pressure, was the golden rule. But experimenting with a lowered pressure setting unveiled a more forgiving, flavorful shot that highlighted the nuances of different beans. That realization taught me to trust my equipment and intuition more than fixed norms.
The Power of Mindful Tuning
Another lesson revealed itself when I began tracking every variable—grind size, tamping pressure, water temperature—in detail. I discovered that consistent, small tweaks based on real taste feedback yielded rapid improvements. This approach reduced frustration and empowered me to become more intimately acquainted with my gear’s capabilities, especially as I moved to a 6-bar setup.
My Go-To Resources for Espresso Optimization
- Precision Tools: A quality pressure gauge transformed my ability to accurately set and monitor pressure levels, making pressure profiling precise and accessible. I trust this guide for understanding how to leverage such tools effectively.
- Grinder Maintenance: Regularly inspecting and replacing dull burrs is vital. The dull burr test became a staple in my routine, ensuring I maintained a consistent grind quality.
- Community Insights: Engaging with fellow espresso lovers on forums and social media introduced me to innovative adjustments, like static reduction tricks, that made grinding smoother. I recommend these static fixes to anyone facing static issues.
Take Action and Elevate Your Coffee Game
Experimenting with pressure, as simple as lowering it to 6 bars, can unlock layers of flavor you’ve never experienced. Don’t hesitate to revisit your grinder’s maintenance, optimize your extraction time, and trust your palate over rigid rules. The path to barista-level coffee starts with curiosity and a willingness to adjust. Are you ready to see what your setup can truly do? Try one tweak today—your taste buds will thank you.
![Why 2026 AI Pressure Profiling Fails on Light Roasts [Fix]](https://espressotechguide.com/wp-content/uploads/2026/04/Why-2026-AI-Pressure-Profiling-Fails-on-Light-Roasts-Fix.jpeg)


Leave a Reply