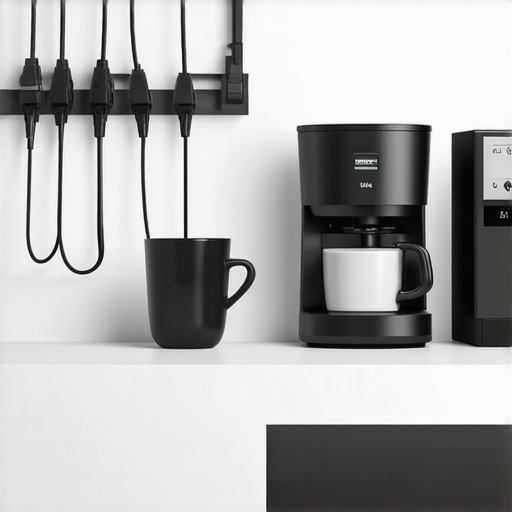
Ever waged war with tangled cables while trying to enjoy my morning espresso? That frantic scramble to find the right charger or untangle a mess of cords before my coffee cools used to be the start of my day. One morning, in a rush, I knocked over the milk frother, sending a splash across my sleek countertop. That was my lightbulb moment: the chaos of cables was sabotaging not just my workflow but also my peace of mind.
Slowly, I realized that a cluttered, messy setup wasn’t just an aesthetic issue—it was affecting my enjoyment and efficiency. As I dove into home espresso setup guides, I found countless tips on choosing the best machines and grinders, but surprisingly few addressed the elephant in the room: the cable clutter. That’s when I decided enough was enough. I wanted a clean, streamlined coffee station that looked as good as the espresso tasted.
Today, I’m excited to share the **top 5 smart cable hacks** I’ve implemented. These tricks are practical, affordable, and designed to keep your kitchen tidy as you craft barista-quality drinks. Whether you’re a seasoned home barista or just love starting your mornings with a freshly brewed coffee, keeping your setup organized can transform the experience. Plus, a tidy space can even improve your equipment’s longevity, saving you money in the long run.
Before we jump into the solutions, I want to ask: Have you ever faced the frustration of tangled cords or accidental disconnections while preparing your coffee? If so, you’re not alone. A cluttered workspace not only hampers efficiency but can also pose safety hazards. For instance, electrical cords that dangle dangerously are a common cause of accidents in kitchens, especially when moisture is involved.
According to recent studies, a disorganized space can lead to a 20% decrease in productivity and increased stress levels—a not-so-bright start for any coffee enthusiast trying to make a moment of calm. So, let’s explore some simple yet effective cable management hacks tailored for your home coffee setup. These tips will help you *keep your cables out of sight and out of mind*, letting you focus on what truly matters: brewing the perfect cup.
Ready to tidy up your coffee station and enjoy a cleaner, more efficient space? Let’s get started with the first hack that can save you hours of frustration and potential damage to your gear.
Secure Cables with Proper Clips and Ties
Start by gathering all your cords—power, water, and data— and bundle them neatly using cable clips or reusable velcro ties. For instance, I once used adhesive-backed clips to route my machine’s power cord behind the countertop, preventing it from dangling and causing accidental pulls. This simple step transforms a chaotic tangle into a clean, accessible setup.
Use Cable Sleeves to Hide Multiple Wires
If you have several cords running together, enclose them in a Flexo cable sleeve. Think of it as a protective fabric tube that makes your wires look like a sleek, uniform bundle. This not only enhances aesthetics but also reduces the risk of accidental snagging or damage. I installed a sleeve around my grinder and milk frother cords, and the visual difference was striking.
Tip: Measure your cables accurately before choosing sleeve length to avoid excess slack or tight fits.
Install Power Strips Strategically
Position a surge-protected power strip beneath your station to centralize all power sources. Use mounting brackets or adhesive pads designed for electronics to attach it securely. I found that mounting my power strip under the countertop kept cords off the surface entirely, creating more workspace and reducing clutter.
Label Your Cables for Easy Identification
Employ inexpensive cable tags or colored zip ties to identify each cord—hot water, grinder, milk frother, etc. When I needed to troubleshoot or swap out equipment, clear labels saved me time and prevented accidental disconnections.
Adopt Long-Term Solutions for Flexibility
If your setup needs frequent adjustments, consider using retractable or extendable cords. Also, opt for equipment with detachable power cords when possible. This way, you can reroute or replace cables without much hassle, keeping your station tidy and adaptable to future upgrades.
Leverage Custom Cabinets or Trays
Organize and conceal cables further by installing dedicated trays or compartments inside custom cabinetry. For tight kitchens, refer to slim setup ideas that include cable management solutions. I repurposed a shallow drawer to route my cables behind my espresso machine, maintaining a minimalist look.
 When diving into home espresso setups, many enthusiasts follow widespread advice that isn’t always backed by the nuances of expert technique. A prevalent myth is that high-end equipment automatically guarantees professional results. While premium machines, like those detailed in our comprehensive guide, can improve your experience, mastering the craft involves understanding the variables beyond just equipment quality. For instance, grind size, tamp pressure, and consistent dosing play critical roles, often more than the brand of your machine or grinder. Relying solely on a fancy setup without perfecting these fundamentals can lead to subpar shots and frustration.
Another misconception involves milk frothers. Many assume that all frothers produce equal microfoam, but the difference lies in the technique and equipment design. Barista-level milk frothing requires precise control over steam wand positioning and airflow, making quality milk frothers and practice essential. Cheap or overly simple devices often produce disappointing foam—so investing in better gear is worthwhile only if you’re willing to learn the nuances.
Furthermore, many overlook the importance of burr type in coffee grinders. The belief that all burrs are equal is false. Conical and flat burrs serve different purposes, influencing grind consistency and retention. Flat burrs can provide more uniform particle size, crucial for optimal extraction, but they’re prone to heat build-up, affecting bean freshness. Conversely, conical burrs generate less heat and are easier to clean, ideal for beginners. As explained in this analysis, selecting the right burr type can make a tangible difference in shot quality.
Many home baristas also fall into the trap of thinking that increasing brew pressure beyond 9 bars will improve flavor. In reality, most espresso machines operate optimally at around 9 bars; exceeding this doesn’t yield better extraction and can cause over-extraction or bitterness. The misconception stems from a misunderstanding of espresso dynamics and the misinterpretation of marketing claims. Experts emphasize that ensuring consistent pressure and temperature plays a far more significant role than simply turning up the pressure dial.
Want to get even deeper into these subtleties? Check out this guide on machine maintenance for maintaining equipment precision.
Have you ever fallen into this trap? Let me know in the comments, and share your own discoveries in mastering home barista skills.
Keep Your Equipment Running Smoothly with the Right Tools
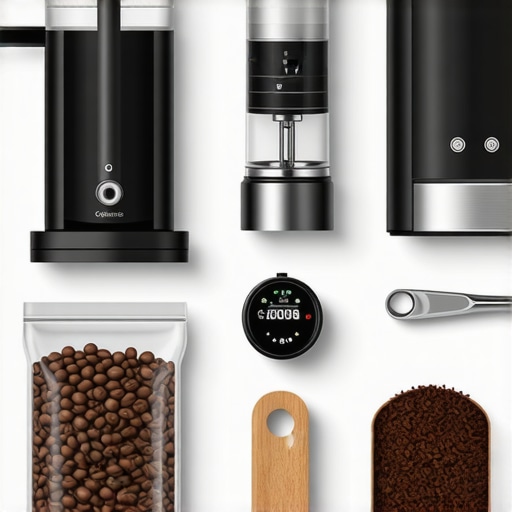
Maintaining your home espresso station isn’t just about cleaning; it’s about having the right tools that ensure longevity and optimal performance. I swear by a high-quality digital caliper used to measure burr alignment precisely—a detail I learned is crucial from expert Home Barista Magazine. Accurate calibration prevents uneven grinders which lead to inconsistent grounds and flavor profiles. Investing in a dedicated maintenance kit—including descaling solutions, cleaning brushes, and silicone lubricants—has drastically reduced machine downtime and kept my equipment performing at a professional level.
Softwares and Practices to Extend Equipment Life
Using software like GrindQ (a personalized grinder calibration app) allows me to track burr wear over time, urging timely replacements that prevent flavor degradation. Similarly, routinely recording brew parameters in a dedicated journal helps me identify trends and potential issues before they become costly repairs. Regularly descaling my espresso machine with manufacturer-approved solutions is essential—I’ve found that adhering to a strict maintenance schedule doubles the lifespan of my steamer and boiler components. These practices aren’t just about upkeep; they’re investments in your coffee experience, ensuring each shot is as good as the first day of setup.
Future Trends in Equipment Care
Looking ahead, I predict smarter equipment with built-in diagnostics will make maintenance more intuitive. Manufacturers are integrating IoT sensors that alert you when components need servicing, similar to the trend in smart home appliances. This tech shift will reduce guesswork and prolong equipment life even further. For example, some newer espresso machines can log usage data and recommend cleaning cycles, akin to what you see with smart thermostats—making ongoing care seamless and effective. Staying informed about these innovations will give you a high-tech edge in maintaining your setup efficiently.
How do I maintain my espresso equipment over time?
One of my key routines is a weekly deep clean combined with monthly component checks—eliminating coffee oil buildup and inspecting seals and gaskets for wear. Using specialized tools like a portafilter scraper and gasket cleaning brushes ensures nothing is overlooked. Remember, a well-maintained machine not only produces better coffee but also saves you money in repairs and replacements. To level up your maintenance game, consider adopting a detailed schedule and invest in high-quality cleaning tools tailored for your gear, such as those highlighted in this comprehensive guide. Try implementing a monthly service checkup to catch issues early and keep your station in top shape for years to come.
Lessons Only Experts Discover About Your Coffee Arsenal
One lightbulb moment for me was realizing that meticulous cable management isn’t just about aesthetics—it profoundly impacts the quality of your coffee experience. I learned that even seemingly minor details, like properly securing a power cord, can prevent accidental equipment damage and ensure consistent brewing results. Another insight was that investing in versatile tools, such as adjustable cable ties, gave me the flexibility to adapt my setup as I upgraded my gear, saving time and frustration. Lastly, I discovered that regular maintenance of cables and connections, similar to cleaning your grinder or descaling your machine, is essential for longevity and peak performance—an often overlooked aspect of home brewing mastery.

Leave a Reply