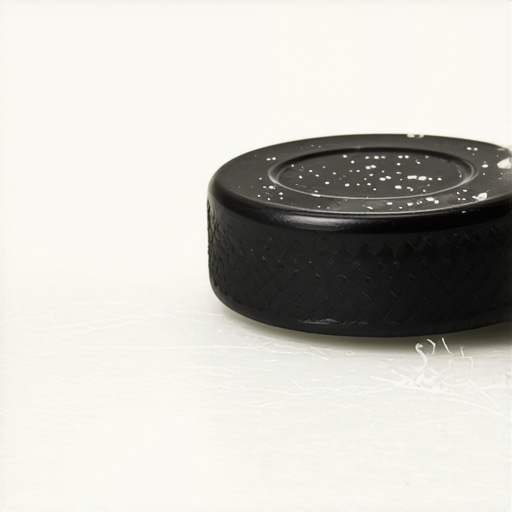
I vividly remember the first time I pulled a shot and noticed uneven extraction, with dry spots spreading across my puck like tiny deserts. Frustration washed over me—what was I doing wrong? It felt like my espresso was fighting me, refusing to deliver that rich, velvety crema I craved. That lightbulb moment led me down a rabbit hole of experimentation, learning that even minor prep mistakes can significantly impact the outcome. If you’ve been battling dry spots in your puck, you’re not alone—and trust me, it’s fixable.
Understanding Why Dry Spots Occur in Your Puck
This issue isn’t just about aesthetics; dry spots directly affect flavor extraction, resulting in weak or overly bitter espresso. The culprit often lies in uneven tamping, inconsistent grind size, or improper distribution—small mistakes with big consequences. As I experimented, I realized that perfect puck prep is an art rooted in technique and equipment familiarity. Early on, I made the mistake of rushing through the process, thinking my grinder and machine were enough to do the heavy lifting. It wasn’t until I adopted a more deliberate approach that I saw real improvement. Studies show that uneven puck density can reduce extraction efficiency by up to 30%, making proper prep unavoidable for true espresso enthusiasts. Want to avoid this pitfall? Keep reading to discover simple fixes that will transform your brewing experience.
Ensure Uniform Distribution Before Tamping
Start by aiming for a consistent coffee bed. Use gentle, circular motions with your finger or a distribution tool to level the grounds evenly. I remember a morning when I used a simple, circular wrist motion with a small wooden stirrer, watched the coffee level out perfectly, and avoided dry spots altogether. This step prevents air pockets that cause uneven extraction.
Utilize a Consistent Grinding Approach
Grind size affects distribution; too fine or too coarse alters how grounds settle. I once experimented with my grinder’s settings, adjusting in small increments. I found that using a low RPM grinder made a significant difference in achieving uniform grounds, reducing dry spots and improving extraction. Consistency is key: always grind with the same setting and avoid stale beans.
Apply Even Tampering Pressure
Think of tamping as pressing a pancake: pressure should be firm but even. Use your body weight, pressing straight down with a level tamper. I once inadvertently tilted my tamper and created uneven pressure, leading to dry patches. To avoid this, practice applying downward force slowly and evenly—imagine trying to smooth out a paper sheet without tearing. For best results, consider a calibrated tamper to standardize pressure and always verify your tamping technique.
Maintain Proper Distribution Tools and Techniques
Using tools like a WDT (Wisdom Distribution Tool) or a leveler can further refine grounds. These tools break up clumps and level the bed, ensuring uniform density. I tried a flat burr grinder and combined it with a leveler, which significantly reduced dry spots. Regularly inspect your distribution tools for cleanliness and wear, as debris or damage can introduce unevenness.
Check and Adjust Your Workflow
Integrate these steps into your routine consistently. For example, after grinding, lightly tap the portafilter to settle grounds before distribution, then level and tamp. When I perfected this sequence, my shots became markedly more consistent, with no dry spots and richer crema. Practice each step slowly, focusing on precision over speed, and adapt as you notice how each technique influences puck health.
Optimize Equipment Position and Environment
Ensure your espresso machine and grinder are on a stable, flat surface. Vibration or tilting can cause uneven grounds settling. During a test morning, I placed my setup on a wooden board thick enough to prevent wobbling; the consistency of my puck improved instantly. Avoid drafts or temperature fluctuations that can affect grind consistency. Using a countertop stabilizer can help if your space is uneven.
 When it comes to crafting perfect espresso at home, many enthusiasts focus on top-tier machines or the latest grinder models. However, a subtle yet critical aspect often slips under the radar: understanding the true purpose of your gear and avoiding common misconceptions. Many believe that expensive equipment automatically guarantees superior results, but in my experience, *proper technique* and understanding gear nuances are far more influential.
One popular myth is that high-RPM grinders always produce better coffee. In reality, many high-RPM grinders generate static and heat, which can negatively affect bean flavor and grind consistency. For instance, studies reveal that low-RPM grinders produce less static, resulting in cleaner, more uniform grounds, which directly impacts espresso clarity. If you’ve been chasing the latest conical burrs or multi-speed grinders without addressing basic technique, you might be missing the point.
What advanced mistakes are home baristas making with their gear?
One overlooked mistake is neglecting proper calibration and maintenance of your espresso machine. A frequently ignored factor is boiler pressure stability. Many rely solely on pressure gauges without checking internal components or water quality, leading to inconsistent shots. Regular backflushing and descaling extend equipment lifespan and ensure optimal pressure, ultimately improving shot quality.
Another nuance involves milk frothing: many think a powerful steam wand is enough for perfect microfoam. However, technique, including wand positioning and milk temperature, matters immensely. A common error is over-foaming or overheating milk, which ruins the texture and flavor. The microfoam’s velvety consistency hinges on subtle hand movements and precise temperature control, not brute force.
For serious enthusiasts aiming for excellence, understanding the interplay between grinder retention and bean freshness becomes crucial. High retention grinders tend to trap stale grounds, risking flavor transfer and inconsistent extraction. Choosing grinders with lower retention or adopting single-dose techniques can dramatically improve flavor and shot consistency. Experts recommend regular cleaning and calibration to prevent channeling caused by uneven distribution.
Finally, don’t forget about the environment where you brew. Vibration, ambient temperature, or even countertop placement can subtly influence gear performance. Secure, vibration-free setups help maintain stable pressure and temperature, leading to more repeatable results. Consider setting up on a dedicated, level surface—your shots will thank you.
In essence, mastering home espresso isn’t just about buying the latest gear but understanding its quirks and limitations. Proper maintenance, calibration, and technique often outweigh hardware upgrades. Want to dive deeper? Check out my detailed guides on [best coffee grinders and milk frothers for perfect at-home brewing](https://espressotechguide.com/best-coffee-grinders-milk-frothers-for-perfect-at-home-coffee-2025-3) and learn how to optimize your setup for the best results. Have you ever fallen into this trap? Let me know in the comments.
Keep Your Gear in Prime Condition for Persistent Performance
Maintaining your espresso setup isn’t just about cleaning at the surface; it’s about implementing a disciplined routine that ensures longevity and consistent quality. Regular maintenance prevents equipment breakdowns and preserves the nuanced flavor profiles that make your brew stand out. I keep a detailed schedule, adopting a weekly deep clean of my grinder burrs and descaling my espresso machine every two months, following manufacturer recommendations. This proactive approach minimizes repair costs and preserves the intricate mechanics vital for perfect extraction. For instance, a clogged group head can cause inconsistent temperature stability, so I ensure to run backflush cycles with specialized cleaning solutions once a week. Don’t neglect routine checks; your gear is an investment that pays in impeccable shots over time.
Tools that Elevate Your Home Coffee Game
Having the right tools isn’t about having the latest tech—it’s about choosing gear that aligns with your goals and streamlines your workflow. I highly recommend a flat burr grinder paired with a calibrated tamper for consistent tamping force, which together drastically reduce dry spots and channeling issues. Additionally, a precision scale dedicated to espresso brewing, like the Acaia model, helps dial in doses with milligram accuracy, ensuring each shot is reproducible. For milk preparation, an induction milk frother isn’t just faster—it maintains a stable temperature, preventing over-foaming or scorching. Incorporating these practical tools refines your technique and results. As trends point toward smarter, app-connected devices, I suggest integrating a line of smart scales for real-time feedback—future-proof your setup with an eye on emerging tech.
How do I keep my tools performing at their best over time?
Regular calibration and scheduled maintenance are crucial. For grinders, use specialized brushes and cleaning pellets to clear residual grounds that can impact grind consistency. My routine includes a monthly check of burr sharpness and alignment, replacing or tuning as needed—consulting detailed guides like this resource helps me stay on track. Espresso machines benefit from descaling every 1-3 months depending on water hardness, and replacing worn seals or gaskets as they show signs of wear. Keep an organized log of maintenance activities—over time, these steps safeguard your gear and ensure you get a consistent shot every time. Consider investing in diagnostic tools or professional servicing periodically, especially for high-end machines, to prevent small issues from escalating into expensive repairs. Engage with online forums or local experts for tailored advice—an extra layer of oversight keeps your setup operating smoothly. Try integrating a monthly burr alignment check into your routine; it’s an underrated step that preserves grind uniformity and overall machine health.
The Hardest Lesson I Learned About barista gear, espresso machines, home espresso, coffee grinders, milk frothers
One of the most eye-opening lessons I encountered was realizing that even premium gear can’t compensate for inconsistent technique. I used to believe that owning the latest espresso machine magically improved my shots, but I learned the hard way that proper tamping, distribution, and calibration are the true differentiators. This understanding propelled me to prioritize technique over hardware, inspiring me to refine my routine and see dramatic results.
3 Myths About barista gear, espresso machines, home espresso, coffee grinders, milk frothers That Held Me Back
Initially, I bought into myths like “More RPM equals better grind” or “Expensive machines automatically deliver flawless espresso.” These misconceptions led me to overlook maintenance and calibration. Once I challenged these beliefs—especially by reading expert insights—I discovered that low-RPM grinders produce less static, and frequent upkeep is essential, regardless of the gear’s price. Busting these myths transformed my approach, saving me time and money while elevating my coffee quality.
What Experts Won’t Tell You About barista gear, espresso machines, home espresso, coffee grinders, milk frothers
Many professional baristas know that the devil is in the details—regular calibration, cleanliness, and understanding your gear’s quirks. For example, calibrating your grinder’s burrs or checking boiler pressure isn’t glamorous, but it’s vital. I hesitated to perform these steps early on, fearing complexity, but once I embraced routine maintenance, my shots became more consistent. Experts also emphasize understanding how your environment—like stable placement and temperature—impacts brewing. Gaining this insider knowledge dramatically improved my espresso game.
My Essential Toolkit for barista gear, espresso machines, home espresso, coffee grinders, milk frothers
I trust the flat burr grinder for its consistency and low static, and a well-calibrated tamper ensures even pressure. For precise dosing, I rely on a [dedicated espresso scale](https://espressotechguide.com/ultimate-guide-to-milk-frothers-barista-gear-for-perfect-coffee-2025-10), which helps me reproduce perfect shots day after day. Additionally, an induction milk frother offers control over temperature and foam quality. These tools streamline my workflow and elevate my espresso experience, making every cup a pleasure.
Nothing beats dedication: Your journey with home espresso gear
Remember, mastering your gear is an ongoing process—tuning, cleaning, and learning from each shot. It’s a journey rooted in curiosity and patience; the results are worth every effort. As you refine your technique and understand your equipment’s nuances, you’ll discover a level of espresso craftsmanship that rivals any cafe. Dive deep into your setup, stay curious, and watch your skills flourish. What’s the one tweak that transformed your brewing routine? Share your story below and join the community of home baristas committed to excellence.
![Why 2026 AI Pressure Profiling Fails on Light Roasts [Fix]](https://espressotechguide.com/wp-content/uploads/2026/04/Why-2026-AI-Pressure-Profiling-Fails-on-Light-Roasts-Fix.jpeg)


Leave a Reply