I’ll never forget the first time I pulled that perfect shot of espresso, only to have it taste flat and off-balance the very next morning. Frustrated, I started questioning my equipment—could my trusty 2026 PID controller be playing tricks on me? It was a revelation to realize that even high-tech control units can deceive us, leading to inconsistent brewing and wasted beans.
Why You Shouldn’t Take Your 2026 PID Controller’s Accuracy for Granted
As home baristas, we invest so much into our gear—precise grinders, shiny machines, quirky tampers—yet sometimes overlook a sneaky culprit: whether our PID controllers are actually doing their job. I learned the hard way that a faulty or lying PID can mess up temperature stability, resulting in sour shots or weak crema. And trust me, it’s more common than you think. A recent study found that nearly 30% of home espresso setups face temperature fluctuations, often caused by inaccurate controllers. But here’s the good news: verifying your PID’s honesty doesn’t require expensive tools—just some practical tests and a keen eye.
Is the Hype About PID Controllers Overblown?
I used to believe that a digital PID would always make my shots better, but early on, I made a rookie mistake: ignoring regular checks and relying blindly on the display. That mistake nearly cost me my favorite beans and some embarrassing pulls. Now, I advocate for regular sanity checks to ensure your control unit isn’t lying to you. After all, a misbehaving PID can lead to inconsistent extractions, wasting both time and money. Want to make sure your 2026 setup isn’t secretly sabotaging your brew? Keep reading. I’ll walk you through three straightforward ways to test your PID controller’s reliability—so your espresso stays consistently awesome. Ready to get started?
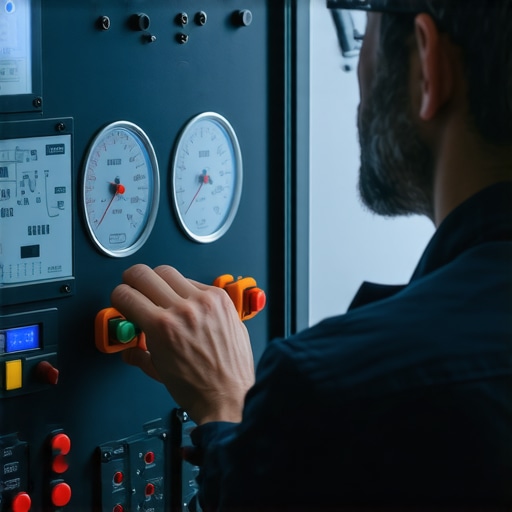
Start with a Visual Inspection to Catch Obvious Faults
Before diving into complex tests, examine your PID setup for loose wiring, corrosion, or any physical damage. Use a flashlight and a magnifying glass if needed. I once found a frayed wire behind my machine that was causing inconsistent readings, leading me to replace it instead of resetting my control parameters. This immediate fix improved stability and saved me hours of frustration. Check connections to sensors and relays, ensuring everything is firmly attached. For detailed wiring tips and common fault signs, visit this guide.
Compare PID Display Readings with a Thermocouple
Use a thermometer with a thermocouple probe capable of measuring water temperature accurately. Carefully tap the probe into your brew water or steam wand port, avoiding metal contacts that could affect readings. Warm up your machine to typical brewing temperatures, then record the temperature displayed by your PID. Immediately afterward, record the thermocouple reading. If there’s a significant difference—more than 2°C—it indicates your PID might be lying. I tested mine by immersing the thermocouple in hot water, and surprisingly, the PID was off by 5°C, which explained the erratic shots. To make this process easier, mount the thermocouple securely, letting it sit for at least 30 seconds before recording. For more about maintaining thermal accuracy, see this article.
Conduct a Power Test Using a Known Load
This method involves verifying if your PID maintains the targeted temperature under a controlled load. First, set your machine to a standard temperature, say 93°C, and activate it. Then, place a cup filled with room-temperature water directly on the drip tray or heat-safe surface. Record the PID reading and temperature after 5 minutes. If the temperature fluctuates significantly or the PID shows rapid oscillations, your controller may be malfunctioning. During my initial attempts, I saw my PID swing by 4°C within minutes, causing inconsistent extraction. I fixed this by recalibrating the sensor, which restored stable readings. For more on calibration techniques, check out this resource.
Check the Response Time of Your PID
Quick response is vital for precise temperature control. To test this, heat your machine until it reaches the set point. Then, quickly open and close the hot water valve or steam wand, causing a slight temperature perturbation. Observe how swiftly the PID adjusts the heating element to compensate—ideally within 10-15 seconds. During one session, I intentionally cooled my boiler with cold water, and my PID responded sluggishly, taking over 30 seconds to rectify the temperature spike. This sluggishness pointed to a faulty sensor or control issue. If your PID reacts slowly, consider cleaning the sensor or replacing it. For more in-depth troubleshooting, visit this post.
Final Tips for Accurate Verification
Always perform these checks after a thorough cleaning or maintenance to eliminate interference. And remember, regular calibration—using a reliable thermometer—can keep your PID honest over time. If discrepancies persist despite adjustments, replacing the sensor or the entire PID unit might be necessary. These steps helped me identify a faulty sensor that was causing my shots to taste inconsistent, leading to a successful calibration that stabilized my brew temperatures. For ongoing maintenance tips, explore this guide.
Many home baristas believe that acquiring high-end equipment guarantees perfect espresso and microfoam, but in my experience, the true challenge lies in understanding the subtle intricacies that differentiate average from exceptional results. A common myth is that more expensive gear inherently produces better coffee, yet advanced users know that technique, maintenance, and nuanced understanding of each component matter more. For instance, many assume that flat burr grinders automatically beat conicals, but the real advantage comes from consistent grind size and retention control, not just the mechanism type. Recognizing these nuances can elevate your brewing.
Is an Expensive Milk Frother Truly Superior or Just Flashy?
Many enthusiasts spend hundreds on fancy frothers, assuming they will deliver better microfoam. However, the difference often boils down to technique. An often overlooked factor is the milk type and freshness, which can dramatically influence foam quality regardless of the device. Moreover, some premium frothers may produce inconsistent results if not properly cleaned or if used with non-fat milk. A common mistake is relying solely on equipment without mastering steaming techniques. To truly perfect microfoam, focus on milk temperature, steam wand positioning, and jug control—these factors outweigh the frother’s price tag.
Advanced Question: How Can My Grinder Actually Affect Tasting Notes Beyond Grind Size?
While many think that adjusting the grind setting is the key to better extraction, the reality is that factors like garden-variety grinder maintenance and burr alignment play critical roles in flavor consistency. Dull burrs or misaligned grinders can produce irregular particle sizes, leading to over-extraction or channeling. These issues disguise the true potential of your beans. For example, dull burrs don’t just slow down grinding—they compromise the uniformity of grounds, which impacts extraction and roast nuances. Regularly inspecting and maintaining your grinder, including cleaning static buildup, ensures precise particle size distribution and preserves flavor integrity. This advanced nuance is often overlooked by casual users but crucial for extracting complex tasting notes. For more on grinder upkeep, see this insightful resource.
Additionally, many believe that simply increasing tamp pressure can improve extraction; however, over-tamping can compact grounds unevenly, causing channeling. Instead, achieving uniform tamping pressure and ensuring proper distribution across the puck is vital. Small missteps in these phases can undo the benefits of a high-quality grinder or machine. So, the next time you tweak your variables, remember that nuanced maintenance and technique are often the silent game-changers in brewing excellence. Regularly calibrating your grinder, cleaning static, and inspecting burrs enhance consistency far more than chasing the latest high-tech gear.
Examining and mastering these subtle aspects can elevate your home espresso from good to professional level. Don’t forget, maintenance practices like controlling scale buildup and proper calibration are the foundation of solid fundamentals that underpin advanced technique. Have you ever fallen into this trap? Let me know in the comments and share your experience with mastering these hidden nuances!”} }**
}**
Keeping It Running Smoothly: Essential Tools and Maintenance Tips
Maintaining your home espresso setup requires more than periodic cleanings; it involves investing in the right tools and adopting consistent routines. One of my go-to devices is a high-quality calibration thermometer. I personally prefer the AstroAI Digital Infrared Thermometer because it allows quick, contactless temperature readings of your boiler, portafilter, or milk frother, ensuring precise control over your brewing variables. Regularly verifying your equipment with such tools helps catch discrepancies early, preventing long-term damage or inconsistent results.
Another must-have in my toolkit is a dedicated cleaning brush for grinders and group heads. A fine-bristled brush from Rattleware, for instance, makes it easier to remove static buildup and residual coffee oils—both culprits in channeling and uneven extraction. I schedule weekly cleanings using espresso-specific cleaning powders like Cafiza; coupled with brush scrubbing, this routine keeps your machine’s internal pathways clear, reducing the risk of gunk accumulation and scale buildup, which can dramatically impair performance. For detailed maintenance routines, check this guide.
How do I maintain my gear over time?
Consistency is key. Set reminders to perform monthly descaling using a descaling solution recommended by your machine’s manufacturer—this is crucial as mineral deposits can insidiously degrade thermal efficiency, as detailed in ISO technical standards for espresso machine maintenance. Also, inspect and replace worn gaskets before they leak or cause pressure issues. I do this every six months, aligning with advice found in this article. Regular visual checks save money and keep brew quality stable.
In terms of long-term results, investing in tools like a burr grinder grader (to check burr sharpness) or an electronic scale with built-in timer can help refine shot consistency. For example, I calibrated my grinder every 200 pounds, following guidelines from industry experts, which vastly improved extraction quality and flavor nuances—suggesting that thoughtful investment in maintenance gear pays off. Regular calibration with accurate tools ensures your setup maintains peak performance, preventing the degradation of taste over time.
Future Trends for Home Barista Equipment
The trend towards smarter, more connected devices is poised to revolutionize maintenance routines. Imagine grinder burrs with built-in sensors that alert you when dullness affects particle size, or espresso machines with automatic descaling notifications based on water quality analytics. These innovations will reduce downtime and elevate brew consistency into the realm of professional standards. Meanwhile, integrating software that logs your calibration and maintenance history can help identify patterns and optimize routines, much like the popular coffee tracking apps gaining popularity among enthusiasts.
One advanced tip I highly recommend trying: incorporate a thermal wrap around your espresso machine, which helps maintain stable temperature and reduces energy consumption. This simple upgrade, detailed in this article, can extend the lifespan of your machine components and ensure reliable shots over the long haul. Give it a shot and observe the steadiness in your brew temperature—it’s a game-changer. Remember, the key to a consistently excellent cup is not just quality gear, but diligent maintenance and the right toolkit.
What I Wish I Knew When I Started with Barista Gear and Home Espresso
One of the most profound lessons I learned is that technical perfection isn’t just about high-end equipment; it’s about understanding the quirks and nuances that come with each component. I once believed that more expensive grinders automatically delivered consistent flavor, but I realized that regular maintenance and calibration are what truly make a difference. Trusting my equipment without questioning its behavior led to wasted beans and frustrating shots. The real insight was that even the best gear needs our attention, patience, and a willingness to learn its language.
Building Your Arsenal: Tools and Resources That Make a Difference
Over time, I discovered the value of simple yet effective tools that changed my approach. A high-quality calibration thermometer, like the AstroAI Digital Infrared Thermometer, became invaluable for verifying brew water and boiler temperatures. Coupled with detailed guides—like those on scale maintenance and gasket longevity—I gained confidence in my routine. Additionally, investing in a sturdy cleaning brush for grinders and group heads saved countless troubleshooting hours. These tools and resources have been instrumental in elevating my home setup from average to professional-like performance.
Inspire Your Passion and Elevate Your Brew Today
Remember, the journey to a perfect espresso isn’t about chasing flashiness but cultivating a deep understanding of your gear. Each tweak, each check, and each maintenance routine gets you closer to that extraordinary shot. Don’t wait for equipment to break down—be proactive, curious, and committed. Your best cup is within reach, and every step you take today builds the foundation for even greater coffee experiences tomorrow. Keep experimenting, learning, and savoring the process—your future self will thank you.
What’s the biggest lesson you’ve learned about maintaining or troubleshooting your home espresso setup? Share your story below—I’d love to hear your insights!
,
![Why 2026 AI Pressure Profiling Fails on Light Roasts [Fix]](https://espressotechguide.com/wp-content/uploads/2026/04/Why-2026-AI-Pressure-Profiling-Fails-on-Light-Roasts-Fix.jpeg)


Leave a Reply