How to Choose a Puck Screen Diameter That Doesn’t Scratch Your Basket
It happened to me just last month. I was in a rush, trying to whip up my morning espresso, when I noticed the unthinkable: a tiny scratch on my beloved brew basket. Frustration bubbled up immediately. Turns out, the culprit was my puck screen—the tiny metal disc meant to distribute water evenly—whose diameter was just a hair too big for my basket. That little misfit caused more harm than I realized, and it drove me to question: how do you pick the right size so your gear stays in pristine condition?
Why the Right Puck Screen Size Can Make or Break Your Coffee Experience
Choosing the correct puck screen diameter might seem trivial at first glance, but trust me, it’s crucial. An ill-fitting puck screen can scratch your basket, leading to uneven water flow, channelling, and ultimately compromised shots. Over time, these scratches become breeding grounds for bacteria and rust, damaging your equipment and affecting flavor quality. Moreover, a puck screen that’s too tight or too loose can cause the screen to slip or lift during extraction, disrupting the delicate balance needed for that perfect crema.
Many enthusiasts jump into buying without paying attention to sizing, thinking any screen will do. But, as I’ve learned from personal hiccups—and extensive research—precision matters. Incorrect size not only risks damaging your basket but also hampers your ability to consistently brew excellent coffee. To avoid the pitfalls I encountered early on, I dived deep into the specifics, learning that the diameter should match the basket’s inner diameter with just enough clearance for easy placement without excess wiggle room. For more insights, check out this detailed guide.
Is size really everything? My mistake early on might surprise you
Back when I first started experimenting, I bought a generic puck screen with no regard to my espresso basket’s dimensions. I assumed size didn’t matter as long as it fit somewhat inside. That was a mistake. My initial oversight caused scratches that, over time, became a headache. I wish I had known earlier that verifying the exact diameter is essential—not just for preserving your basket’s integrity but also for ensuring consistent, high-quality shots. If you’re eager to learn more about maintaining your gear’s health, check out why your equipment’s longevity matters.
So, before you rush to buy the next puck screen, take a moment. Measure your basket carefully, understand the nuances of sizing, and choose a screen that complements your setup perfectly. Up next, I’ll walk you through the simple steps I use to select the ideal puck screen diameter—saving my gear and ensuring my coffee is always top-notch.
Measure Your Basket Accurately Before Shopping
Start by confirming your espresso basket’s inner diameter precisely. Use a digital caliper or a flexible measuring tape to get an accurate measurement. I learned this the messy way when I bought a puck screen that was slightly too big, causing scratches during assembly. Ensuring a tight but movable fit prevents damage and ensures consistent water distribution.
Choose the Right Puck Screen Material and Design
Opt for high-quality stainless steel screens, which resist rust and staining. Look for a design that fits snugly without creating too much resistance. During my first attempt at replacing my puck screen, I selected a cheap plastic one—easy to install but prone to warping, which affected water flow. Investing in a durable, well-made screen saves trouble in the long run.
Align the Puck Screen Correctly During Installation
Place the puck screen centrally on the coffee puck, ensuring it’s level. If it tilts or shifts during brewing, it can cause channeling. I once hurried the process and had a shot with uneven extraction, all because I didn’t double-check alignment. Take a moment to verify even seating—using a small, flat tool can help press the screen evenly.
Verify Fit with a Test Run
Before brewing your ideal shot, run a test cycle without coffee or with a small amount of coffee, observing the water flow. A properly fitted puck screen will lead to even water distribution and no unusual noises or vibrations. I caught a sizing mismatch early this way, saving my basket from scratches and my brew from channeling issues.
Adjust and Fine-Tune for Optimal Performance
If you notice inconsistent flow or water spraying from the sides, reassess the fit. Sometimes, slight sanding or polishing the edges of the puck screen can improve fit and performance. For persistent issues, refer to expert tips on matching grinder burrs and ensure your equipment isn’t contributing to flow inconsistencies. Proper sizing and installation will make your brew more stable and flavorful.
Many coffee enthusiasts assume that selecting high-end equipment guarantees perfect brews, but in my experience, there’s more to it than just brand or price point. A common misconception is that grind size alone dictates shot quality, yet neglecting burr condition, noise levels, and grinder calibration can lead to subpar results even with premium machines. Likewise, with milk frothers, many think that all foam is created equal; however, achieving microfoam requires understanding steam wand pressure, pitcher angle, and milk temperature—details often overlooked by even seasoned baristas. When it comes to home espresso setups, the myth persists that bigger or more expensive gear automatically improves espresso, but the real secret lies in proper tuning, maintenance, and technique. Don’t be fooled into thinking that technology alone solves all issues; manual calibration and nuanced adjustments often produce better outcomes than relying solely on automation.
Are My Grind Settings Truly Optimal or Just Convenient?
Frequently, home baristas stick to default or familiar grind settings without testing their impact on extraction quality. This complacency can mask subtle inconsistencies that deteriorate flavor, mouthfeel, and crema. According to coffee scientist Dr. Matthew Perger, small deviations in grind size can have exponential effects on extraction—he recommends testing grind adjustments in small increments and observing changes over multiple shots. Overlooking grinder maintenance, such as burr alignment and cleaning, compounds the problem, causing dose inconsistencies and uneven particle sizes. An often-ignored detail is that grinders might require a settling period—sometimes 5kg of beans—to stabilize burr alignment and achieve consistent particle distribution. If you’re serious about perfecting your espresso, scrutinize every element from burr health to calibration routines; this meticulous approach makes a significant difference. For advanced tips, see how hybrid burrs fail on certain beans and learn how to prevent common pitfalls.
Another frequent trap is assuming that steam wand performance is solely dependent on machine power. In reality, frothing quality hinges on factors like pitcher tilt, steam pressure, and milk composition. Using proper steaming technique ensures microfoam consistency, but it requires practice and fine-tuning. Advanced baristas often warm the pitcher beforehand, adjust steam wand position, and monitor milk temperature closely—elements that amateurs tend to ignore. Recognizing these nuances transforms your milk texturing from trial-and-error to a science.
Ultimately, mastering the details behind your equipment’s performance elevates your coffee from good to exceptional. Regular maintenance, precise calibration, and understanding equipment nuances—these are the real secrets often hidden behind the scenes. So, have you ever fallen into this trap? Let me know in the comments and share your revelations.
Keep Your Equipment in Peak Condition for Consistent Results
Investing in high-quality gear isn’t enough; regular maintenance ensures your tools stay at their best. For espresso machines, rituals like weekly descaling using specialized cleaners—such as those recommended by this guide—prevent scale buildup that hampers performance. Moreover, inspecting and replacing wear parts like seals and gaskets every six months can avoid leaks and pressure issues.
How do I maintain my grinder over time?
Grinders demand meticulous attention. I personally use a vacuum brush attachment to remove residual coffee grounds from the burrs weekly, which prevents old coffee oils from degrading grind quality. Additionally, a burr settling process after every 5kg of beans ensures consistent particle size. Remember, a clean, well-tuned grinder produces flavor-rich, balanced shots door to door.
The right tools make all the difference
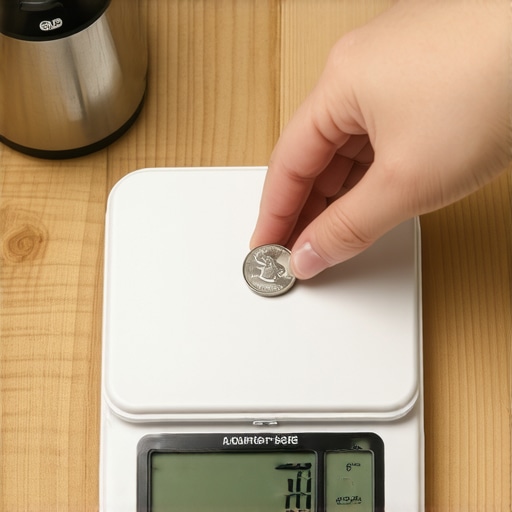
When I first started, I underestimated the impact of calibrated tools. Investing in a digital scale with flow rate tracking, like the ESPRO Calibrate, transformed my dialing process. It offers real-time feedback, allowing you to perfect your extraction within seconds. Pair this with a precision tamper—I favor the Espro Tibber—which helps achieve uniform tamping pressure, crucial for even extraction. These tools, though seemingly small, elevate your consistency significantly.
What’s coming next for long-term gear care?
In the future, smart sensors and IoT integration will likely dominate barista gear maintenance. Imagine coffee machines that alert you when descaling or part replacements are due, or grinders that self-calibrate based on usage data. Staying ahead involves adopting these smart solutions as they become more accessible, ensuring your setup remains optimal with minimal fuss. I predict that embracing automation will enable baristas—home or professional—to focus more on craft, less on troubleshooting.
Practices to sustain your setup’s performance
Integrate routine checks into your weekly schedule. Regularly verify calibration, inspect seals, and clean dispersers—like puck screens—to prevent long-term buildup. Emulate my approach: set a recurring reminder to run a quick test shot after cleaning or adjustments, observing for any inconsistencies. Small, consistent steps today prevent costly repairs tomorrow and preserve your investment in quality coffee-making gear.
To maximize your equipment’s lifespan, try adopting a frozen bean storage method; it keeps beans fresh longer, reducing grind variability and improving shot consistency. Also, exploring advanced calibration routines, like adjusting for variable roast profiles, will future-proof your skills and setup.
Ready to take your home barista game to the next level? Implementing meticulous maintenance routines and investing in precision tools can make all the difference. Start with a simple step today: calibrate your grinder using flow rate measurement—it’s a game-changer for consistent shots. Remember, a well-maintained arsenal ensures that every cup is as good as the first.
What No One Tells You About Espresso Gear Secrets
Over the years, I’ve realized that many home baristas stumble not because they lack passion but due to overlooked nuances—like proper puck screen sizing or grinder calibration—that can make or break your brew. The most valuable lessons I’ve learned involve meticulous attention to detail and understanding that every component, from burrs to steam wands, plays a crucial role in your coffee’s final flavor. Embracing this deeper knowledge transforms your espresso routine from trial-and-error to a finely tuned craft, elevating your daily ritual and delivering barista-quality shots with confidence.
Gear and Techniques That Took My Coffee to the Next Level
From investing in a digital flow meter to mastering the perfect tamping pressure, the right tools and techniques profoundly impacted my results. I found that regularly maintaining my grinder and carefully selecting a puck screen that fits precisely saved me from scratches and uneven extraction. Additionally, understanding the intricacies of steam wand management—like pitcher angle and milk temperature—enabled me to produce microfoam consistently. These small but impactful adjustments are often overlooked but can significantly elevate your home espresso game, ensuring each shot is as flavorful and beautiful as in your favorite café.
Choosing to Dive Deeper: Lessons I Wish I Knew Sooner
- Precision Matters: Always measure your basket’s inner diameter with a digital caliper before selecting a puck screen. Small mismatches can cause scratches and water flow issues that compromise your machine over time.
- Calibration is Ongoing: Regularly re-calibrate your grinder, especially after changing beans or roast profiles, to maintain consistency. Don’t rely solely on factory settings—small adjustments make a big difference.
- Invest in Quality Tools: A well-made tamper and a calibrated scale can help you tamp evenly and dose accurately. These tools are cheap compared to the cost of replacing worn-out parts or fixing damaged baskets.
- Understand Your Machine: Each espresso machine has quirks. Spend time learning its heating and pressure cycles, and perform routine maintenance like descaling and gasket checks to keep it performing optimally.
- Stay Curious and Keep Learning: Read expert guides and watch tutorials—sites like this resource have been invaluable for me. The more I learned, the better my shots became.
Fuel Your Passion and Elevate Every Cup
Mastering the art of home espresso is an ongoing journey filled with discovery and refinement. By paying attention to the smallest details—like puck screen sizing, grinder calibration, and steam technique—you unlock a world of richer flavors and more consistent results. Embrace the process, invest in quality tools, and don’t shy away from experimentation. Your perfect espresso is just a few adjustments away, and the satisfaction of crafting it yourself makes every sip worthwhile. So, are you ready to dive deeper into your brewing journey and uncover hidden techniques that could transform your mornings?
What hurdle have you faced recently in your home espresso setup? Share your experiences below—I’d love to hear your story!