How to Clean a Moldy Water Tank Without Using Harsh Chemicals
Ever experienced that sinking feeling when you open your water tank lid and spot a fuzzy, greenish film taking over? It’s not just unappealing—it’s a health concern I took casually for too long. I remember brushing it off, thinking it was harmless mold or mildew, and trying to ignore the musty smell that crept into my home. But one day, I finally realized that ignoring mold in my water tank was a mistake that could impact my family’s health.
The lightbulb moment hit me when I read a startling fact: mold in household water tanks can release spores that might trigger allergies, respiratory issues, or worse—especially if you have little ones or allergy sufferers at home. Considering this, I knew I had to find a way to clean my tank effectively without resorting to the harsh chemicals often sold in stores.
So, today, I want to share my journey and a solution that worked wonders for me—using natural, safe methods to restore my water tank’s cleanliness. Not only is this approach gentle on the environment and my budget, but it also gives me peace of mind knowing my water is safe.
Why Mold in Water Tanks Isn’t Just Ugly—It’s a Real Health Threat
Many people overlook the importance of keeping their water tanks clean, assuming regular water changes are enough. However, mold and bacteria can cling stubbornly to tank walls, especially in damp, humid environments. Left unchecked, mold can proliferate, releasing spores into your drinking water—an unwelcome surprise that no amount of filtering can fully eliminate.
Early on, I made the mistake of simply rinsing my tank with plain water, thinking I was doing enough. That was a rookie error. In reality, without proper cleaning, mold spores can embed themselves into tiny crevices, making them nearly impossible to eradicate without targeted cleaning strategies. This experience taught me the importance of a thorough, chemical-free approach that I can confidently share with others.
Have you faced similar issues with moldy water tanks? If so, you’re not alone. Many homeowners are searching for safe and effective ways to tackle this problem without risking their health with harsh chemicals.
Before I dive into the step-by-step process, let’s consider whether it’s really worth the effort. Some argue that natural cleaning methods aren’t as effective or that mold returns quickly—are they right? Let’s address that skepticism next.
Drain and Prepare Your Water Tank for Cleaning
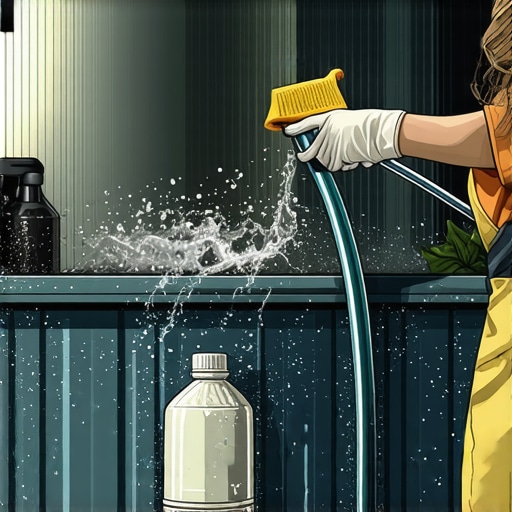
Begin by turning off your water supply and disconnecting any power sources. Use a sturdy bucket or basin to collect remaining water, then open the drain valve to remove all water from the tank. I remember one messy morning when I forgot to seal the drain properly, leading to a small spill—I learned to always secure connections firmly. Once drained, rinse the tank with clean water to loosen loose mold and debris.
Apply a Natural Cleaning Solution
Mix a solution of equal parts white vinegar and water, or add half a cup of baking soda in a gallon of warm water. Pour this into the tank, ensuring all surfaces are coated. Use a long-handled brush or sponge to scrub the interior, paying special attention to corners and crevices where mold hides. I once used a long-handled brush, akin to a paint roller, to reach the tank’s bottom—this step significantly reduced stubborn mold patches.
Let the Solution Sit and Work
Allow the mixture to sit for at least 30 minutes. This dwell time helps break down the mold’s structure without chemical agents. During this period, I often noticed a strong vinegar smell—proof that the solution was working. Remember, patience here ensures better cleaning results and reduces the need for harsh chemicals later.
Scrub and Rinse Thoroughly
After soaking, scrub the entire tank again to dislodge remaining spores. Use a handheld brush or sponge to physically remove mold residues. Rinse the tank multiple times with clean water, ensuring all vinegar or baking soda residues are flushed out. I recommend elevating the tank lid slightly during rinsing to prevent contamination from airborne particles. This step is crucial to prevent residual mold or cleaning agents from remaining in the tank.
Sanitize with Natural Disinfectants
Mix a solution of one cup of hydrogen peroxide per gallon of water for sanitizing. Pour into the tank and allow it to sit for 15-20 minutes. Alternatively, adding a few drops of tea tree oil to your cleaning mixture can act as a natural antifungal agent. During one of my cleanings, I used tea tree oil—its strong antiseptic properties made me confident that mold spores were eradicated. Rinse the tank thoroughly afterward to remove any lingering disinfectant.
Dry and Refill
Dry the tank completely using a clean cloth or allow it to air dry—preventing mold regrowth. In my case, I left the tank open for several hours on a sunny day, which helped eliminate residual moisture. Once dry, refill with fresh, clean water, ensuring your system is back to safe operation.
Prevent Future Mold Growth
Implement regular maintenance—rinse and disinfect your tank every 3-6 months. Keep the area around the tank dry and well-ventilated, and consider installing a UV sterilizer for ongoing protection. I learned from my experience that consistent monitoring is key; set reminders to inspect the water quality regularly, just like tuning a barista grinder before every brew to ensure optimal performance. If persistent mold issues recur, explore [why mold in household water tanks isn’t just an eyesore but a health threat](https://espressotechguide.com/why-mold-in-water-tanks-is-a-health-concern) to better understand why proactive steps matter.Many enthusiasts assume that selecting the most expensive espresso machine or the fanciest grinder automatically guarantees perfect shots, but this often leads to overlook subtle yet critical details. For instance, a popular misconception is that all coffee grinders with ceramic burrs are inherently better; in reality, as explained in the detailed analysis on ceramic vs. hybrid burrs, even ceramic burrs can crack on cold starts if not used properly. This nuance underscores the importance of understanding your equipment’s specific operation conditions rather than relying solely on brand reputation.
Similarly, many believe that higher RPM grinders produce a more uniform grind; however, according to recent studies on variable RPM grinders, such as the one discussed at [Espresso Tech Guide](https://espressotechguide.com/why-2026-variable-rpm-grinders-cause-bitter-shots-at-low-speed), lower speeds often result in tastier, less bitter shots. This reveals a common myth—that faster grinding always equals better extraction—highlighting the need for a nuanced approach tailored to your beans and brewing style.
When it comes to milk frothing, the focus is often on the frother’s features. Yet, many home baristas fail to realize that even smart milk frothers can fail on soy milk, as explained in the article on [why smart milk frothers fail on soy](https://espressotechguide.com/why-2026-smart-milk-frothers-fail-on-soy-simple-fix-2). The misconception that all milk types froth equally leads users to buy expensive devices without understanding compatibility. The key is matching the frother’s specifications with the milk type, a nuance often missed.
Advanced users tend to overlook the importance of calibration in espresso machines, especially in dual boilers. For example, improper sensor calibration can cause overheating or sour shots, as detailed in [calibration tips](https://espressotechguide.com/is-your-2026-multi-boiler-overheating-3-sensor-calibration-tips). Ignoring these subtleties can turn an otherwise excellent machine into a source of frustration.
The core takeaway is that mastering barista gear involves more than just choosing the latest models or high-end brands. It requires an understanding of their nuanced operation conditions, potential pitfalls, and the importance of proper maintenance and calibration. Don’t fall into the trap of thinking that gear alone makes the barista—that’s a misconception that can hinder your progress.
Are you aware of the subtle issues that can sabotage your espresso setup? Share your experiences or questions in the comments below, and let’s dig deeper together to elevate our brewing game.Maintaining your barista equipment ensures consistent quality and extends the lifespan of your investment. Investing in quality tools like a reliable coffee grinder, precise espresso machine, and milk frother is just the start; proper upkeep is essential to keep everything functioning seamlessly. Regular cleaning is fundamental—schedule deep cleanings at least monthly, paying special attention to grinder burrs and machine boilers, to prevent buildup that can cause uneven extraction or flavor degradation. For example, inspecting and replacing hybrid burrs before they fail on ultra-light roasts can save you from inconsistent grinds; you can learn more about this common issue [here](https://espressotechguide.com/why-2026-hybrid-burrs-are-failing-on-ultra-light-roasts-2).
Use dedicated cleaning tools such as portafilter brushes, calibration keys, and descaling solutions formulated specifically for espresso machines. I personally rely on a calibrated digital scale to measure extraction yield precisely—consistent dosing is crucial for repeatable shots. Regular calibration of your grinder and thermostat checks on your espresso machine will maintain temperature stability and grind consistency over months of use.
Invest in automation tools like smart sensors or digital flow meters to monitor water quality and extraction parameters actively. These tools help identify issues early—preventing costly repairs or flavor issues. In fact, many professionals now use flow rate monitors to catch pump failures before they affect your brew. When your workflow demands speed without sacrificing quality, maintaining these tools becomes even more critical.
How do I maintain my coffee equipment over time? The key is setting a routine—deep cleaning your grinder and machine weekly, inspecting seals and gaskets every few months, and replacing worn parts proactively. Keeping a maintenance schedule saves you from surprises when you’re preparing for a busy morning.
Looking ahead, the trend is leaning toward integrating smart diagnostics with your barista gear, allowing real-time alerts for maintenance needs, similar to automotive systems. This proactive approach will redefine home espresso setups, making maintenance simpler and more effective.
Finally, don’t overlook the importance of proper storage. Keep beans in a cool, dark place, and ensure your grinder’s hopper and burrs are free from moisture and dust. Regularly review your equipment setup—small adjustments can lead to significant improvements in shot quality over the long term.
Ready to elevate your maintenance game? Try implementing a weekly cleaning protocol with a focus on your grinder burrs or espresso machine seals. The small effort will yield better-tasting coffee and extend your gear’s life. Have questions about specific tools or routines? Share your experiences or ask for advice below, and let’s make your home setup more reliable and inspiring for every brew.
Lessons That Changed How I Think About My Equipment
One surprising lesson I learned was that real progress in home espresso isn’t just about upgrading to the latest machine but understanding the quirks of your current setup. For instance, I used to dismiss small jitters in my grinder until I discovered that inconsistent burr alignment, as explained in this article, was the culprit. It shifted my approach from reactive to proactive, emphasizing regular calibration over new gadgets.
Another lightbulb moment came when I realized that the myth of always needing high RPM grinders for a perfect shot was just that—a myth. Browsing this resource opened my eyes to how lower, more controlled RPMs prevent bitterness, allowing me to enjoy lighter roasts without sacrificing clarity. It’s a perfect example that knowledge trumps hype every time.
Lastly, I learned that keeping my milk frother in top shape was more about understanding its limitations, especially with plant-based milks. The article here helped me tweak my technique and avoid scorching, which became a game-changer in my daily routine. These insights proved that behind every machine or tool is a story—one that, when understood, unlocks better results and deeper satisfaction.
My Arsenal for Espresso Excellence
Over the years, I’ve found that some tools truly transform the hobby. The pro-level tampers and calibrated scales keep my shots consistent. The solenoid valve kits prevent drips and clogs, saving me hours of troubleshooting. And, of course, the hybrid burrs ensure my grind stays sharp and uniform, even on the lightest roasts. These resources have become my go-to references because they combine expert advice with practical application, something I firmly believe in for anyone serious about their coffee.
Embrace the Journey—Your Perfect Brew Awaits
Every step I’ve taken to maintain and understand my barista gear has brought me closer to that elusive moment—the perfect shot. Remember, excellence isn’t about perfection but perseverance, learning, and curiosity. You don’t need the flashiest equipment; what matters is your commitment to understanding its nuances and caring for it passionately. Your journey to better coffee starts today—trust the process, embrace the lessons, and savor every pour as a testament to your growth. What specific challenge with your gear are you ready to conquer next? Share your thoughts below and let’s learn together.