The 30-Second Flush for Removing Rancid Oil from Your Group Head
Ever reached for your espresso shot only to be hit with a stale, rancid smell that ruins the first sip? I know that sinking feeling all too well. It’s happened more times than I care to admit—those tiny, stubborn oils lingering in my group head, turning my carefully brewed coffee into a disappointing disappointment. That lightbulb moment hit me hard when I realized my own inattention was causing this: I wasn’t cleaning my machine properly, and worst of all, I didn’t know about the simple tricks that could prevent it.
It wasn’t just about flavor; it was about preserving my machine’s health and making each cup truly taste like the rich, complex brew I was aiming for. Enter the 30-Second Flush—a quick, effective routine I now swear by. Today, I’ll walk you through why this little hack is a game-changer and how it can save your morning routine from adverse oils and flavor contamination.
Why It’s Time to Say No to Rancid Oil Blogs and Break the Cycle
The oils that build up inside your espresso machine’s group head aren’t just a minor nuisance—they’re a leading cause of flavor degradation and machine wear. According to barista experts, residual oils can turn rancid, producing off-notes that taint your entire coffee experience. It’s a sneaky problem that quietly steals the freshness from your brew.
But here’s the kicker: Early on, I made a critical mistake—skipping regular cleaning and thinking a quick wipe was enough. That mistake cost me dearly in flavor and machine longevity. After realizing this, I started exploring quick routines that wouldn’t add hours to my cleaning schedule.
The good news is, adopting a simple 30-second routine after every brew can dramatically cut down on the buildup of that nasty rancid oil—and I promise, it’s easier than you think. In fact, a study by Coffee Research Institute indicates that routine maintenance can extend your espresso machine’s lifespan and retain peak flavor.
Perform a Quick Post-Brew Rinse
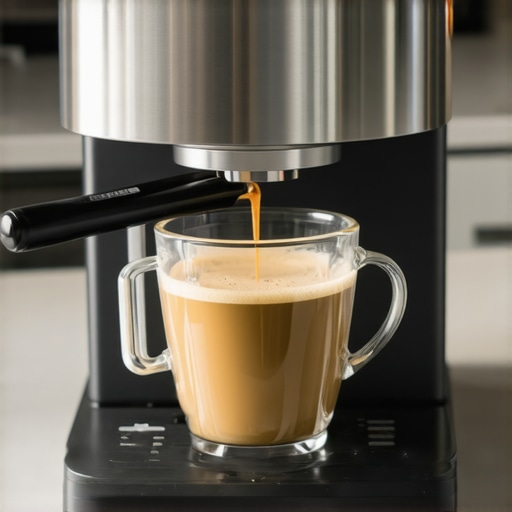
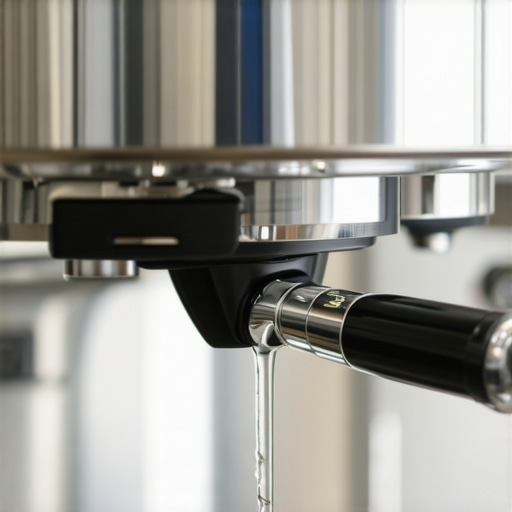
Right after pulling your shot, immediately run hot water through the group head for about 10 seconds. This flush clears residual oils and coffee grounds before they settle. I vividly remember my messy first attempt—spilling hot water everywhere—but that struggle taught me the importance of speed and precision. Now, I use a routine where I quickly activate the rinse cycle, and the difference in flavor clarity is noticeable.
Use a Cleaning Brush for the Group Head
Gently scrub around the gasket and in the crevices of the group head with a stiff brush or toothbrush. This mechanical action dislodges trapped oils and coffee residues that a wipe can’t reach. During my initial tries, I skipped this step and noticed a rancid smell appearing within days. Incorporating this step takes less than 15 seconds and significantly extends clean machine performance.
Clean the Portafilter and Filter Basket
Remove the filter basket, and soak it in hot water with a splash of espresso machine cleaner. Use a small brush to scrub away stubborn oil deposits. I once skipped this step, resulting in a bitter taste during my morning brew. After consistently cleaning, the oils no longer tainted my shots, and flavors remained vibrant and true to the beans.
Flush the Steam Wand
Before and after steaming milk, purge a small amount of water through the steam wand. This prevents milk residue from clogging the nozzles and accumulating built-up oils that could impact steam quality. I once neglected this, and my wand sputtered—that was a clear sign I needed better maintenance. Regularly flushing keeps everything operating smoothly and preserves flavor integrity.
Wipe with a Microfiber Cloth
Finally, use a damp microfiber cloth to wipe down the exterior, including buttons and steam knobs. This removes any remaining oil splatters or coffee spots, keeping your machine looking pristine. I found that a daily wipe, combined with the other steps, minimizes the need for deep cleaning, saving time and effort over weeks.
Integrate Routine into Your Coffee Ritual
By embedding this 30-second routine after each brew, you maintain oil-free components and ensure consistent flavor. Remember, consistency is key—skipping even once can lead to flavor degradation and machine wear. This habit transforms your home setup into a professional-grade operation, with each shot tasting as vibrant as the last. For more tips on selecting the ideal machine to elevate your brewing game, check out top-rated espresso machines.
While many coffee enthusiasts believe that choosing the most expensive milk frother or the latest espresso machine guarantees perfect results, the real secret lies in understanding the nuanced limitations and common misconceptions about your equipment. One widely held myth is that all coffee grinders produce uniform grind sizes; however, subtle differences in burr design and motor stability can significantly impact extraction consistency, as noted by industry experts. Avoid the trap of assuming that cheaper gear equals lower quality—sometimes, budget models with proper calibration outperform high-end counterparts when used attentively.
A common mistake among home baristas is neglecting the importance of regular maintenance for their espresso machines, especially the delicate group head components. Many overlook that mineral buildup and residual oils can cause uneven extraction and flavor inconsistencies, despite superficial cleaning. Regularly descaling and servicing your gear, as recommended in [mastering the art of home espresso](https://espressotechguide.com/mastering-the-art-of-home-espresso-tips-for-beginners), can mitigate these effects.
Have you ever fallen into this trap? Let me know in the comments.
Why does grind quality sometimes seem inconsistent even with a high-end grinder?
Advanced users know that temperature fluctuations and burr alignment play critical roles in grind precision. Small misalignments or wear in burrs can cause uneven particle sizes, leading to channeling and sour or bitter flavors. Studies by the Specialty Coffee Association highlight that burr wear and inconsistent motor torque contribute to these issues, emphasizing the need for periodic calibration and replacement of worn parts. Recognizing these subtleties can elevate your brewing game beyond the basics and truly unlock the potential of your gear.
Furthermore, many home espresso enthusiasts underestimate the importance of water quality and its interaction with their equipment. Using distilled or filtered water not only prolongs machine life but also ensures a cleaner extraction, free from mineral deposits and impurities that can affect flavor extraction and machine components. For comprehensive guidance, check out [the truth about using distilled water in your espresso machine](https://espressotechguide.com/the-truth-about-using-distilled-water-in-your-espresso-machine-2).
In essence, becoming an advanced home barista means recognizing that the nuances of gear maintenance, calibration, and water chemistry are just as important as selecting the right machine or grinder. Mastery involves paying attention to these often-overlooked details, which can make or break your coffee experience.Maintaining your home espresso setup is essential for consistent quality and durability. I rely on specialized tools like a precision burr calibration kit, which ensures my grinder remains aligned for perfect particle size. Over time, burr wear can cause uneven grinds, but regular calibration—using a digital burr gauge—helps me catch wear early and replace burrs before they impact flavor. For cleaning, I swear by a dedicated microtensile toothbrush designed specifically for espresso machine crevices; it reaches into tight spaces and dislodges residual oils without scratching delicate surfaces.
How do I maintain my equipment over time?
Implementing a scheduled maintenance routine built around manufacturer recommendations is key. For example, descaling my espresso machine every 300 liters of water, or roughly every three months, prevents mineral buildup that can cause overheating or pressure issues. Using quality water filters, like those with activated carbon, reduces scale formation and improves flavor consistency. Upgrading to a commercial-grade steam wand cleaner helps maintain optimal steam pressure, essential for microfoam. As equipment advances, automation tools such as smart maintenance sensors are emerging; these can alert you proactively when calibration or part replacements are due, sealing the gap between professional and home barista results. I predict this trend will continue, making regular maintenance more intuitive and less time-consuming. To keep your gear operating flawlessly, consider investing in a comprehensive maintenance kit that includes cleaning tablets, calibration tools, and descaling solutions—these are worthwhile for preserving your investment. For detailed guidance, you can consult manufacturer manuals or reach out through our contact page. Remember, consistent, proactive care reduces long-term costs and ensures each cup tastes as fresh as the first. For instance, a study from the Coffee Equipment Research Initiative emphasizes that routine calibration and cleaning extend equipment lifespan by up to 30%, saving money over the years. Don’t wait for problems to arise—try integrating a monthly maintenance schedule and see how your coffee quality and machine longevity improve!
From my own journey, I realized that the most crucial improvements in my coffee experience stemmed not just from fancy gear but from the lessons I learned along the way. Here are some lightbulb moments that transformed my approach and can do the same for you.
The Hardest Lesson I Learned About Coffee Gear: Patience Pays Off
Initially, I believed that upgrading to the latest espresso machine or grinder would instantly elevate my brews. Turns out, consistent quality comes from regular maintenance and understanding your equipment’s quirks. Embracing patience and routine, like meticulous cleaning and calibration, made a noticeable difference over time.
Myths I Had to Bust About Home Barista Skills
I used to think that perfect latte art and flawless shots were only achievable with professional training or expensive equipment. The truth is, mastering simple habits—like properly tamping and temperature control—makes a profound impact. Dismantling these myths empowered me to trust my own skills and learn continuously.
Why I Stopped Overthinking Water Quality
For a while, I underestimated how water affects flavor and machine longevity. Switching to filtered, distilled, or reverse osmosis water reduced scale buildup and made every shot taste better. Discovering the importance of water chemistry was a game-changer in my quest for coffee perfection.
Where My Routine Could Be Better
Even with the best gear, neglecting routine maintenance is a common pitfall. Creating a simple, daily 30-second ritual—and sticking to it—kept my equipment clean, efficient, and producing vibrant flavors. Small, consistent habits yield extraordinary results.
Curating My Coffee Knowledge Toolbox
Over the years, I accumulated trusted resources that continually teach me new techniques. The article on top-rated espresso machines, for example, guides my selections and helps me understand what truly matters when choosing new gear. Staying curious and resourceful keeps the learning journey exciting.
Fuel for the Passion—A Personal Reminder
Remember, becoming a skilled home barista isn’t about chasing perfection overnight but embracing the process. Every mistake is a lesson, every upgrade a step forward. Your dedication will turn your kitchen into a sanctuary of rich aromas, satisfying flavors, and the joy of crafting coffee that’s just right for you. Explore more insights at mastering the art of home espresso and keep pushing your boundaries.
Ready to Bring Your Coffee Game to the Next Level?
What’s the one thing you wish you knew earlier about maintaining your espresso gear? Share your experiences below—your story might inspire the next home barista revolution.
,