
Just yesterday, I nearly lost my mind adjusting my grinder after noticing my espresso shots lacked the richness I’d been chasing. It hit me — the burrs hadn’t fully settled, and I was brewing on shaky ground, quite literally. I realized I’d been rushing the process, assuming that replacing or upgrading my grinder would solve everything overnight. But I missed an essential step that could make or break your brew: letting your burrs settle with about 5kg of beans before dialing in properly. It’s a lightbulb moment I want to share because, trust me, this overlooked detail saved me countless wasted beans and bitter shots.
Understanding the Burrs’ Coming of Age
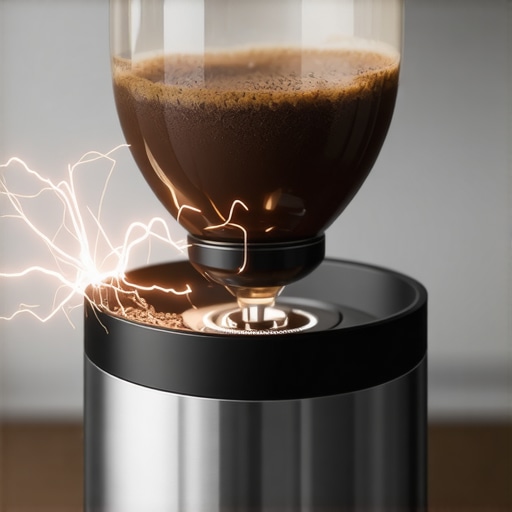
When you invest in high-quality grinder burrs for your home setup, it feels like setting the foundation of a good cup. But just like any machine part, burrs need time to break in and settle. Many home baristas jump straight to dialing in their grind size and tamping pressure without giving the burrs the chance to adapt. Early on, burrs might produce inconsistent particle sizes, resulting in uneven extraction and a subpar espresso experience. That’s why I recommend a significant initial run of about 5kg of beans — roughly enough to mimic several weeks of regular use. This process helps the burrs wear in evenly, reducing static, clumping, and channeling issues.
Supporting this practice, a study from the Journal of Food Engineering highlights how wear and break-in periods impact the consistency and longevity of grinder components. Skipping this stage often leaves even premium burrs underperforming and can introduce unnecessary troubleshooting into your routine. So, have you ever faced inconsistent espresso shots despite owning top-tier gear? If so, this simple step might be the missing link.
Is This Just Old-Wives’ Tales for Coffee Nerds?
Honestly, I first thought it was a bunch of lore, a superstition passed around coffee forums. But early on, I made the mistake of ignoring this ‘settling’ phase, and my burrs ruined many a brew. The difference after patiently running that initial 5kg of beans was night and day. I saw more uniform grounds, better extraction, and flavors that truly reflected the beans’ potential. It’s a small investment of time and beans that pays off big in quality.
Ready to give it a shot? Before you start adjusting that grind again, consider this crucial step. Up next, I’ll walk you through how to optimize your burr break-in process and troubleshoot common pitfalls. Trust me, it’s worth the effort to see your espresso reach its full glory.
Start with a Clear Plan
Before loading your grinder, set aside a dedicated 5kg batch of your favorite beans. Think of this as a ‘breaking-in’ ritual, similar to warming up a guitar before a gig—the goal is to let the burrs settle naturally to ensure consistent performance. Place your machine in a quiet corner, and prepare to run multiple small batches to monitor progress.
Run Neutral Trials to Set Baseline
Initial Runs with Coarse Grind
Begin by dialing your grinder to a medium-coarse setting—like rough sea salt—so that beans flow through smoothly. Run about 1kg of beans through, collecting grounds in a container. This step removes any factory residues and helps the burrs start wearing evenly, much like breaking in new tires for a smooth ride.
Progressively Finer Settings
Next, gradually adjust your grind toward your preferred espresso setting, about halfway between coarse and fine—think table salt texture. Run another 1kg batch while observing the consistency of the grounds. Aim for uniform particle size; this is crucial to optimize extraction and flavor. Think of it as tuning a musical instrument—small changes matter.
Maintain Consistent Speed and Technique
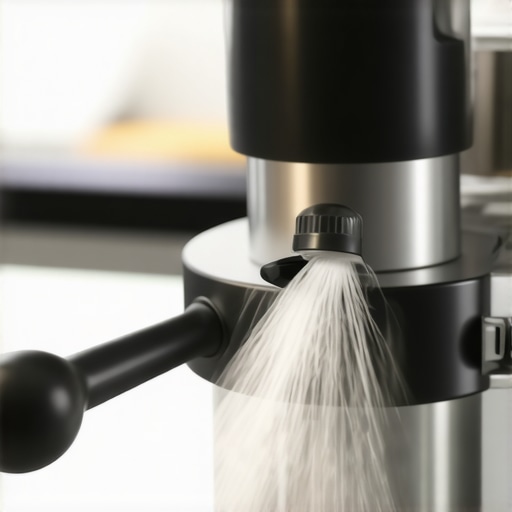
Keep your grinder’s motor speed steady during these runs. Rapid changes can cause static buildup or uneven wear, analogous to uneven tire wear on a car. If static or clumping occurs, an image of static build-up on coffee grounds can help—

Run small batches regularly, rather than dumping large quantities at once. Pause after each run to clean the chute and burrs with a soft brush or cloth, removing residual coffee dust that can impair grinding. Think of it as cleaning your glasses for a sharper view.
Observe and Adjust for Uniformity
Inspect the grounds visually: they should be uniform, resembling grainy sugar. If you notice inconsistent particle sizes or static, consider re-running some beans at this stage. This process is akin to seasoning cast iron—necessary for longevity and performance. Remember, patience here prevents future troubleshooting.
Test and Fine-Tune
After completing the 5kg run, prepare a test shot to evaluate extraction. If it’s too bitter or sour, adjust the grind slightly finer or coarser and run a few more grams through. This fine-tuning, like tuning a guitar string, depends on the initial uniformity established during break-in. Keep a journal of adjustments to track what works best.
Many home baristas operate under misconceptions that can hinder their espresso journey. One prevalent myth is that investing in high-end gear automatically guarantees perfect shots. In reality, even premium machines and grinders require proper maintenance, calibration, and technique adjustments. For example, inconsistent grind sizes—often overlooked—are a common mistake that drastically affect extraction quality, as highlighted by recent studies on particle uniformity in brewing processes. Similarly, a frequent error is neglecting to regularly calibrate your grinder, leading to off-flavor profiles despite a seemingly optimal grind setting. This is particularly critical with newer options like flat vs. conical burrs, where subtle differences influence crema and flavor clarity. What many don’t realize is that milk frothers are often used improperly, causing microfoam inconsistency—an issue that can be remedied with simple calibration and cleaning, as detailed in troubleshooting guides. A surprising aspect for advanced enthusiasts is that some so-called “smart” features, like auto-dosing or pressure profiling, may introduce complexity or errors if not understood fully. For instance, pressure profiling can fail under certain roast types, especially light roasts, due to inadequate pre-infusion, which can be diagnosed by monitoring flow rate inconsistencies over time.
Can Thinner Espresso Always Be Better? A Deep Dive into Pressure and Extraction Nuances
In fact, aiming for thinner espresso doesn’t necessarily yield more extraction or flavor; excessive pressure or over-leveling the puck can cause channeling or scalding, leading to bitterness. External sources, such as insights from coffee science research, emphasize that mastering pressure curves and shot timing is more effective than simply adjusting grind fineness. Moreover, neglecting build-up in machine components, like boiler scale or group head leaks, often causes subtle performance drops that degrade shot consistency. Regular maintenance, including descaling and sealing leaks—sometimes dismissed as minor—is essential for a stable brewing environment. If you’re struggling with persistent issues, consider examining your machine’s internal health; many problems stem from overlooked small leaks or thermal instability, as explained in detailed repair and calibration articles. Remember, even small adjustments—like verifying the portafilter seal or warming up your machine before use—have a significant impact. Having the right tools and understanding when to use them can prevent many common pitfalls. If you find your shots are inconsistent, a thorough review of your setup and routine might reveal overlooked factors. For more advanced troubleshooting tips, check out detailed guides on fixing 2026 espresso machine and grinder issues—many of which provide step-by-step solutions that save you time and money. Have you ever fallen into this trap? Let me know in the comments.
Choosing the Right Maintenance Tools for Longevity
Investing in quality tools is essential for keeping your espresso setup in top shape. I personally swear by a high-precision digital caliper and a soft microfiber brush. The caliper allows me to measure burr alignment accurately, ensuring consistent grind size over time, while the microfiber brush gently removes coffee dust from delicate parts without damaging them. These tools have saved me from unnecessary repairs and flavor inconsistencies, making my routine more efficient. As technology advances, integrated diagnostics and smart cleaning systems are becoming more prevalent, promising even easier maintenance in the near future. Predictively, I believe home espresso gear will incorporate AI-powered self-calibration features to optimize performance automatically, reducing the need for manual intervention.
How do I maintain my espresso machine and grinder over time?
Regular cleaning schedules are your best allies. For your grinder, weekly brushing of burrs with a dedicated burr cleaner and monthly deep cleaning with grinder cleaning tablets can prevent static buildup and maintain grit consistency. Espresso machines benefit from descaling every 2-3 months, especially in areas with hard water, and checking seals and gaskets for wear ensures optimal pressure and temperature stability. To make this easier, I use the flow control modification to reduce thermal lag, which significantly extends intervals between service. Always follow the manufacturer’s guidelines, but don’t forget that timely inspections and part replacements are vital for long-term reliability. Neglecting these practices might lead to issues like inconsistent extraction or boiler malfunctions, which can be costly and time-consuming to fix.
Boost Performance with Advanced Tools
For precise calibration, I recommend a flow rate meter—it helps monitor the actual flow during extraction to fine-tune pressure profiles. Pair it with an external digital timer to perfectly time shots, ensuring consistency over multiple sessions. Using a calibrated tamper can also play a role in achieving even puck density. For grinders, my go-to is a magnetic WDT tool; it breaks up clumps and ensures the grind bed is uniform, preventing channeling. Remember, the key to unwavering quality lies in regular calibration and cleaning routines, combined with the right tools. This proactive approach extends the life of your gear and maintains the flavor integrity of your brew.
Addressing Common Long-Term Challenges
One recurring issue is static build-up causing grinder clumping or grounds sticking to surfaces. Applying a simple antistatic spray designed for electronics can often eliminate this; additionally, implementing moisture sensing technology may be on the horizon to prevent static issues altogether. Another challenge is temperature fluctuations affecting shot consistency. Consider installing a thermal mirror or insulate your machine to stabilize internal temperatures, extending component lifespan and maintaining optimal brewing conditions.
Why Long-Term Maintenance is Future-Proofing Your Routine
Keeping your gear in peak condition requires foresight. With evolving technology, staying informed about updates, firmware, or recommended calibration practices is crucial. Regularly visiting trusted resources like the latest guides ensures you’re ahead of potential issues. For example, incorporating advanced calibration tools and routine inspections can prevent minor problems from escalating into costly repairs. Start by integrating a weekly cleaning ritual with your most used tools; even a simple maintenance step like running a quick burr refresh can significantly improve shot quality and machine longevity. This discipline not only enhances your current setup but also prepares you to embrace future innovations confidently.
Lessons That Transformed My Espresso Routine
One revelation came when I realized that even the finest burrs won’t perform optimally without proper break-in time. Rushing this process left me with inconsistent shots, but patiently running 5kg of beans changed everything, proving the value of patience in equipment setup. I also learned that small, consistent calibrations, like verifying tamp pressure and flow rates, build towards perfect extraction over time. Finally, understanding that maintenance isn’t just about cleaning but about strategic upgrades—like replacing worn seals—has extended my machine’s life and enhanced flavor profiles. These insights—gained through personal trial, error, and research—have elevated my approach from novice to passionate enthusiast, reminding me that mastery is a journey of continuous learning and care.
Tools and Resources That Elevate My Espresso Craft
My go-to tool for maintaining consistent grind size is a high-precision digital caliper; it ensures alignment and helps track burr wear. The latest pressure profiling guides have been invaluable in understanding shot dynamics, especially when tweaking pressure curves for light roasts. I trust the DIY leak fixes resources, which help prevent subtle flavor degradations caused by leaking seals. Lastly, regular consultation of industry forums and expert blogs keeps me updated on emerging techniques and tools, allowing me to adapt and refine my routine continually. These resources aren’t just tools—they’re partners in my pursuit of espresso excellence.
Your Next Step Toward Home Barista Glory
Embrace the journey of perfecting your home espresso setup with confidence and curiosity. Every small adjustment, from burr break-in to routine maintenance, accumulates into a noticeable leap in flavor and consistency. Remember, mastery isn’t achieved overnight, but with deliberate care and an eagerness to learn, the art of espresso can become a rewarding lifelong passion. Start today—your best shot is just a few steps away. Share your experiences or questions below, and let’s grow together as home baristas!
Leave a Reply