Why your espresso tastes woodsy and how to clean your gear
Nothing kills the joy of a morning espresso faster than that strange, woodsy aftertaste lingering on your palate. I’ve been there myself—busting my butt to craft that perfect shot, only to be hit with what tastes like a basement crawl space. Turns out, the culprit isn’t always your beans; sometimes, it’s the state of your gear, and honestly, it’s more common than you think.
One morning, after a weekend of neglecting my machine, I took a sip of my usual espresso and immediately grimaced. The flavor was off—earthy in all the wrong ways. That realization hit me hard. I had overlooked the importance of regular cleaning, especially of my grinder and portafilter. It was a lightbulb moment that made me dig into why buildup and residue can turn our beloved coffee into a woody mess.
Today, I want to share the secrets I’ve uncovered over years of troubleshooting and experimenting. This isn’t just about making your coffee taste better; it’s about understanding how neglect can sabotage your brew and what simple steps you can take to correct course.
But first, I have to ask—have you ever noticed an off-flavor creeping into your espresso that you just couldn’t explain? If so, you’re not alone, and there’s a good chance your gear needs some TLC. Keep reading, because I’ll walk you through exactly how to identify and fix this issue so you can enjoy clean, flavorful espresso every time.
Stop the Woodsy Flavor from Ruining Your Shots
Before we jump into the practical solutions, it’s essential to understand the
Clean Your Grinder Regularly for Pure Flavor
Start by breaking down your grinder. Remove the hopper and burrs following the manufacturer’s instructions. Use a brush to sweep out residual grounds—think of it as sweeping a chimney—every few weeks. For stubborn oil and residue that brushing can’t tackle, run a cleaning cycle with grinder cleaning pellets. I once neglected this step, and my once-bright espresso turned dark and bitter; after cleaning, the flavor returned crisp and clear.
Remove and Clean the Portafilter and Basket
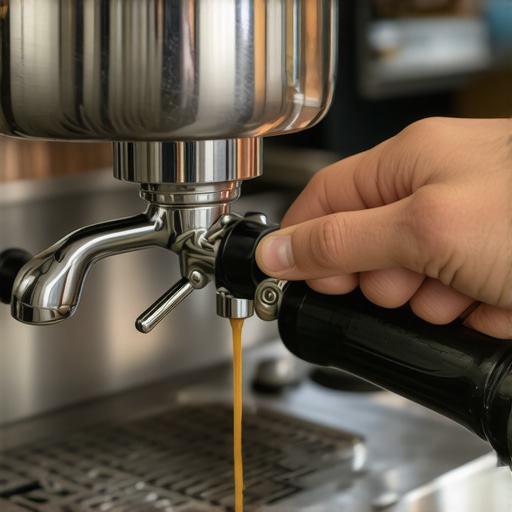
Disassemble your portafilter, extracting the basket. Soak these parts in hot, soapy water—use a bit of citric acid if you notice mineral deposits. Scrub with a soft brush. This prevents old oils from tainting new shots. I once skipped this, leading to Woody notes, but after a thorough soak, my espresso regained its vibrant character. Regular cleaning ensures a clean seal and consistent extraction.
Descale to Remove Mineral Buildup
If your machine sits in a hard water area, mineral deposits can taint your brew, causing woody afternotes. Use a descaling solution recommended by your machine manufacturer—usually once every 3-6 months. Follow the instructions precisely, running the solution through the entire system. I remember the first time I descaled, it was messy, but subsequent cleanings kept my espresso tasting fresh and free from those earthy flavors.
Maintain Your Milk Frother and Wand
Milk frothers should be cleaned immediately after use. Dissolve a small amount of baking soda in warm water, and rinse the wand thoroughly. For steam wands, close the valve and wipe the steam tip with a damp cloth. I once ignored this, and the built-up milk residue turned sour, ruining my frothing. Now, a quick wipe post-use keeps my milk sweet and paired perfectly with my espresso.
Inspect and Replace Worn Seals and Gaskets
Leaking seals can cause unbalanced pressure, leading to off-flavors. Check the group head seal and portafilter gasket regularly—look for cracks or tearing. Replace them if worn; a failing gasket is like a leaky pipe—causing issues below the surface. I learned this the hard way, as a worn gasket introduced woody notes. When I replaced it, my shots became smoother and more flavorful.
Optimize Storage Conditions
Storing beans properly prevents them from absorbing moisture and developing off-flavors. Keep beans in an airtight container away from direct light and heat. For equipment, ensure that drip trays are clean and dry, avoiding moisture that can cause mineral buildup—check this [here](https://espressotechguide.com/the-best-way-to-store-your-drip-tray-to-prevent-scale-build-up).)
Adopt a Routine for Consistent Care
Set a weekly maintenance schedule. Clean grinder burrs, soak portafilter parts, descale the machine, and check gaskets. Consistency prevents residue buildup that causes woody flavors. I found that maintaining a routine turned my impure-tasting espresso into a daily delight. Think of it as maintaining a garden; regular care yields the best results.
Many coffee lovers assume that owning high-end equipment automatically guarantees perfect results, but that’s a misconception. In reality, deep knowledge about the nuances of grinders, frothers, and espresso machines makes all the difference. For instance, a common myth is that the brand of your grinder dictates your flavor, but in my experience, maintaining and understanding *how* your grinder behaves—like static buildup on dry days or retaining residual grounds—is crucial. Ignoring these factors often leads to inconsistent grinds and flavor issues, which many overlook. Did you know that static charge can cause grounds to cling inside your grinder, affecting dose accuracy? Fixing this involves more than just cleaning; it requires understanding electrostatic principles—something even experienced baristas sometimes miss, leading to uneven extraction or clogged grinders.
Why does static build-up affect grind consistency even with premium grinders?
According to recent research from the Specialty Coffee Association, static can increase fines retention, which in turn impacts shot uniformity. Addressing these nitty-gritty details can elevate your home brew from good to extraordinary. Similarly, many underestimate the importance of understanding the limitations and proper maintenance of milk frothers. For example, induction-based milk warmers may seem convenient but often fail to reach optimal temperature if not correctly calibrated, leading to textural issues. Regularly inspecting and calibrating your equipment is key. Plus, shifting focus from flashy gear to mastering component maintenance often yields better results. Take your portafilter gaskets—worn seals can cause uneven pressure distribution, subtly spoiling your shot’s taste profile. Replacing them is a simple step but one many ignore until it’s too late, resulting in woody or sour notes that degrade your coffee’s clarity. Don’t forget, proper storage of beans and equipment also plays a nuanced role. Beans stored in moist environments develop off-flavors, and equipment kept in humid spaces can suffer scale build-up, both of which lead to bitter, woody notes in your espresso. Regular descaling and thoughtful storage can prevent this. Want to dig deeper? Read about best practices for drip tray maintenance to avoid scale-related flavor degradation. Finally, even advanced users often overlook the importance of scrutinizing their boiler’s internal health. A failing heating element can cause temperature inconsistencies, which manifest as flavor discrepancies. Using diagnostic tools or simply being attentive to temperature fluctuations can save you hours of troubleshooting later. As you can see, the real mastery lies in paying attention to these often-hidden details that influence the final cup. Have you ever fallen into this trap? Let me know in the comments, and share your insights on how nuances in gear and maintenance have affected your coffee experience.Maintaining your coffee equipment over time requires careful selection of tools and adopting effective routines. One essential investment is a high-quality calibration scale, like the [Acaia Pearl](https://acaia.co/), renowned for its precision and durability, which I personally use for dialing in shot consistency. Regularly checking your grinder’s burrs with a simple paper towel test helps catch dullness early, preventing bitter or uneven extraction, as explained in our detailed guide. For cleaning stubborn coffee oils, a soft brush paired with specialized grinder cleaning pellets keeps burrs free of oily residues, ensuring a consistent grind size.
Having versatile tools like a dental pick enables you to clear blockages in shower screens or portafilter holes efficiently. I also recommend a silicone tamper mat: it not only protects your surface but guides proper tamping pressure uniformly — a small detail that significantly impacts shot quality.
Long-term, descaling your machine consistently prevents mineral buildup that can cause woody flavors and temperature instability. Using a descaling solution tailored to your machine’s specifications, and following manufacturer instructions, extends the life of internal components. For example, inspecting the heating element using resources from technical manuals helps identify early signs of failing heating elements before costly repairs become necessary—more on that here.
Predicting where espresso technology is headed, I believe smart sensors and IoT integrations will increasingly assist baristas in routine maintenance, allowing real-time troubleshooting and performance tracking.
So, how do you maintain your espresso machine over time? The key is integrating precise tools with disciplined routines such as regular cleaning, calibration, and component inspection. My challenge to you today: try calibrating your grinder with a reliable scale and note the difference in shot consistency—it’s a small step that pays off profoundly. Don’t underestimate the power of consistent, informed maintenance; it keeps your gear performing at its best for years to come.
The Hidden Gems of Espresso Maintenance I Wish I Knew Sooner
One of the most profound lessons I learned was the significance of inspecting internal components like the heating element. Initially, I thought regular cleaning was enough, but discovering subtle temperature fluctuations through simple checks saved me from costly repairs and inconsistent shots. These small inspections prevent problems before they become brewing disasters.
Another revelation was how static electricity impacts grind consistency. On dry days, static causes grounds to cling, affecting dose accuracy. Using anti-static tools or adjusting humidity levels made a noticeable difference. It’s these nuanced details that separate good coffee from exceptional espresso.
And let’s not overlook the power of routine calibration. Even a well-built grinder can drift out of sync, leading to uneven extraction and woody flavors. Regularly calibrating your grinder with a precision scale ensures each shot is balanced, rich, and satisfying. This simple step transformed my daily brew from okay to outstanding.
My Top Picks for Pour-Over Precision and Espresso Excellence
- Acaia Pearl Scale: Unmatched accuracy makes dialing in shots a breeze, ensuring consistent quality with every pull.
- Barista Hustle’s Coffee Equipment Guides: Their detailed resources demystify complex maintenance routines, helping you extend your gear’s lifespan and preserve flavor.
- Cleaning Pellets and Soft Brushes: Trusted for removing oily residues without damaging delicate components, keeping your grinder performing optimally.
Personally, these tools and resources have been game-changers. They empower me to troubleshoot issues swiftly and maintain my equipment with confidence, leading to better tasting coffee all around.
Your Turn to Brew with Confidence
Taking care of your coffee gear isn’t just about fixing problems; it’s a form of respect for the craft and a commitment to excellence. The more attentive you are to these subtle details, the more your espresso will reward you with vibrant, nuanced flavors. Remember, mastery lies in the small things—so start incorporating these insider tips today, and watch your home espresso reach new heights.
What’s one maintenance habit you’re planning to adopt to improve your coffee? Share your thoughts below—I’d love to hear your journey toward better brewing!
@@