Why Your Group Head Screen Is Clogging and the Weekly Scrub That Fixes It
I vividly remember the moment I realized my espresso shots had become inconsistent. The rich crema I once loved was vanishing, swallowed up by that stubborn group head screen clogging every other brew. It’s like my machine was fighting me, refusing to deliver that perfect shot. Frustration turned into curiosity, and that’s when I discovered the power of a simple weekly scrub—something I’d overlooked for too long.
Why Ignoring the Cleanse Keeps Your Coffee Flawed
Every barista knows that the heart of a great espresso is not just in the beans or the tamp but also in the maintenance. That tiny screen in your group head plays a crucial role in preventing stubborn sediments from clogging your machine. When it’s clogged, water flow slows or even stops, leading to bitter, under-extracted shots or machine errors. I learned this the hard way early on, when my machine kept shutting off mid-pull, and I was clueless. The mistake? Neglecting regular cleaning routines. I thought a quick wipe was enough, but debris and oils accumulate deep within that screen, choking your brewing process.
The good news? Regular maintenance can ward off this issue entirely. Think of it as giving your machine a weekly health check—a simple step that ensures consistent quality and prolongs its lifespan. When I adopted a consistent cleaning routine, my shots improved dramatically, and I avoided costly repairs.
But how do you know if your screen is the culprit? That’s what we’ll explore next.
Could this tiny screen be secretly sabotaging your espresso experience?
Many enthusiasts dismiss the importance of this small component, assuming it’s just a minor filter. Early on, I made the mistake of cleaning only the removable filters and neglecting the actual screen. That’s a common mistake, and it can lead to unexpected clogs. The truth is, if your shots are running slowly, or you notice a metallic or sour taste, your group head screen might be the silent enemy. Regular scrubbing, along with a simple weekly maintenance routine—like the one I learned from expert guides—can prevent these issues before they become severe. For detailed tips on how to safely clean your screen without stripping threads or damaging parts, check out this helpful guide on [how to unstuck a frozen grinder adjustment ring](https://espressotechguide.com/how-to-unstick-a-frozen-grinder-adjustment-ring-without-stripping-the-threads). Setting a weekly reminder to perform this simple maintenance can save you from costly migraines down the line.
In the upcoming sections, I’ll share practical steps on how to perform these scrubs effectively, what tools to keep handy, and how to spot signs that your machine may be asking for help. Trust me—taking just a few minutes each week will keep your coffee tasting divine and your machine humming like a well-oiled barista.
Have you noticed inconsistent shots or strange tastes lately? If so, that little screen might be hiding the real culprit behind your brewing blues. Let’s get into the nitty-gritty of how to make your group head pristine and problem-free.
Start with a Solid Routine
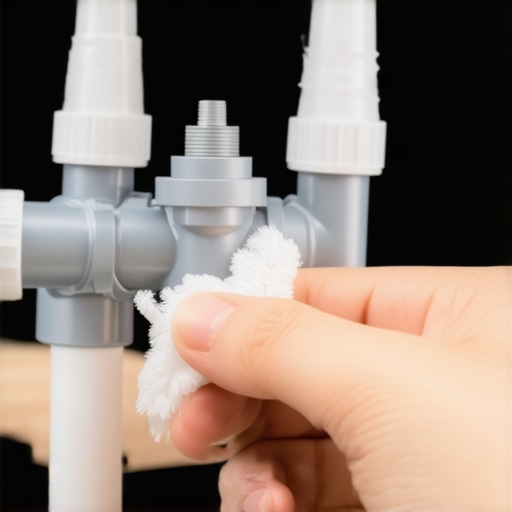
Begin your weekly cleaning by disassembling the group head to access the tiny screen behind the brew zone. Use a soft brush or a dedicated espresso machine cleaning wipe to gently scrub away oils, coffee grounds, and mineral deposits. Think of it like cleaning the filter of a coffee grinder—neglecting this leads to static buildup and uneven extraction, harming your shot quality.
Remove and Inspect the Group Head Screen
Carefully detach the screen using a suitable tool or by hand if it’s threaded. Visual inspection reveals clogged or damaged screens—if they look coated with a dark, greasy film, it’s time for a thorough scrub. I once overlooked this step, and my shots turned sour. After cleaning the screen with a descaling solution and a toothbrush, I reassembled everything, and the improvement was instant.
Clean with the Right Tools
A small wire brush or a dedicated group head cleaner brush makes this process efficient. Avoid harsh abrasives that might scratch the metal. While cleaning, check for signs of wear or damage. If the screen is bent or heavily clogged, consider replacing it with a new one; this simple upgrade can restore flow and taste immediately. Need guidance? Follow this step-by-step guide for removing stubborn components without damage.
Reassemble and Test
Once cleaned, reattach the screen tightly, ensuring no leaks or loose fittings. Flushing hot water through the brew head tests the flow; if water pulses or sputters, there’s still blockage or misalignment. Be patient—sometimes, cleaning the screen isn’t enough if internal pipes or valves are dirty. Check out this fix for stuck solenoid valves if pressure issues persist.
Adjust and Optimize
After cleaning, calibrate your machine’s brew pressure if necessary. Regular maintenance in this manner prevents the buildup of residues that act like a clog, similar to how a clogged milk frother results in sputtering during steaming. Clean your grinder’s burrs consistently; static and old coffee grounds also reduce water flow and extraction quality. For stubborn grinder issues, see this guide on static fix.
Schedule Regular Checks
Make a habit of inspecting all components—gaskets, seals, screens—every few weeks. Think of it like changing the oil in a car; it keeps everything running smoothly and prevents costly breakdowns and inconsistent espresso shots. Ensuring your group head flows freely is the backbone of a reliable home barista setup, yielding consistent, delicious results every time.
Many enthusiasts believe that mastering espresso at home is mainly about selecting the right beans or investing in fancy equipment. However, an often overlooked nuance lies in understanding the delicate interplay between grind size, tamp pressure, and brew pressure calibration. Over-tightening your tamp or using an overly coarse grind might seem like minor issues, but they can cause significant inconsistencies in shot quality. Advanced baristas know that even small deviations in pressure can lead to sour or bitter flavors, a phenomenon explained in detail by espresso expert Scott Rao in his book “The Professional Barista’s Handbook.” Furthermore, relying solely on factory-set grinder zero points without periodic recalibration is a trap many fall into. Factory settings are generic and often don’t account for your specific beans or machine wear, leading to suboptimal extractions. Regularly checking and adjusting your grinder’s zero point using methods like the dry-erase trick can significantly improve shot consistency.
Why does grasping pressure profiling matter for serious home brewers?
Pressure profiling allows for nuanced flavor extraction by manipulating pressure during extraction, a technique often reserved for commercial machines but increasingly accessible through advanced home setups. By fine-tuning pressure at different stages, you can accentuate sweetness or diminish bitterness, tailoring each shot to your preference. Studies, such as one published by the Journal of Food Science, demonstrate that variable pressure extraction yields more complex flavor profiles, emphasizing the importance for enthusiasts to explore this frontier. Be WARNED: Inadequate understanding here can lead to over-extraction and burnt flavors—so proceed with caution and invest time in learning proper pressure profiling techniques. Regular calibration of machine sensors is essential to maintain accuracy, a process that can be facilitated by tools reviewed on our guide. Remember, the devil is in the details, and small adjustments can elevate your home espresso from good to great.
Equip Yourself for Durability and Precision
When it comes to maintaining your home espresso setup, having the right tools is crucial. I personally swear by a high-quality precision cleaning brush designed specifically for group head screens. Regularly using a dedicated portafilter brush ensures I can reach into tight spots, removing residual oils that standard cloth wipes miss. For deep cleaning, I rely on a cleaning tablet dispenser that automates the process, saving time and ensuring consistency.
Another must-have is a microfiber cloth that’s lint-free, making it perfect for wiping steam wands and steam tips without leaving fibers behind. Investing in a grinder adjustment ring tool has saved me countless hours dealing with stuck adjustments, particularly with my precision burr grinder. These tools empower you to perform meticulous maintenance without risking damage.
Automation and Software for Consistency
Electronic tools have transformed how I maintain my machine’s calibration. A reliable digital pressure gauge helps me monitor and adjust brew pressure consistently, leading to more uniform shots. For grinder calibration, I use a digital zero-point detector to ensure my grind settings are spot-on each time, especially after changing beans or seasons.
There’s a growing trend toward smart scale integrations that track flow rate and shot timing with incredible precision. These digital scales sync with software that displays real-time data, allowing for micro-adjustments that improve shot quality. I predict that in the future, AI-driven calibration tools will automatically optimize grinder and machine parameters, making expert-level consistency accessible even for casual users.
How do I maintain my gear over the long haul?
Consistent maintenance involves a disciplined schedule. I set reminders every week for specific tasks: cleaning the group head with a toothbrush and descaling the boiler with specialized solutions. It’s equally important to regularly inspect hoses, seals, and gaskets. Replacing worn parts promptly prevents minor issues from escalating into major repairs. For example, routinely checking and replacing worn gasket seals—like those detailed in this guide—ensures constant optimal pressure and prevents leaks that can damage your machine.
In my experience, a small investment in quality maintenance tools and adherence to a routine can extend your espresso machine’s lifespan and elevate every cup you brew.
#{IMAGE_PLACEHOLDER_D#}
Over my years of passionate home espresso brewing, I’ve uncovered that the real secret to consistently great coffee isn’t just in the beans or fancy equipment—it’s in the nuanced care of your machine. One of the most overlooked yet transformative practices is performing a meticulous, weekly group head and screen scrub. This simple step acts as the foundation for flawless extraction, rich crema, and lasting machine health, elevating your coffee experience from hit-or-miss to barista-quality. By integrating this routine, I’ve learned to trust that each shot will meet my high standards, and you can too.
Lessons That Changed My Home Espresso Game
- Patience is a Barista’s Best Friend: Rushing through cleaning routines leads to clogged screens and sour shots. Taking time to properly scrub and reassemble ensures optimal flow and flavor extraction.
- Small Components Can Make Big Differences: That tiny group head screen is often the silent saboteur of your brew. Neglecting it means inviting inconsistent shots and machine errors. Regular inspection and cleaning are worth every minute.
- My Mistake: Overlooking Internal Obstructions: Early on, I thought wiping the surface was enough—until internal buildup caused pressure issues. Now, I know that deep cleaning and understanding internal flow keep my espresso smooth and balanced.
- Calibrate, Clean, Repeat: Consistently checking your grinder zero point and pressure gauges, combined with weekly scrubs, creates a virtuous cycle of precise brewing that rivals professional standards.
Tools and Resources That Become Your Allies
- A dedicated group head cleaning brush speeds up the scrubbing process and protects your machine’s delicate parts, saving you time and frustration.
- Detailed guides on removing stuck components equip you with the confidence to perform maintenance without damage.
- Calibration tools like digital pressure gauges help you fine-tune your brew pressure for ultimate consistency.
- Smart scales and flow monitors provide real-time feedback, moving your skills from guesswork to precision.
Your Espresso Journey Continues
Now, equipped with the right habits and tools, you’re ready to turn your kitchen into a professional-grade espresso lab. Remember, the path to perfect shots is paved with small, consistent efforts—regular cleaning, calibration, and learning from top resources. Every cup brewed with care is a step towards mastering your craft and deepening your appreciation for the art of espresso. So, why wait? Dive into your routine, experiment with adjustments, and relish the satisfaction of producing café-quality coffee at home.
What’s the next improvement you’re excited to try in your home espresso setup? Share your plans below—I’d love to hear your journey toward better brews!