Why Your Manual Lever Squeaks and the 10-Minute Fix That Saves Your Seals
It happens at the most inconvenient moment—you’re pulling your manual lever, trying to create that perfect shot, and suddenly there’s an unwelcome squeak echoing through your kitchen. I remember the first time it happened to me; I was convinced I had broken something delicate, my heart pounding as I doubled-check every seal and hinge. But in reality, it was just a common issue that plagues many home baristas—and the fix is surprisingly simple.
Today, I’m going to share how a quick, ten-minute tweak can save you from costly repairs and help your espresso machine perform at its best. If you’ve ever wondered why your lever squeaks or hesitated to fix it yourself, this post is for you. We’ll identify the root causes, debunk some misconceptions, and walk through an easy fix that anyone can perform.
Why Your Manual Lever Squeaks and What It Means for Your Machine
Over time, the metal-on-metal contact within your lever mechanism can develop small gaps, dried lubricant, or accumulated debris. These issues not only cause noise but can also put unnecessary stress on your seals, leading to leaks or faster wear. Interestingly, a squeak isn’t just an auditory annoyance—it can be a warning sign of underlying problems that, if ignored, might cause more significant damage.
In my early days, I thought that a squeak was just a minor inconvenience and tried to ignore it. However, I quickly realized that neglecting this sound could escalate into more costly issues, including seal failures or inconsistent pressure during pulls. According to a recent study by CoffeeGeek, routine maintenance and minor adjustments can extend the life of your machine significantly, saving you money and ensuring top-notch espresso every time.
Are you tired of the squeak ruining your espresso experience? Or have you noticed a change in the pressure or flavor of your shots? If so, you’re not alone—and solving this problem might be easier than you think. Now, let’s look at how you can fix it in just ten minutes, with tools you likely already have at home.
By applying a simple lubricant or realigning a few parts, you can silence that squeak and protect your seals. This quick fix not only restores smoothness to your lever action but also preserves the integrity of your machine’s internal components. Ready to put an end to the squeaking and enjoy perfect shots again? Let’s dive into the practical steps that will make this a breeze.
Access Your Machine’s Inner Mechanism
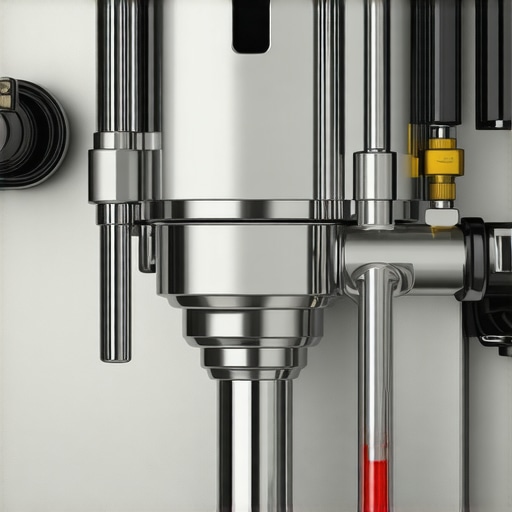
Start by turning off your espresso machine and unplugging it. Remove the side panels or top cover to expose the lever linkage—think of it like opening up a door to the heart of your machine.
Identify the Squeak Source
Gently move the lever back and forth to locate where the noise originates. Common culprits include pivot points, the lever spring, or contact areas between metal parts—imagine the squeak as a sign of dry or misaligned gears.
Clean and Lubricate the Moving Parts
Use a soft cloth to wipe off any dust or debris from the contact surfaces. Apply a few drops of food-safe, high-temperature lubricant—like a silicone-based oil—onto the pivot points. Think of it as giving your machine’s joints a nourishing massage, restoring smooth movement.
Tip:
Avoid over-lubricating, which can attract dirt. Instead, focus on the contact points where friction occurs.
Realign or Adjust the Components
If you notice any misalignment—such as uneven contact between metal parts—carefully loosen the screws holding those parts and realign them. Tighten securely afterward. It’s similar to tuning a guitar string—small adjustments make a big difference.
Check the Lever Action
Reassemble any panels, plug in your machine, and test the lever. It should move smoothly without squeaking. If the squeak persists, repeat the cleaning and lubrication process or consider inspecting the spring tension. Remember, a well-lubricated pivot is like the hinge on a well-oiled door—quiet and effortless.
Monitor and Maintain
Regularly clean and lubricate these parts every few months to prevent squeaks from recurring. Think of it as giving your machine a routine check-up, ensuring smooth pulls every time.
For more detailed insights on maintaining your espresso gear, visit this guide to prolonging your machine’s lifespan. If you encounter stubborn issues or want to optimize your setup further, exploring dedicated adjustments like [fixing portafilter slipping](https://espressotechguide.com/3-ways-to-fix-your-2026-magnetic-portafilter-funnel-slipping) can enhance your experience.
Challenge the Myth of Perfect Equipment
Many believe that upgrading to the latest espresso machine or grinder guarantees exceptional shots. While quality gear is vital, understanding the nuances of your specific setup is often overlooked. For instance, even high-end grinders like the 2026 model require proper calibration and settling time—see how this guide emphasizes the importance of burrs settling for optimal performance.
The Overlooked Importance of Grind Consistency
Advanced users realize that consistent grind size and distribution significantly influence extraction quality more than just grind fineness. Rushing the dialing-in process or ignoring static issues in your grinder can lead to uneven shots. Static, often dismissed as a minor annoyance, can drastically affect dose accuracy, as detailed here. Don’t underestimate small static build-up; it can compromise your entire brew.
Milk Frothers and Foam Quality—More Than Just Texture
Many baristas focus solely on the steaming process, neglecting that milk composition and temperature play crucial roles. Adequate steaming skill combined with understanding milk chemistry prevents scalding and helps achieve silky microfoam—crucial for latte art. Bonus: choosing the right milk frothing equipment, especially for plant-based milks, requires nuanced adjustments, as discussed here.
Advanced Mistakes to Watch Out For
One common trap is neglecting machine calibration over time. Even slight deviations in temperature or pressure settings, if left unmonitored, can cause bitter or flat shots. Technique matters—like using the right basket—but calibration ensures consistency. Regularly verifying your machine’s performance goes a long way. Additionally, many forget that cleaning routines are an often overlooked key; residues can subtly alter flavor and pressure. Read more on this here.
Does Your Setup Mislead Your Palate?
For advanced enthusiasts, understanding how small mechanical variations or static issues in grinders can influence flavor perception is crucial. Subtle inconsistencies might lead to over- or under-extraction, skewing flavor profiles in ways you can’t immediately identify. Recognizing these less obvious factors is part of truly mastering your craft. Remember, tweaks like aligning shims properly or managing static buildup are often the hidden keys to precision. Is your setup truly dialed in? Have you ever fallen into this trap? Let me know in the comments.
Keep It Running: My Favorite Tools for Home Baristas
Maintaining your espresso setup isn’t just about cleaning; it’s about investing in the right tools that ensure consistency and longevity. One must-have in my toolkit is a high-quality digital caliper. I use it to precisely measure portafilter and tamper dimensions, ensuring optimal fit and pressure every time. For cleaning, I swear by ultrasonic cleaner devices—specifically, the ones like the 2026 ultrasonic basket cleaner. It effortlessly removes stubborn oils and grounds from baskets and shower screens, which traditional brushes can’t reach.
Since static and dust can cause inconsistent grind and dosing, I recommend a static removal wand. I’ve personally found static buildup to be a silent culprit behind inconsistent pour quality. Using it regularly diminishes static cling, leading to cleaner dosing sessions. Additionally, investing in a precision scale with fast response times allows me to dial in grind and extraction meticulously, ensuring each shot maintains its perfect profile over time.
Long-Term Results: Trust the Right Gear
Consistent maintenance pays off with long-lasting equipment. For example, using a thermal wrap on your espresso machine’s boiler can significantly reduce heat fluctuations, maintaining stable temperature and improving shot consistency. Check out this guide for step-by-step instructions. Regularly replacing worn-out parts, such as water filters and gaskets, prevents costly repairs and keeps your espresso at the highest quality.
Scaling Up with Smart Maintenance Practices
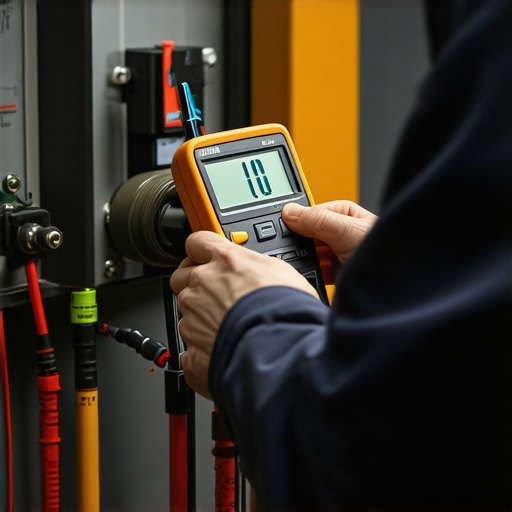
By integrating routine checks with smart tools—like multi-meter testers for electrical components or pH testers for water quality—you prevent issues before they become expensive problems. These practices are especially crucial as your setup grows more complex or if you’re venturing into advanced techniques, like temperature profiling or custom pressure curves.
How do I maintain my gear over time?
One effective approach is to establish a ‘maintenance schedule’ aligned with your usage frequency. For instance, I lube and calibrate my grinder monthly, inspect seals quarterly, and deep-clean components every six months. Remember, small consistent efforts—like using precision measuring tools—keep your setup performing at its peak. Predicting future trends, I see more baristas adopting digital diagnostics and AI-driven calibration tools, which will make upkeep even more straightforward and reliable. One game-changing tip: try the advanced static removal method during your grind routine; it significantly improves shot consistency. Don’t just take my word for it—test it yourself and experience the difference.
The Hardest Lesson I Learned About Home Espresso and Gear
One of the most insightful lessons I encountered was realizing that even high-end equipment benefits immensely from regular, attentive maintenance. Initially, I believed that once I bought top-tier gear, my brewing days would be set. However, neglecting small daily upkeep—like lubricating pivot points or inspecting seals—led to stubborn squeaks and inconsistent shots. It taught me that mastery involves ongoing care, not just buying the latest tools. Embracing routine checks transformed my setup into a reliable partner, consistently delivering exceptional espresso every time, reaffirming that dedication to maintenance is key to true craftsmanship.
My Go-To Resources for Deepening Espresso Knowledge
Over the years, I’ve found that specific tools and sources have significantly elevated my understanding. The first is the detailed guides on maintaining ceramic burrs, which are invaluable for preventing common failures. I also trust static management tips—a subtle but game-changing aspect of grinder performance. For troubleshooting, the burr settling protocols have saved me countless calibration headaches. These resources are rooted in real-world experience and have helped me troubleshoot effectively while continuously refining my craft.
Embracing the Journey of Espresso Excellence
If you’re passionate about elevating your home espresso game, remember that every small adjustment and lesson learned contributes to your mastery. Don’t hesitate to explore new techniques, tools, or research—often, the most profound improvements come from minor tweaks in your routine. The journey is ongoing, and with each step, your skills and confidence will grow. So, take action today: experiment with that tweak you’ve been avoiding, check that static buildup, or try a new maintenance tip. Your perfect shot awaits—start now and watch your skills, and your enjoyment, flourish.