I remember the moment clearly—trying to perfect my morning espresso, only to be met with a tangled jungle of cables sprawled across my countertop. It was frustrating, honestly. Every time I reached for my grinder or milk frother, I had to navigate a maze of cords, which not only looked messy but also felt like a hazard waiting to happen. That lightbulb moment made me realize: a cluttered setup isn’t just about aesthetics—it’s about efficiency, safety, and ultimately the quality of my coffee.
Why Cable Chaos is More Than Just an Eyesore
Many home baristas underestimate how much disorganized cables can impact their daily routine. A tangled mess might seem like a minor aesthetic issue, but it often leads to slower workflows, accidental unplugging, or even damage to delicate electronics. Plus, a neat setup makes cleaning easier and reduces fire risks. Trust me, the difference between a cluttered and a well-managed espresso station is night and day.
According to industry insights, poor cable management can cause electrical hazards and equipment failures over time. Proper organization not only prolongs your gear’s lifespan but also enhances your overall brewing experience.
Will Better Cables Actually Make a Difference?
I used to dismiss cable tidiness as a low-priority task—until a loose wire caused my grinder to stall mid-shot. That mistake cost me precious minutes and a ruined brew. Since then, I’ve explored simple fixes that can turn chaos into calm, making my setup not just prettier but more reliable.
If you’ve ever felt your workspace is more tangled than your favorite espresso shot, you’re not alone. The good news? With a few strategic tweaks, you can keep everything in order, streamline your workflow, and enjoy your home brewing routine without the nuisance of unplugged cords.
Ready to transform your espresso station into a sleek, efficient sanctuary? Let’s dive into the top five cable management fixes that will make your 2026 setup both beautiful and functional. Whether you’re a seasoned barista at home or just starting your journey, these tips will help you avoid common pitfalls and set yourself up for coffee greatness.
Prioritize Your Power Sources
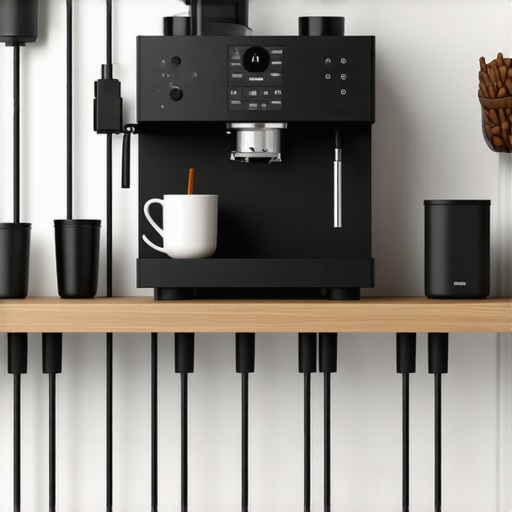
Begin by assessing your power outlets. Use a surge protector with multiple outlets to centralize your connections, preventing a web of cords behind your setup. In my case, I replaced individual plugs with a power strip mounted underneath the counter, which kept cords off the floor and within easy reach.
Simplify with Cable Ties and Clips
Gather loose cables and bundle them using Velcro cable ties. Avoid over-tightening to prevent damage to delicate wires. I attached small clips along the underside of my countertop to route cables neatly along edges—this kept cords from dangling and created a clean look.
Use Proper Length Cables
Replace excessively long cables with custom-cut or shorter ones. This minimizes slack and tangle risk. I swapped out my extra-long power cords for custom lengths, which kept my workspace tidy and eliminated accidental unplugging during busy mornings. Consider labeling each cable for quick identification.
Invest in Quality Cable Sleeves
For a professional aesthetic and added protection, encase bundled cables within braided sleeves. This prevents abrasion and keeps everything unified. My setup’s cables now run through a sleek black sleeve, reducing visual clutter and protecting against wear.
Designate a Controlled Cable Path
Plan a single, unobtrusive route for cables behind your equipment. Use adhesive-backed clips or conduits to secure cables along walls or furniture edges. I painted a small conduit along the back wall to route power and data cables, ensuring nothing drags on the floor or gets in the way of my workflow.
Apply Static-Free Techniques to Reduce Clumping
Static electricity can cause grinder chutes and cables to attract dust and coffee particles, which may lead to clumping or electrical issues. Use anti-static sprays or mats near your workspace and periodically ground yourself during setup. This simple step preserved the cleanliness and performance of my equipment.
Regular Maintenance and Reassessment
Every month, revisit your cable setup. Check for wear, looseness, or tangling. Replace worn ties and adjust routes as you upgrade or add gear. My monthly review uncovered a few loose cords, which I replaced promptly, maintaining a safe, efficient environment.
For more detailed insights into equipment maintenance, review this guide on boiler issues or explore seasoning your grinder burrs to optimize performance.
Many enthusiasts believe that simply owning the latest espresso machine or a fancy grinder guarantees perfect coffee, but in reality, there’s much more beneath the surface. A common misconception is that higher-end gear automatically produces better shots; however, even premium machines can falter if overlooked nuances aren’t addressed, such as thermal stability or proper calibration. For instance, many people don’t realize that a packed portafilter or inconsistent tamping can significantly affect extraction quality, regardless of machine quality. Moreover, advanced mistakes like neglecting routine descaling or ignoring boiler pressure fluctuations can subtly degrade performance over time. Understanding these finer points can save you from bitter disappointments and inconsistent flavor profiles. Interestingly, according to expert insights, even seasoned baristas constantly tweak variables like grinder burr alignment or pump pressure to optimize shots, which many home brewers overlook. Have you ever fallen into this trap? Let me know in the comments. When it comes to coffee aficionados, embracing the intricacies—like optimizing grind size for different beans or monitoring temperature gauges—is what separates casual brewers from true connoisseurs. Another often-missed nuance is the role of headspace in portafilter preparation; too much air can cause channeling, resulting in uneven extraction. Investing in tools like a high-precision scale or even exploring the impact of different baskets can make a noticeable difference, especially with light roasts where extraction control is paramount. Finally, meticulous cleaning protocols, such as regularly descaling or inspecting seals, are vital to prevent performance dips. For deeper insights, exploring topics like why 88°C beats 93°C for light roasts in test results can reveal surprising truths about temperature optimization, or understanding why your boiler may be hissing as explained in this detailed guide. Remember, the difference between good and exceptional espresso is often found in these subtle, advanced nuances—learning and mastering them elevates your brewing from hobbyist to artisan.To keep your home espresso station running smoothly, investing in the right tools and establishing a routine maintenance schedule is essential. Reliable equipment like a high-quality ultrasonic cleaner can drastically improve your grinder’s performance by effectively removing coffee residue and static build-up when used periodically. I personally rely on the [ultrasonic basket cleaner](https://espressotechguide.com/3-reasons-your-2026-ultrasonic-basket-cleaner-is-leaving-residue) because it ensures my grinder’s burrs are free of oils and particles that compromise shot quality, especially when switching beans frequently. Regular descaling of your espresso machine is another cornerstone—if you haven’t already, check out the latest insights from industry experts to understand the importance of timely descaling, which can be crucial for preventing boiler issues like those explained in [this detailed guide](https://espressotechguide.com/5-reasons-your-2026-espresso-machine-boiler-is-hissing). Tools like a precision tamper calibration kit also help maintain consistent tamp pressure over time, ensuring uniform extraction and flavor fidelity. As equipment ages, components like seals and valves should be inspected—replacing worn parts prevents leaks and maintains pressure stability, which is vital for perfect shots. Looking ahead, the trend towards smart sensors and IoT-enabled devices promises even more precise maintenance alerts and automatic system adjustments, making the home barista’s life easier. To get the most out of your gear now, I recommend scheduling quarterly deep cleans using specialized tools, and incorporating firmware updates where applicable—these small actions add up to significant improvements in shot consistency and machine longevity.
### How do I maintain my espresso setup over the long term?
Start by establishing a clear routine for cleaning and replacing small parts. For example, integrating a monthly descaling with an auto-dilution process can prevent mineral buildup and keep your boiler functioning optimally. Additionally, regularly checking and calibrating your grinder’s burrs using a precision RDT (Residence Dosage Technique) method, as discussed in recent industry findings, ensures consistent particle size distribution. Don’t forget to document your maintenance schedule—it helps spot recurring issues early and prevents unexpected breakdowns. Incorporate tools like a smart scale that syncs with your machine, providing real-time feedback on shot volume and grind adjustments, elevating your brewing precision. These practices not only extend the lifespan of your equipment but also ensure each cup meets your highest standards. Once you’ve established these routines, try implementing the advanced tip of using an ultrasonic cleaner periodically—it’s a game-changer for persistent static and residues, ensuring your grinder remains in peak condition, especially when switching between light and dark roast profiles.
Lessons Only the Pros Realize About Home Barista Setup
One of the biggest truths I discovered is that even the small details—like proper cable management—can profoundly impact your brewing consistency. I used to dismiss cable clutter as a minor aesthetic concern, but I realized that a tidy setup reduces accidental disconnections and equipment wear, leading to more reliable shots. Additionally, my mistake of neglecting routine maintenance, such as descaling and burr calibration, often caused inconsistent flavors, reminding me that behind every great cup is a foundation of regular care. Finally, I learned that understanding nuanced variables—like tamping pressure and temperature stability—is what separates good from exceptional espresso, encouraging me to continually refine my technique and equipment understanding.
![Why Your 2026 Ceramic Burrs Crack on Cold Starts [Fix]](https://espressotechguide.com/wp-content/uploads/2026/04/Why-Your-2026-Ceramic-Burrs-Crack-on-Cold-Starts-Fix-1.jpeg)
![Why Your 2026 Ceramic Burrs Crack on Cold Starts [Fix]](https://espressotechguide.com/wp-content/uploads/2026/04/Why-Your-2026-Ceramic-Burrs-Crack-on-Cold-Starts-Fix.jpeg)
Leave a Reply