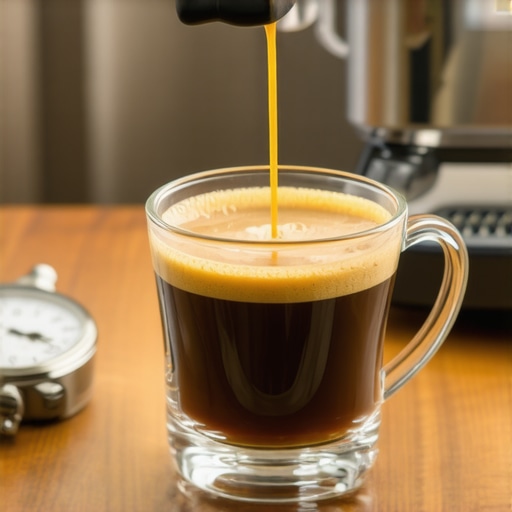
The Proper Depth for WDT Distribution That Actually Stops Channeling
Have you ever pulled a shot of espresso only to find it spraying unevenly, tasting sour or bitter, despite your meticulous tamping and grinding? I’ve been there—frustrated, staring at a mess of coffee grounds and wondering what I was doing wrong. The lightbulb moment came when I realized that my distribution technique, especially the depth of my WDT (Weiss Distribution Technique), was the silent culprit behind channeling disasters.
Why the Depth of Your WDT Matters More Than You Think
In my early days of espresso pulling, I thought I was doing everything right—consistent tamp, precise grind, and a good dose. But the shots still flickered with uneven extraction and occasional spurts. It wasn’t until I paid attention to my distribution depth that things started to change. I learned that wiggling the needle too shallow or too deep could inadvertently channel water straight through the puck, undermining flavor and risking raw, under-extracted coffee. This realization made me question everything I knew about tamping and distribution—because sometimes, precision starts beneath the surface.
Is Overthinking the Distribution Depth Really Worth It?
Early on, I made the mistake of assuming that simply stirring the grounds was enough. I believed that pressing the grounds flat with a tamper was the only thing that mattered—and that any extra fussing was unnecessary. But I was wrong. Subtle variations in depth and method make a huge difference. I found that adjusting my WDT paddle to the proper depth—not too shallow, not too deep—dramatically reduced channeling. And when I finally understood how to control this variable, my shots became cleaner, more consistent, and full of nuanced flavors. If you’re tired of inconsistent extractions, you might want to consider experimenting with the depth of your distribution technique. You’ll find some helpful tips for optimizing your process in this guide.
Set Up for Precision: Prepare Your Tools and Workspace
Before diving into the distribution process, ensure your workspace is clean and organized. Use a high-quality, well-calibrated coffee grinder to achieve consistent grind size, as variances here can undermine your efforts. Have your tamper, distribution tool, and a small brush handy. Warm your cup to maintain temperature stability during extraction. Setting up a stable workstation minimizes errors later and helps you focus on the critical steps to perfect your distribution technique.
Apply the WDT Technique Correctly to Control Depth
Initial Puck Preparation
Start by dosing your portafilter with fresh, evenly ground coffee—aim for a consistent dose based on your basket size. Use a finger or small tool to distribute the grounds evenly without pressing them down initially. This step ensures even surface and avoids pre-compactation that could interfere with distribution depth.
Using the Distribution Tool Effectively
Select a distribution paddle or a thin needle, and insert it into the coffee puck. Gentle, controlled pokes should be made in a circular pattern, applying just enough pressure to penetrate but not overly compress the grounds. Think of it as planting seeds—pressing too deep can cause uneven watering, just as excessive depth risks channeling during extraction. Practice moving the tool with a consistent depth—about one to two millimeters—until you develop a feel for the appropriate resistance.
Monitoring Depth and Adjusting Technique
Pay close attention to how much resistance you experience when poking. If you notice the needle wobbles or sinks too easily, you’re likely too shallow; if it meets firm resistance or feels like hitting a wall, you might be pressing too deep. Keep your strokes light and consistent, aiming for a balance where the grounds are evenly disturbed without over-compacting. During my early trials, I found that adjusting the depth based on the puck’s firmness led to immediate improvements in shot consistency.
Fine-Tune Your Pressure to Eliminate Channeling
Once the distribution is at an optimal depth, gently apply pressure with your tamper, ensuring you press evenly across the surface. An uneven tamp can negate the benefits of proper distribution depth. Consider investing in a leveling tamper to maintain uniform pressure. I discovered that a slight adjustment in tamp pressure, combined with precise distribution depth, drastically reduced channeling, resulting in cleaner, more flavorful shots.
Validate and Adjust Your Technique Regularly
After each shot, observe the extraction for signs of channeling—fast flow, uneven color, or sour notes. Use a visual puck screen or look for uneven wetness. If issues persist, revisit your distribution depth, perhaps experimenting with slightly shallower or deeper pokes. Regular calibration of your technique brings consistent improvement and helps you develop muscle memory for the perfect distribution.
Remember, mastering the precise depth takes practice. Patience and observation are your allies on this journey toward espresso perfection.
Many home espresso enthusiasts believe that owning top-tier gear guarantees perfect shots, but the truth is far more complex. A common misconception is that calibrated grinders or expensive espresso machines alone ensure optimal extraction, yet even seasoned baristas know that it’s the subtle nuances—like the precise distribution of coffee grounds or the exact pressure applied—that determine success. For instance, many overlook the importance of **consistent tamping pressure**; uneven tamping can negate even the most precise grind adjustments, leading to channeling and sour shots. A study published in the Journal of Food Science emphasizes that *micro-level variations during tamping significantly influence extraction quality*, highlighting the need for meticulous consistency. Exploring this further, many assume that their milk frother’s settings are a catch-all solution for microfoam. However, the heat distribution and airflow dynamics, which are often overlooked, directly impact foam quality. For example, a common mistake is relying solely on the frother’s temperature setting without considering how the pitcher angle affects microfoam formation—an issue addressed effectively in this guide on pitcher angles to achieve perfect microfoam. Are you making the mistake of assuming gear alone makes the barista? The real secret lies in refining your technique with your existing equipment. Be cautious: a frequent trap is neglecting regular maintenance and calibration—like overlooking the importance of a clean group head or a well-aligned grinder burrs—leading to inconsistent shots. For advanced users, understanding the impact of *boiler temperature fluctuations* can dramatically improve espresso consistency; even a 1°C variance can alter extraction, as backed by research in Food Chemistry. Would you like to delve into techniques to monitor and stabilize your machine’s temperature? Improving your shot quality isn’t just about buying new gear—it’s about mastering these nuanced variables. So next time you find your espresso underwhelming, ask yourself: have I considered how these hidden factors might be sabotaging my efforts? Remember, consistent success in home brewing results from attention to detail, not just the right equipment. Keep experimenting and stay observant—your perfect shot awaits.
**Have you ever fallen into this trap?** Let me know in the comments!
Keep Your Gear in Prime Condition
Investing in quality equipment is only half the battle; regular maintenance ensures your espresso setup continues delivering top-tier shots over time. I personally schedule weekly cleanings of my espresso machine’s group head and portafilter, using a soft brush and appropriate cleaning solutions. This proactive approach prevents the buildup of coffee oils and mineral deposits that can compromise flavor and machine longevity. Remember, a clean machine not only lasts longer but also reduces the risk of unexpected breakdowns, making your morning ritual smoother and more reliable.
Tools I Recommend for Maintenance
For routine cleaning, I swear by a dedicated group head brush and a descaling solution suited for espresso machines. A cleaning sequence that includes backflushing with blind filters, soaking detachable parts, and descaling every 3-6 months has kept my machine performing consistently. Calibration tools like a digital thermometer and manometers help me verify that my machine’s boiler temperature and pressure settings stay within optimal ranges, reducing variability in shots. These small investments can extend the lifespan of your equipment and ensure that every cup is as good as the first.
Assuring Long-Term Quality with Proper Calibration
Over time, even the best espresso machines drift from their ideal settings. Regular calibration—adjusting PID parameters in some models or verifying pressure consistency—can significantly impact shot quality. I recommend using a reliable digital temperature monitor to track boiler performance and maintain stable extraction parameters. This meticulous approach pays off by preserving the nuanced flavors unique to your beans, especially when working with delicate single-origin coffees.
How do I maintain consistent pressure and temperature over time?
Maintaining pressure stability involves regular checks and occasional pump calibrations. Ensuring your boiler temperature remains steady is crucial, especially if you notice gradual shifts in shot clarity. A helpful tip is to keep a log of your calibration settings and shot parameters, which can reveal trends and help preempt issues before they affect your brew. Moreover, a proper puck prep—like consistent grind, dosing, and distribution—becomes easier when your machine operates within calibrated parameters.
Tools that Will Elevate Your Espresso Game
Beyond basic maintenance, some tools can boost your consistency and efficiency. For example, a clean steam wand attachment or an ultrasonic descaler can save you time and effort. Upgrading to a high-precision flat burr grinder with stable grind settings ensures your doses stay consistent as beans age. Also, using software or apps to track your brewing parameters can lead to noticeable improvements, especially when experimenting with different beans or brewing styles.
What’s on the Horizon for Home Barista Tools?
Looking ahead, I believe IoT-connected devices and smart calibrators will become more common, allowing real-time adjustments and remote diagnostics. Enhanced user interfaces and AI-guided calibration will empower even home enthusiasts to achieve professional results without extensive technical skills. Embracing these innovations can offer long-term benefits, like reducing the learning curve and preventing costly damage from improper setup.
Start by investing in a good calibration tool and commit to regular checkups. A small effort now will pay dividends with consistently excellent espresso shots and prolonged equipment life. Remember, maintaining your gear isn’t just about avoiding breakdowns—it’s about cultivating a sustainable, enjoyable brewing experience that keeps getting better over time.
By integrating these precise tools and routines, you’ll be well on your way to becoming a true home barista. Ready to give your setup the care it deserves? Try calibrating your pressure gauge this week and notice the difference in your shots!
What I Wish I Knew Before I Started Dialing In
One of the most profound lessons I discovered is that no amount of fancy equipment can compensate for attention to detail. I used to believe that a high-end grinder or a top-tier machine would make my espresso perfect; however, I quickly realized that my consistency in distribution and tamping played a much bigger role. The moment I started focusing on controlling the depth of my distribution and the pressure applied during tamping, my shots transformed from hit-or-miss to reliably excellent. It’s these subtle adjustments, often overlooked, that separate good home baristas from the great.
Tools That Elevated My Espresso Journey
For me, precision tools made all the difference. A reliable leveling tamper ensures even pressure, while a good clean steam wand attachment helps me achieve smooth microfoam consistently. Additionally, a digital thermometer allowed me to monitor boiler temperatures accurately, preventing shot deviations caused by heat fluctuations. These tools may seem simple, but their cumulative effect is extraordinary in crafting the perfect shot.
Embracing the Small Wins
The journey to exceptional espresso isn’t huge leaps; it’s a series of small, deliberate tweaks. For instance, adjusting the depth of my distribution pokes just a millimeter or two made a remarkable difference in preventing channeling. Likewise, maintaining my equipment regularly—like backflushing and calibrating pressure—keeps everything running smoothly. Each small success built my confidence and understanding, turning complex-sounding techniques into second nature. Remember, these nuances are what truly elevate your home espresso game.
Are You Ready to Elevate Your Espresso Ritual?
The real secret isn’t just in having the right gear but in mastering the incremental steps that define consistency and flavor. Whether it’s perfecting distribution depth, fine-tuning tamp pressure, or maintaining your machine meticulously, each effort pays off. So, I challenge you: pick one aspect of your process today—maybe your distribution technique or machine calibration—and give it your full attention. The payoff will be a more satisfying, repeatable espresso experience that rivals your favorite coffee shop.
What has been your biggest breakthrough in home espresso so far? Share your story below and join the community of passionate home baristas striving for excellence.