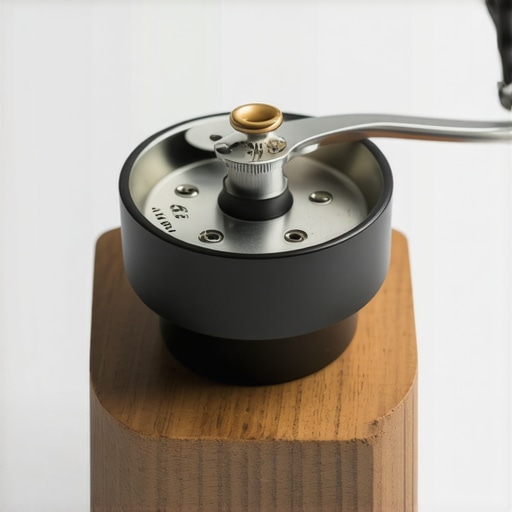
Why Your Grinder Adjustment Ring Is Stuck and How to Free It Safely
I still remember the frustrating moment when I tried to tweak my grinder, expecting a perfect grind, only to find the adjustment ring wouldn’t budge. It was late, I was eager to dial in that perfect espresso shot, but the ring was stuck tighter than a stubborn nail. That feeling of helplessness—like my morning routine was about to be derailed—hit hard. Turns out, I’m not alone. Many home baristas and even seasoned espresso enthusiasts face this exact issue, battling with a jammed adjustment ring that refuses to turn despite their best efforts.
Why Your Grinder Adjustment Ring Gets Stuck—and Why It Matters
This stuck adjustment isn’t just an annoyance; it can seriously impact your coffee quality. When the ring is jammed, your ability to fine-tune grind size—crucial for extracting rich flavors—is compromised. Plus, applying excessive force in an attempt to loosen it can lead to damage, meaning costly repairs or replacements down the line. Early in my journey, I made the classic mistake of using brute force, which only worsened the issue. Trust me, there’s a better way.
Is Forcing It Really Worth the Risk?
Many worry that trying to loosen the adjustment ring might cause thread stripping or damage to the grind mechanism. I’ve been there, too. But the truth is, with patience and proper technique, you can free a stuck adjustment without risking your equipment. Have you ever forced a stubborn ring, only to find yourself needing to replace the entire grinder? I thought so. For more insights on common grinder problems, check out this guide.
In this post, I’ll share the practical steps I used to safely free my adjustment ring and avoid costly mishaps. Whether you’re dealing with a minor stiffening or a completely stuck ring, these methods will help you regain control and get back to your perfect espresso. Ready to fix your grinder and get that adjustment ring turning again? Let’s dive in and make it happen!
.
Prepare Your Workspace and Tools
Start by unplugging your grinder to ensure safety. Gather a set of rubber gloves, a flat-head screwdriver, a plastic mallet, and penetrating oil like WD-40. The goal is to approach the jam with patience and caution. I once attempted to force mine with pliers, which almost stripped the threads—so avoid brute force here.
Apply Gentle Heat and Penetrating Oil
Spray the penetrating oil around the adjustment ring’s threads, then use a hairdryer or heat gun to gently warm the area for about 1-2 minutes. The heat helps loosen any corrosion or debris causing the jam. I found that after warming and applying oil, I could feel the ring’s movement improve—a promising sign.
Use the Plastic Mallet for Gentle Tapping
If the ring remains stubborn, tap around the adjustment ring lightly with a plastic mallet. Think of it like chipping away at a stubborn piece of ice—gentle, controlled taps gradually free the jam. Be careful not to hit too hard, as excessive force can damage the threads. During my attempt, a few gentle taps combined with oil allowed the ring to turn freely again.
Avoid Metal Tools That Can Damage the Threads
Never use metal screwdrivers or sharp tools to pry or turn the adjustment ring, as they can scratch or strip the threads, making the problem worse. Instead, opt for plastic or rubber tools designed for delicate work.
Work the Ring Back and Forth
Once loosened, slowly turn the adjustment ring back and forth, applying light pressure. This helps break any residual corrosion and realigns the threads. I recommend rotating it a few degrees in one direction, then the other, gradually increasing movement. I noticed that this method prevents the ring from sticking again and preserves the integrity of the threads.
Clean and Lubricate
After freeing the ring, clean the threads with a dry cloth to remove debris and excess oil. Consider applying a small amount of food-safe lubricant designed for threaded components if necessary. This step ensures smoother adjustments in the future and reduces the risk of re-jamming. Remember, regular maintenance can prevent this issue—check out this guide for more tips.
Test and Adjust Gently
Reconnect the grinder, plug it in, and test the adjustment ring’s movement. Turn it gently through its full range to confirm smooth operation. During my last fix, this careful testing prevented me from forcing the ring again and preserved my grinder’s lifespan.
When to Seek Professional Help
If the ring remains stuck despite these efforts, or if threads appear damaged, it’s wise to consult a professional technician. For persistent issues, professionals can replace thread inserts or even perform a more in-depth repair. Meanwhile, explore this resource for additional strategies.
 When it comes to home espresso brewing, many enthusiasts fall prey to misconceptions that hinder their progress. Contrary to popular belief, investing in high-end equipment doesn’t automatically guarantee great shots; understanding nuances like grind size, dose, and machine calibration is essential. For example, many think that a larger portafilter always produces better extraction, but in reality, selecting the right basket size and avoiding soggy pucks are more critical—learn more about this at this guide.
A common myth is that more expensive steam wands produce better microfoam. While quality matters, technique and proper steam wand maintenance play a bigger role. Don’t overlook regular descaling and cleaning, which prevent buildup that causes splattering and uneven frothing. Also, many users underestimate the importance of grinder consistency; a finely tuned burr set and correct adjustment ring alignment can make or break your espresso quality. For tricky adjustments, see this troubleshooting method.
Are you aware that milk frothing involves more than just texture? The temperature of your pitcher and milk type significantly affect microfoam quality. Using cold milk and ensuring your pitcher maintains an optimal angle during steaming result in finer bubbles—check out these tips for a perfect setup.
A valuable insight often missed by amateurs is the importance of pre-infusion. Many focus solely on grind size and dose but ignore how pre-wetting the coffee can improve extraction, especially with dark roasts. A small delay allowing water to soak in can prevent channeling and bitterness, as explained in this article.
What about equipment quirks? For instance, a loud vibration pump may seem like a flaw, but it often indicates a deeper issue like a blocked solenoid valve or descaled brew head—see this quick fix. Lastly, don’t overlook the role of water quality; hard water not only affects taste but also causes mineral buildup, leading to costly repairs. Regularly maintaining your water reservoir and applying descaling routines keep your machine running smoothly.
Remember, mastering home espresso involves understanding and managing these subtleties. Don’t be fooled by surface-level specs or common myths—deep knowledge and attentive maintenance are your best tools. Have you ever fallen into this trap? Let me know in the comments.
Equip Yourself for Consistent Performance
Maintaining your home espresso gear requires the right tools and a disciplined approach. I personally swear by a high-quality cleaning brush set designed for portafilters and group heads. These tools allow me to reach every nook and cranny, ensuring mineral buildup and coffee oils don’t compromise flavor over time. A calibrated digital scale is indispensable for dialing in precise doses, which directly influences extraction consistency. Investing in a decent basket cleaning kit also reduces channeling, giving you better shot clarity and flavor.
Incorporate Regular TLC into Your Routine
Just like any machine, espresso equipment benefits from routine maintenance. I recommend setting a weekly schedule for descaling your machine—especially if you brew daily. Use a descaling solution recommended by the manufacturer and follow specific procedures outlined in this guide. Consistent cleaning extends the lifespan of components like the water reservoir, pH sensors, and heating elements, preventing costly repairs later. For grinders, regular lubrication and burr maintenance keep performance optimal.
Mastering Long-Term Results
Achieving stellar espresso isn’t just about daily upkeep; it’s about understanding how your gear ages and responding proactively. For example, replacing worn-out portafilter gaskets or upgradeable parts can prevent leaks and uneven extraction. I also recommend investing in a dial indicator tool to check your grinder’s burr alignment periodically. Staying ahead of equipment wear ensures consistent shots and saves money over the years. Moreover, periodically reviewing your setup with resources like this detailed troubleshooting guide can prevent small issues from snowballing into major failures.
Scale Up Without Losing Quality
If you’re considering expanding your home setup—perhaps adding a second espresso machine or upgrading to a commercial-grade grinder—think about modular, space-efficient solutions. Modular systems allow easy upgrades, such as integrating a PID controller for temperature stability, which is critical for delicate roasts. According to industry expert Espresso 101, maintaining temperature consistency becomes increasingly vital as you scale. Always prioritize machines with accessible maintenance ports and compatible spare parts, which simplifies long-term upkeep. For example, choosing a model with a removable pump can make future repairs smoother.
How do I keep my gear functioning flawlessly over time?
Aside from routine cleaning and timely replacements, I recommend documenting your maintenance schedule with a simple log. Track when you last replaced parts like gaskets, cleaned your boilers, or calbrated your grinder. I also advise experimenting with advanced techniques like temperature profiling to optimize your machine’s performance for different beans. Implementing these practices ensures your investment continually produces café-quality results. For the ambitious, regularly inspecting critical components such as steam wands or adjustment rings will keep your workflow smooth and enjoyable.
Now, I challenge you to try calibrating your grinder’s zero point with the detailed method from this resource. Small adjustments can significantly impact shot clarity and flavor. Remember, consistent maintenance isn’t just a chore—it’s an investment in your craft and daily coffee pleasure.
What I Wish I Knew Before My First Fix
The toughest lesson I learned about home espresso was realizing that patience and finesse trump brute force every time. Rushing to loosen a jammed adjustment ring only led to stripped threads and more frustration. It taught me that approaching the problem with gentle techniques and proper tools—like heat, penetrating oil, and plastic mallets—saves you time and money, while preserving your equipment’s longevity. For instance, I avoided damaging my grinder by never resorting to metal tools or excessive torque, a mistake many beginners make.
Tools That Turn Problems into Solutions
Over the years, I’ve curated a set of go-to items: a high-quality descaling brush, a calibrated digital scale, and a food-safe lubricant. These tools have become essential for maintaining consistent performance and ensuring smooth adjustments. Investing in a quality grinder maintenance kit or a reliable adjustment ring fixer has made my espresso journey more enjoyable and less stressful. Trusting these resources has helped me troubleshoot more effectively, turning small issues into manageable tasks.
Embracing the Learning Curve and Staying Motivated
The most emotionally rewarding part of mastering home espresso is recognizing that every hurdle is an opportunity to improve. Whether it’s fine-tuning your grinder, perfecting your milk frothing, or understanding your machine’s quirks, every step deepens your craft. If I could offer one piece of advice, it’s to see challenges not as setbacks but as lessons—each one bringing you closer to barista-level shots. This mindset fuels my passion, inspiring me to experiment and hone my skills daily.
Where to Take Your Espresso Skills Next
For continuous growth, I recommend exploring resources like this guide on basket sizing or trying techniques to improve tamping consistency. Upgrading to specialized tools like a deep cleaning kit can keep your machine in top shape. Committing to regular maintenance routines, informed by trusted sources, ensures you produce café-quality espresso every time and enjoy the art of brewing more fully. Remember, every expert was once a beginner; your journey is just beginning, and the learning never stops.
Your Turn to Brew with Confidence
Building mastery in home espresso is a rewarding process that taps into your patience and curiosity. Don’t shy away from tackling stubborn adjustment rings or routine maintenance—each fix boosts your confidence. What issue have you struggled with most, and how did you overcome it? Share your experiences below and let’s learn together!
.