Why Your Digital Scale Turns Off During a Shot
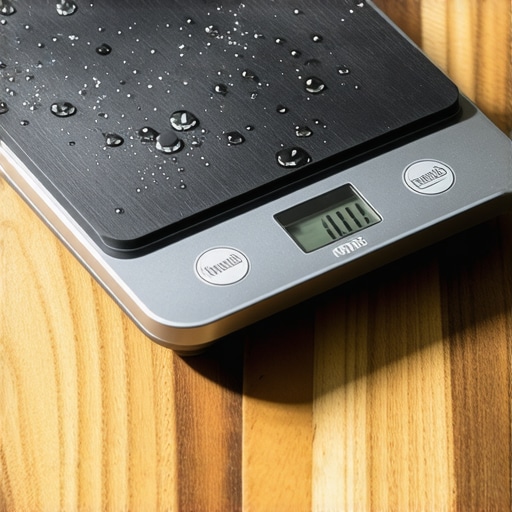
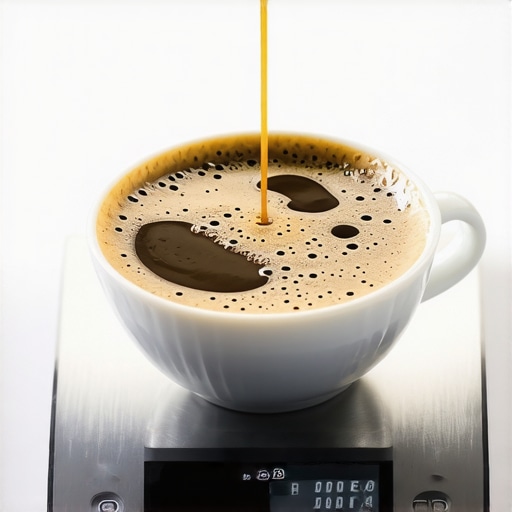
I remember the exact moment I realized my digital scale was sabotaging my espresso workflow. I was mid-pour, experimenting with a new roast, when suddenly, the scale blinked out. The shot was lost, and I felt that familiar surge of frustration. That tiny device, which I trusted to give me precision, was turning itself off just when I needed it most. It was maddening and eye-opening all at once.
Don’t Let Your Scale Steal Your Coffee Mojo
Digital scales are vital tools for home baristas, giving us that edge in consistency and accuracy. But what do you do when your partner in precision suddenly betrays you? If your scale turns off during a shot, it feels like the universe is conspiring against your perfect espresso. Well, I’ve been down that rabbit hole, and I’ve uncovered some common culprits that might be causing this issue. Today, I promise to help you troubleshoot and put an end to this annoying habit once and for all.
Is Your Scale Actually Worth the Hype?
Many new enthusiasts, including myself at the start, assume every digital scale is built the same. I used an inexpensive one that kept turning off during coffee sessions. Turns out, I was making a crucial mistake early on — neglecting the fact that some scales have auto-sleep features that activate after a brief period of inactivity. It’s a tempting feature designed to save battery, but in practice, it often kicks in right when you’re most engaged in pouring. If you’re questioning whether your scale’s behavior is normal, remember that some models are notorious for dropping out unexpectedly, especially when battery life is low or the auto-shutoff settings aren’t properly configured. Want to learn how to keep your scale reliable? Check out this comprehensive guide on [why your espresso scale lag is killing your shot accuracy](https://espressotechguide.com/why-your-espresso-scale-lag-is-killing-your-shot-accuracy).
Understanding these common pitfalls is the first step toward a more consistent brew. Next, we’ll explore practical tips that will help your scale stay powered during those critical moments. Ready to get back to perfecting your pour? Let’s dive in and restore your confidence in your gear — because every second counts when making that shot and every gram influences the flavor.
Adjust Your Scale’s Auto-Sleep Settings
Start by locating your scale’s manual and check if it has auto-sleep or auto-off features. Many scales turn off after a set period to conserve battery, but during espresso shots, this can be disastrous. To prevent the scale from shutting down mid-pour, disable the auto-sleep mode if possible. For example, I once owned a compact scale that would turn off after 3 minutes. I navigated the menu, turned off the auto-sleep, and experienced more consistent measurements during brewing. If your model doesn’t allow disabling this feature, consider investing in a higher-quality scale with customizable settings.
Use Fresh Batteries and Proper Power Sources
Weak batteries are a common culprit for unexpected shutdowns. Replace old batteries with fresh, high-quality alkaline or rechargeable ones. When I replaced my old batteries, I noticed my scale stayed on longer and provided consistent readings. Also, ensure you’re using a stable power source—avoid plugging into outlets with frequent power fluctuations. Keep a set of spare batteries nearby to swap in before long brewing sessions.
Calibrate Your Scale for Accuracy and Reliability
An uncalibrated scale can behave unpredictably, especially during critical pulls. Follow your model’s instructions to calibrate the device regularly, especially after changing batteries or moving it to a different location. To calibrate, place the scale on a flat surface, turn it on, and follow the calibration procedure, often involving a known weight. Selenium calibration ensures your measurements stay precise, preventing drift that could cause it to turn off unexpectedly. Trading in inconsistent readings for dependable measurements makes a tangible difference in shot quality.
Secure the Scale During Use to Minimize Vibrations
Vibrations from your espresso machine or grinder can unsettle your scale and trigger auto-off. Use rubber padding or a dedicated scale mat to stabilize it. During my last experiment with a high-pressure grinder, vibrations caused the scale to intermittently turn off. Placing it on a silicone mat minimized movement, keep the weight stable, and prevented auto-shutoff interruptions. This simple step gives more consistent results, especially when grinding or tamping.
Manage Your Scale’s Drain and Cleaning Schedule
Residue and dust from coffee can interfere with the sensor, causing erratic behavior. Keep the scale clean by wiping it gently with a damp cloth after each session. For thorough cleaning, avoid harsh chemicals—use a soft cloth and a mild cleaner. Additionally, ensure the scale’s drainage and vents are clear if it has any. This routine maintenance preserves the sensor’s integrity, reducing false signals that might trigger shutdowns. Regular upkeep avoids unexpected restarts at crucial moments.
Implementing Best Practices for Consistent Measurements
Consistent placement is key: always place your scale on a flat, stable surface away from airflow or direct sunlight. Consider using a dedicated platform for your espresso setup to reduce disturbance. During a recent shot, I carefully placed my portafilter directly on the scale, avoiding vibrations from nearby equipment. This stability helped the scale remain on throughout the extraction, providing precise measurements that improved my shot consistency. Simple adjustments like this can greatly enhance your brewing workflow and reliability.
Additional Resources to Improve Your Setup
If you continue facing issues, it might be time to upgrade your equipment or review your operation techniques. For more guidance on maintaining your grinder, check out how to calibrate your grinder, or learn about effective storage methods for your beans and accessories at bean storage tips. Proper setup, calibration, and maintenance form the trifecta of reliable espresso brewing—every detail counts when striving for excellence.Many enthusiasts jump into upgrading their home espresso setup with the belief that buying the latest machine or fancy grinder guarantees great results. However, a deeper understanding reveals nuanced pitfalls that even experienced baristas sometimes overlook. For instance, the myth that all coffee grinders produce equally consistent grinds is widespread. In reality, many home grinders, especially budget models, suffer from inconsistent particle size distribution, leading to channeling and uneven extraction. This is why regular calibration and understanding grind uniformity are crucial, and you can learn more about this in the article on [the truth about precision baskets and why they might be ruining your extraction](https://espressotechguide.com/the-truth-about-precision-baskets-and-why-they-might-be-ruining-your-extraction).
Another common misconception centers around milk frothers. Many believe that more aggressive frothing, with high steam pressure, creates better microfoam. Contrarily, over-foaming or using the wrong technique can produce large bubbles and a separation of milk proteins, ruining the latte art and texture. Using stale milk or improper temperature control can also sabotage your milk consistency. Check out [how to revive stale beans for better milk drinks](https://espressotechguide.com/how-to-revive-stale-beans-for-better-use-in-milk-drinks) for tips that improve overall milk preparation.
When it comes to espresso machines, a frequent mistake is assuming higher pressure always yields better results. This overlooks the importance of optimizing other factors, such as temperature stability and backpressure management. An overlooked but critical factor is protecting your equipment from scale build-up, which can affect pressure consistency. Regular descaling and maintenance are essential, and I recommend reviewing [the best way to store your drip tray to prevent scale build-up](https://espressotechguide.com/the-best-way-to-store-your-drip-tray-to-prevent-scale-build-up).
Aspiring baristas often assume that newer models with multiple features are inherently better. Yet, those complex machines might require more precise operation to avoid common mistakes like uneven tamping or inconsistent dosing, which significantly impact shot quality. It’s worth investing time in mastering foundational skills before relying solely on technology. For advanced techniques, [the error of using too much force when tamping light roasts](https://espressotechguide.com/the-error-of-using-too-much-force-when-tamping-light-roasts) can be a game-changer.
Have you ever fallen into this trap? Let me know in the comments. Remember, mastery often comes from understanding these subtle nuances — after all, even a small mistake can lead to a sour shot or a mess on your countertop. Let’s dig deeper and refine our approach to home espresso to truly elevate our daily brew.
Prioritize Regular Equipment Checks
Maintaining your espresso setup requires a committed routine. I swear by a weekly inspection schedule where I check seals, gasket conditions, and cleanliness—especially the group head gasket, which is critical for consistent shots. Replacing worn gaskets before they cause leaks saves me from expensive repairs. To ensure your espresso machine stays in top shape, follow manufacturer maintenance guidelines and perform routine inspections for any signs of wear. For detailed gasket replacement tips, see this guide.
Invest in Quality Calibration Tools
Your grinder’s accuracy directly affects your shot quality. I recommend investing in a precision calibration kit and a calibration coffee for your grinder. I personally use the Spectra Classic grinder calibration tool, which ensures my burrs produce consistent particle sizes after replacement or adjustments. Regular calibration prevents grind inconsistency, flavor variations, and missed extraction targets. Check out this calibration guide to master the process.
Utilize Effective Cleaning Regimens
Proper cleaning extends the lifespan of your equipment and maintains optimal performance. I keep a small spray bottle of descaling solution on hand, which I use monthly—especially if I notice buildup or scale on my boiler parts. Regularly flushing the group head with a dedicated cleaning solution, like Puly Caff, ensures that oils and residues don’t compromise flavor or machine operation. For flushing, follow this quick procedure. Consistent cleaning prevents costly repairs down the line and sustains your espresso quality over the long haul.
Keep Your Tools Organized for Efficiency
A cluttered workspace leads to lost time and overlooked maintenance. I recommend setting up a dedicated station with labeled containers for tools, cleaning supplies, and spare parts. Using a mounted magnifier and good lighting speeds up troubleshooting. Remember that a little effort organizing your barista gear, such as in this guide, pays off during busy mornings and prevents skipped maintenance tasks.
Predict Future Tech Trends
Emerging smart diagnostics and IoT-enabled espresso gear are on the rise, promising real-time health monitoring of your machine. Devices like the Flair Pro’s smart grinder monitor are paving the way for predictive maintenance, which could minimize unexpected breakdowns. As these technologies mature, we’ll likely see apps that automatically schedule maintenance or even order replacement parts before failures occur, cutting down downtime. Staying updated with these innovations will help you stay ahead of potential issues, making your home setup more resilient.
How do I maintain my espresso equipment over time?
Adopt a routine combination of regular cleaning, critical component inspections, and calibration. Document your maintenance schedule and set reminders. Using dedicated tools like calibration kits and cleaning solutions—such as checking your pump for cavitation—ensures longevity. Additionally, investing in quality tools and staying informed about emerging smart tech will keep your setup performing at professional levels for years to come. Try implementing a weekly cleaning ritual and see how much more consistent your shots become, and you’ll appreciate how these small practices safeguard your investment.
Over the years, I’ve learned that the difference between a good shot and a fantastic one often comes down to paying attention to the little details that most home baristas overlook. From scale auto-off frustrations to calibration blunders, these lessons have transformed my brewing experience from guesswork to consistency. Embracing these insights isn’t just about troubleshooting—it’s about elevating every cup you make and truly honoring your craft.
The Hidden Gems of Espresso Success That Few Share
- Patience with Calibration: I used to think my scale was faulty whenever shots varied. It turned out, regular calibration after changing batteries or relocating my grinder drastically improved accuracy. Staying diligent with calibration, as explained in this guide, is a game-changer—trust me, your shots will thank you.
- Vibration Control Is Everything: Vibrations caused my scale to turn off mid-pour, ruining critical moments. Using simple solutions like placing a silicone mat under your scale (check out this tip) makes a noticeable difference in keeping measurements stable and your workflow smooth.
- Know When Your Gear Needs TLC: Clean, maintained equipment isn’t just about sanitation—it’s about performance. Regularly descaling your machine, cleaning the group head, and inspecting seals can prevent unexpected breakdowns. If you’re unsure how to keep your setup top-notch, examining this maintenance routine can help maintain peak performance.
- Upgrade with Purpose, Not Price: Investing in quality tools like a calibration kit or a sturdy tamper yields long-term gains. Remember, better equipment combined with proper technique often outweighs buying the latest gadget. Discover how calibration tools can protect your investment and milk every ounce of flavor from your beans.
Elevate Your Espresso Game with Trusted Tools and Ideas
Growing in this hobby involves learning from sources I trust and practicing consistently. For mastering calibration, I rely on precise calibration kits and dedicated guides. When it comes to maintaining my grinder, I turn to step-by-step tutorials that demystify common frustrations. And for preserving my beans’ freshness, I follow tips from trusted freshness tricks. Building your personal toolkit equipped with reliable resources is the best way to grow confidence as a home barista.
Turn Your Routine Into a Ritual, Not a Chore
Homemade espresso is an art form that rewards patience, precision, and passion. Every small improvement—be it stabilizing your scale, cleaning your machine, or calibrating your grinder—brings you closer to the perfect shot. Don’t let technical hiccups discourage you from embracing this craft. Remember, the joy of coffee lies in continuous learning and refining your process. So, I challenge you: what small tweak will you try today to improve your home espresso experience? Share your thoughts below and let’s elevate our brewing game together.