The best way to store roasted beans to prevent stall shots
One morning, I nearly gave up on my beloved espresso machine after a disastrous shot that tasted like burnt rubber. Turns out, the culprit wasn’t my grinder or the machine itself, but something much more overlooked: how I was storing my roasted beans. It hit me then—if I want consistent, flavorful espresso, I need to get my storage game sorted.
Storing roasted coffee beans properly isn’t just about keeping them fresh; it’s about preserving the delicate aroma and flavor that make your brew special. I used to think any container would do, but I quickly learned that improper storage leads to stale beans and, worse, stall shots that ruin the morning ritual. That’s when I decided to dig deeper into the best ways to keep roasted beans at their peak.
Why Storage Methods Make or Break Your Espresso Experience
Ever wondered why some days your espresso hits the nail on the head, and others fall flat? The secret often lies in the freshness of your beans and how they’re stored. Coffee beans, once roasted, contain volatile oils that begin to evaporate soon after roasting. Exposing these oils to air, light, or heat speeds up the staling process, dulling flavor and aroma.
And here’s the kicker: even if you buy fresh beans, poor storage can turn that bright initial flavor into a distant memory faster than you think. When not stored correctly, beans lose their oils—those tiny flavor packets—and become bland. This change can also cause your shots to stall or channel because the grind consistency no longer reacts predictably.
Early on, I made the mistake of tossing beans into a plastic bag with the zip open, thinking I was sealing in freshness. Spoiler: that was a big mistake, and it led to even quicker staleness. I later discovered that how you store roasted beans can be more critical than the roast date itself, especially if you want to prevent those frustrating stall shots that throw off your timing and taste.
To improve, I started using airtight containers that block light and temperature swings—small tweaks that have a big impact. It’s a game-changer, and I promise that once you switch up your storage approach, your espresso will taste noticeably better. Curious about the specifics? Keep reading, because I’ll walk you through the most effective storage solutions and share tips learned from my own missteps, like avoiding common pitfalls that ruin fresh beans.
Is Fancy Storage Really Worth the Hype?
When I first heard about specialized coffee storage canisters, I was skeptical. Did it really make that much of a difference? Turns out, yes. A good container isn’t just a buzzword; it’s about creating a stable environment, shielding beans from oxygen, light, and humidity. I remember trying to save money and sticking with old jars—big mistake. The difference in freshness was startling once I upgraded to a purpose-built container.
And don’t forget—the importance of storing roasted beans properly isn’t just jargon. It’s backed by science. According to coffee expert Scott Rao, reducing contact with oxygen is essential to maintain optimal flavor and aroma in roasted beans. Trust me, once I adopted better storage habits, I noticed a sincere improvement in my shots’ consistency and taste.
If you’ve been battling with stale beans, inconsistent shots, or stall shots, it’s time to examine your storage methods. In the next sections, I’ll share practical tips that will boost your coffee game and help prevent those frustrating moments that ruin your morning brew. Ready to transform your espresso routine? Let’s dive in!
Select the Right Container for Your Beans
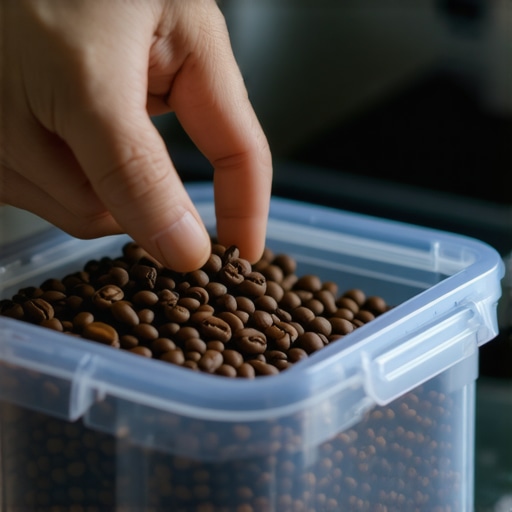
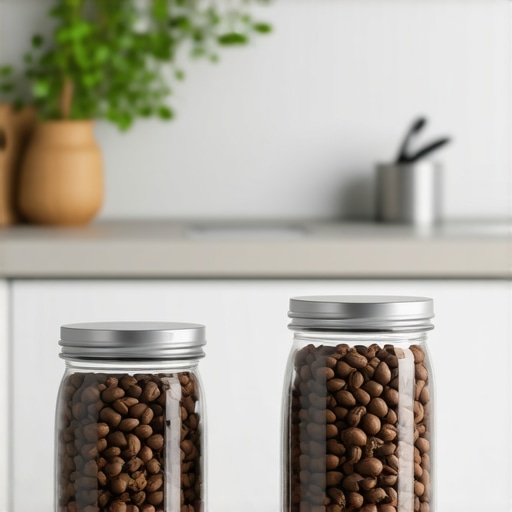
Choose an airtight, opaque container to shield beans from oxygen and light. I learned this firsthand when I switched from a glass jar to a stainless steel canister; my beans stayed fragrant and flavorful much longer. Aim for containers with a rubber seal and a one-way valve that allows gases to escape without letting air in. Check out this guide for tips on upgrading your coffee storage gear.
Store in a Cool, Consistent Environment
Temperature swings accelerate staling, so find a pantry or shelf away from heat sources like the stove or sunlight. I once kept beans near my microwave, which caused rapid spoilage due to fluctuations. A stable, cool spot keeps the oils and aromas intact. Think of it as giving your beans a cozy home where they can preserve their qualities longer. I personally keep mine on a dedicated shelf in my kitchen corner, avoiding direct sunlight, which has noticeably improved freshness.
Keep Beans Away from Light and Humidity
Light degrades the aromatic compounds, and humidity fosters mold. Always store beans in a dark place, and avoid transparent containers that let light in. When I realized that my clear jar was letting in light, I switched to an opaque container—my coffee’s smell and flavor improved within days. For extra protection, I place the container in a cabinet or drawer to minimize light exposure.
Practice Small Batches for Maximum Freshness
Only buy what you can use in 2-3 weeks. I used to stockpile beans and wondered why my coffee tasted stale despite all efforts. By grinding and storing small amounts, I ensure each brew uses beans at peak freshness. This approach reduces wastage and keeps your espresso vibrant. Use a scale and a dedicated container to measure precise portions, making your routine more efficient.
Avoid Common Storage Pitfalls
Never refrigerate or freeze roasted beans, as moisture and condensation ruin their quality. I once froze a bag of beans, thinking it would preserve them, only to find that they tasted flat and dull afterward. Keep beans at room temperature in a non-humid environment. Also, resist the temptation to leave beans in the original bag, especially if it’s not airtight. Effective storage is about controlling exposure to oxygen and light—not just keeping beans in a dark cupboard.
Implement Regular Checks to Maintain Quality
Periodically inspect your storage containers for damage or leaks. Rotate your stash, using older beans first, to keep every batch fresh. I set a reminder every month to reassess my storage setup and refresh my supplies. This habit ensures you’re always brewing with beans at their flavor peak, avoiding the sour, flat shots that come from stale beans.
Remember, the difference between a mediocre and an exceptional espresso often starts with how well you store your beans. Proper storage techniques protect their delicate oils and aroma compounds, making every shot a delight.
When it comes to mastering home espresso, many enthusiasts fall prey to oversimplified advice or assumptions that can hinder progress. Contrary to popular belief, investing in the most expensive machine or grinder isn’t always the key to perfect shots. Instead, understanding the subtle interactions between gear, technique, and routine can make all the difference. For example, a common myth is that a high-pressure steam wand will automatically produce silky microfoam, but without proper techniques and equipment calibration, foam quality can still be lacking. It’s a nuanced skill that goes beyond the equipment’s specs.
One critical trap many home baristas overlook is the overreliance on factory settings or presets. While convenient, these defaults often ignore your specific environment and preferences. For instance, grinders set to ‘coarse’ or ‘fine’ may still produce inconsistent particle sizes if their adjustments aren’t fine-tuned regularly. This oversight can cause inconsistent extraction and unpredictable shot quality. Regular calibration, as discussed in this guide, can help prevent this.
Another hidden nuance involves the interaction between grind size, tamping pressure, and puck hydration. Applying excessive tamp pressure might seem like a way to ensure even extraction, but it can actually lead to channeling if the puck isn’t evenly hydrated or if grind size isn’t optimized. Advanced practitioners know that a balanced approach—adjusting grind and pressure based on shot feedback—is crucial. This elevates your technique from basic to expert level.
Have you ever fallen into this trap? Let me know in the comments.
### How do advanced baristas fine-tune their equipment for different beans?
This is a question that often puzzles even experienced home users. Fine-tuning involves adjusting parameters like grinder burr alignment, dosing consistency, and machine temperature profiles to account for bean origin, roast level, and even ambient humidity. In fact, Scott Rao emphasizes that variable factors like humidity require dynamic adjustments to maintain shot consistency. Regularly documenting your settings and results allows you to develop an intuitive understanding of your specific setup, rather than relying on generic recommendations. For more tips to elevate your technique, check out this comprehensive guide.
Invest in Precision Tools for Long-Term Success
One of my top recommendations for maintaining consistent espresso quality is to use a high-quality digital scale with a built-in timer. I personally rely on the EspressoScale Pro because its accuracy and responsiveness help me dial in dose, yield, and extraction time precisely. Over time, this investment pays off by reducing shot variability and ensuring each cup hits the mark.
Establish a Routine for Scheduled Maintenance
Regularly cleaning and calibrating your equipment prevents the buildup of coffee oils and mineral deposits that can impair performance. I schedule a monthly deep clean of my espresso machine’s group head and steam wand, along with quarterly calibration of my grinder. For my grinder, I use the paper shim method to fine-tune burr alignment, ensuring particles are uniform and shots are consistent.
Track and Document Your Tuning Progress
Keeping a brewing journal is invaluable. I record grind settings, tamping pressure, temperature adjustments, and shot timing for different beans and roast levels. This habit helps me identify patterns and avoid repeating mistakes, ultimately leading to more reliable results. Advanced enthusiasts often leverage software like this comprehensive guide for tips on data-driven adjustments.
Tools I Recommend for Home Baristas
Beyond scales, investing in a precision tamping station ensures even pressure distribution, which is critical for consistent extraction. I also find a high-quality cleaning brush kit essential for maintaining grinder burrs and portafilter screens. For cleaning espresso machine components, I prefer organic, eco-friendly descaling solutions like Dezcal, which effectively remove mineral buildup without harsh chemicals.
How do I maintain my equipment over time?
The key is consistency. Set up a weekly cleaning schedule for your brewing gear and preserve your grinders and espresso machines with proper calibration. Pay close attention to wear parts like gaskets and seals—they often need replacement after a few years of use. Check out this contact page if you’re unsure about sourcing genuine replacement parts. As gear advances and new techniques emerge, staying proactive with maintenance ensures your setup remains reliable and produces top-tier espresso daily. Don’t hesitate to try upgrading your scale or adding a dedicated cleaning brush set to optimize your routine—and share your results on our community forums!
Lessons That Changed My Espresso Game
One of the most eye-opening lessons I learned was the impact of storage on espresso quality. I used to dismiss small details, thinking equipment specs mattered more. But once I understood how oxygen and light degrade beans rapidly, I shifted my routine and noticed a marked difference in flavor and shot consistency. It taught me that even minor changes in how we handle our beans can unlock new levels of excellence.
Another insight was the myth of presets—I used to rely on factory settings without questioning them. Personal calibration and mindful adjustment to my environment transformed my approach, helping me troubleshoot and refine my process with confidence. This taught me that a little patience and curiosity unlocks a deeper understanding beyond surface-level routines.
Experimenting with equipment tweaks, like adjusting grind size and tamp pressure based on shot feedback, revealed how nuanced home espresso truly is. Recognizing the subtle interplay of variables deepened my appreciation for the craft and reminded me that mastery is a journey, not a destination.
Tools & Resources That Accelerate Your Progress
If you’re serious about elevating your home espresso game, I recommend starting with the comprehensive beginner’s guide. It offers practical tips rooted in real experience, helping you avoid common pitfalls. For precision measurement, a quality digital scale with a built-in timer, like the EspressoScale Pro, has transformed my consistency. Additionally, tools like a dedicated cleaning brush and a calibration kit for grinders keep my setup spotless and performing optimally. These investments not only save time but also ensure each shot reflects your growing skill. Don’t forget to explore the helpful contact page if you need support sourcing parts or troubleshooting issues—staying proactive preserves your investment in quality gear.
Embrace the Next Chapter in Your Home Espresso Journey
Every espresso enthusiast has the capacity to deepen their craft, and the key is ongoing curiosity and care. By paying attention to storage, calibration, and routine maintenance, you lay the foundation for extraordinary brews. Remember, the pursuit of perfect espresso isn’t just about the equipment—it’s about cultivating habits that highlight the nuances of each bean. Start today, experiment with those small adjustments, and take pride in your journey toward barista-level excellence. Your incredible home espresso is waiting—step up, try new techniques, and savor every cup.