Why Your Shot Volume Changes Every Time You Use the Same Grind Size
If you’ve ever carefully dialed in your espresso, only to find that the volume of your shot suddenly isn’t what it was yesterday—or even just a few minutes ago—you’re not alone. I remember that frustrating feeling of hitting that perfect shot one minute, and then, the next, it’s like my grinder and machine forgot how to cooperate. It’s as if every shot is a little surprise, no matter how consistent I try to be. And trust me, I’m not alone in this struggle; many home baristas face this inconsistency daily, often feeling like they’re chasing a ghost.
Why Your Coffee Shot Volume Is So Unpredictable, Even With the Same Grind Setting
The truth is, maintaining a consistent shot volume isn’t just about setting your grinder to the same number every time. There are a bunch of subtle factors at play—factors that often go unnoticed but have a big impact on your brew. Tiny changes in humidity, coffee bean density, and even how fresh your beans are can influence how much water passes through the coffee during extraction. Even your grinder’s burrs can shift slightly over time, affecting particle size distribution and shot consistency. These nuances make every shot unique, even if your equipment settings stay the same.
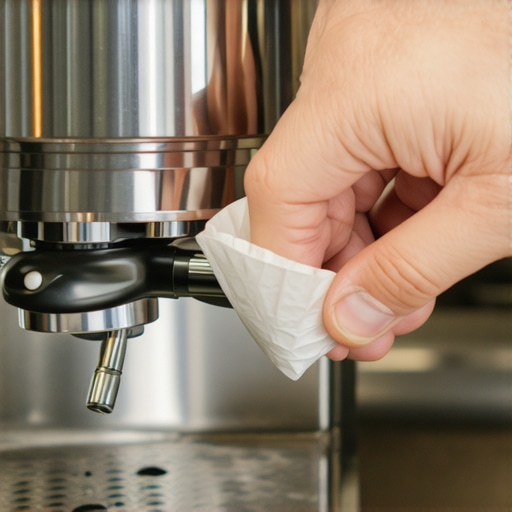
Early in my journey, I made the mistake of assuming that setting my grinder argument to the same number would give me identical shots. I didn’t realize that my grinder’s burrs were gradually dulling without me noticing—a tiny shift that drastically changed the grind size and, consequently, the shot volume. This simple oversight threw me for a loop until I learned to pay attention to these subtle signs. To truly understand your equipment and its quirks, I recommend reading why the paper towel test is the best way to check for dull burrs.
So, what can we do to gain control over this elusive aspect of home espresso? That’s precisely what we’ll uncover today. From practical checks to tiny adjustments, I’ll guide you through the steps to tame your shot volume and make your coffee routine more predictable—and more enjoyable. Ready to stop chasing shadows and start brewing with confidence? Let’s dive into the details.
Are You Wasting Time Trying to Fine-Tune Without Addressing the Real Issue?
I used to believe that tweaking the grind size was the ultimate answer. But I’ve found that focusing solely on grind adjustments often masks underlying issues like burr wear or inconsistent tamping pressure. Addressing these root causes makes a world of difference. For instance, regularly cleaning your grinder’s burrs can prevent subtle changes in grind size that throw off your shot volume. Want to learn how to keep your grinder performing at its best? You might find this simple cleaning guide helpful. And remember, consistency is a game of layers—small, deliberate steps build up to perfect shots over time. In the coming sections, I’ll share my tried-and-true methods to help you achieve that.
Check Your Grinder Regularly for Wear and Dullness
Start by inspecting your grinder’s burrs daily. A dull burr causes inconsistent particle sizes, leading to unpredictable shot volumes. Remove the hopper and look for signs of dullness or clogging. Use the paper towel test described in this guide to confirm burr sharpness. I once forgot to check my burrs and continued fine-tuning my grind size, only to realize my shots were wildly inconsistent. Cleaning or replacing burrs restored my control and shot consistency.
Calibrate Your Grinder at the Same Time Every Week
Establish a routine to calibrate your grinder once a week. Pick a standard dose and measure the mass after grinding to ensure it aligns with your desired particle size. Consistently calibrating prevents drifting settings due to burr wear or temperature fluctuations. When I first started, I overlooked this step, which resulted in fluctuating shot volumes even with the same grind setting. Creating a calibration schedule helped me dial in my adjustments and avoid guesswork.
Master Distribution and Tamping Pressure
Uneven puck distribution causes water channels, affecting shot volume. Use a distribution tool or your finger to evenly spread coffee in the basket, ensuring uniform density. Follow with firm, consistent tamping—about 30 pounds of pressure—applied evenly across the puck. I once hurried through tamping, and my shots came out watery and under volume. After adopting a steady, deliberate tamp, shot consistency improved markedly, making volume more predictable.
Control Your Brew Parameters Precisely
Set your machine to temperature and pressure levels suited for your coffee. Use a calibrated shot timer to stop extraction at the proper volume—usually 25-30 seconds for a double shot. If shots vary in volume, write down the exact timing and weight with a scale to find the sweet spot. I experimented with timing and kept detailed notes, which helped me hit the target shot volume reliably, reducing waste and disappointment. Invest in a good espresso machine with stable pressure control for better consistency.
Adjust for Bean Freshness and Humidity
Remember that fresh beans and humidity affect grind and extraction. Store beans in an airtight container and adjust grind size slightly if your shot volume suddenly changes after a bag is opened. I learned this the hard way when a bag of beans fell in humidity, and I had to fine-tune my grinder for the right shot volume. Keep a record of environmental conditions and adjust your settings accordingly.
Identify and Address Machine Vibrations
Vibrations can alter shot volume by disrupting water flow. Secure your machine on a stable surface and check for loose components. Regularly inspect the water reservoir and ensure the machine is level. Once, my machine shook so much during operation that the shot volume varied unpredictably. Using a level and anti-vibration pads fixed this problem, giving me more control over each shot.
Implement Routine Maintenance Practices
Perform weekly cleaning of your brew head, portafilter, and steam wand. Build-up affects water flow and temperature stability. Use the proper cleaning techniques to keep everything functioning smoothly. In my experience, neglected maintenance led to inconsistent pressure and shot volume, which cleared up once I followed a strict maintenance schedule.
Many seasoned home baristas operate under misconceptions about their equipment, often unaware of the subtle nuances that truly influence shot quality. One prevalent myth is that high-end gear always guarantees perfect results. While premium machines and grinders provide quality foundations, they aren’t magic wands. Overlooking maintenance and technique nuances, like burr alignment or portafilter handling, can negate the benefits of top-tier equipment. Let’s dig deeper into what most people get wrong about barista gear.
Are You Falling for the Equipment Trap When Brewing?
It’s common to believe that upgrading to the latest espresso machine or grinder will resolve brewing issues. However, studies show that operator technique and understanding gear intricacies often outweigh hardware upgrades. For instance, many forget that grinder calibration drift over time can cause uneven grind sizes, leading to channeling or inconsistent shot volume. Regular calibration and maintenance are crucial—more than just owning fancy gear. Investing in learning proper dialing-in techniques and understanding gear behavior, as discussed in mastering home espresso, yields better results than merely buying new equipment.
Another common misconception revolves around milk frothers. Many think that high-powered frothers are always better. But in reality, understanding how to manipulate temperature, pressure, and foam texture matters more. Cheap frothers may produce large bubbles or uneven microfoam if not used correctly, which is a frequent oops I encountered. To avoid this, get familiar with the nuances of milk steaming, such as pitcher angle and technique, outlined in this guide.
Now, what about coffee grinders? A trap many fall into is focusing solely on burr size or branding. But the hidden nuance lies in burr alignment, cleaning schedule, and grind consistency. Using proper burr maintenance can extend their lifespan and ensure uniform particle sizes. Ignoring these details might lead to over-extraction or under-extraction, despite setting the grind size correctly.
And when it comes to espresso machines, the misconception that high pressure alone leads to better shots is misleading. Actually, the consistency of pressure over time, boiler temperature stability, and proper pre-infusion play critical roles. An article from industry experts emphasizes that a machine’s ability to maintain stable pressure and temperature is a more reliable predictor of shot consistency than peak pressure capabilities alone. For a comprehensive understanding, you can explore top-rated machines.
Vary Your Approach to Achieve Consistent Results
It’s easy to fall into routines that emphasize hardware over technique, but the real mastery comes from understanding hidden nuances—such as burr alignment, environmental factors, or how tamping pressure interacts with grind consistency. Ignoring these factors often results in unpredictable shot volume and flavor. Believe me, addressing these details will upgrade your home barista game more than any gear upgrade could.
Finally, remember that even advanced enthusiasts can fall prey to these oversights. Regularly inspecting, maintaining, and understanding your gear’s quirks will prevent many common pitfalls. If you’re curious about preventing equipment errors and optimizing your setup, check out my detailed article on checking burr sharpness. Staying proactive with gear care is an often overlooked secret to brewing excellence.
Have you ever fallen into this trap? Let me know in the comments.
Keeping Your Coffee Gear in Peak Condition
Investing in quality equipment is only the first step; maintaining it over time ensures longevity, consistent performance, and optimal results. For home baristas, understanding the right tools and routines can transform your coffee routine from a series of guesswork to a reliable process. I personally rely on a few specialized tools that have made significant differences in my setup, especially when it comes to grinder calibration and machine health checks.
One essential item I swear by is a calibrated scale. It helps me measure shot volume precisely and catch deviations early. Investing in a high-precision digital scale with a tare function allows me to monitor the exact weight of extracted coffee, ensuring consistency every time. For ongoing calibration of my grinder, I use a step-less grinder adjustment tool to fine-tune particle size and avoid deviations caused by burr wear or environmental changes.
Regular cleaning is critical. I prefer burr cleaning brushes designed specifically for espresso grinders. They reach deep into the burr chambers without disassembly, saving time and reducing wear risks. A specialized burr cleaning kit makes a noticeable impact on maintaining grind consistency. Similarly, a dedicated machine descaling solution keeps internal components free of mineral deposits that can cause pressure inconsistencies and flavor issues.
For those who want a more proactive approach, I recommend a water quality testing kit to regularly check mineral content and pH levels. Using softened or filtered water with ideal parameters can prevent scale buildup, which directly impacts long-term performance. Checking and adjusting water composition is especially important if you live in an area with hard water—something many enthusiasts overlook until it’s too late.
To predict future equipment needs, staying updated on latest machine reviews helps you anticipate technological advancements like improved PID controllers or self-cleaning features. Embracing evolving tech ensures your setup remains reliable and reduces downtime.
How do I maintain my gear over time?
The key is establishing a routine that includes weekly calibration, bi-weekly burr cleaning, and monthly descaling. Creating a schedule prevents complacency and helps you spot wear or performance issues early. For advanced users, investing in tools like a burr alignment gauge can fine-tune your grinder and further stabilize shot volume. Remember, consistent maintenance not only extends the lifespan of your tools but also elevates your brewing game to professional standards. If you’re ready to take your hobby further, try integrating a weekly water check and see how it improves both flavor and machine health—small steps with big rewards.
Over the years, I’ve discovered that the true art of home espresso brewing isn’t just about high-end gear or fancy techniques—it’s about understanding the subtle nuances that influence every shot. One of my most eye-opening lessons was realizing that burr alignment issues or slight environmental shifts can silently sabotage even the most carefully calibrated machines. It taught me to be vigilant and proactive, inspecting my equipment regularly and mastering routine maintenance. This insight transformed my approach, proving that consistent excellence stems from paying attention to the details others often overlook.
The Surprising Truths Most Barista Experts Keep Quiet About
Many of the top baristas and gear manufacturers know that even the best equipment needs constant care and understanding. I once assumed that once I dialed in my grinder, I was set for good. Turns out, burr wear and subtle machine tremors can alter shot volume over time, making my perfect shot vanish without warning. Real mastery comes from daily vigilance—checking burr sharpness, calibrating grinders weekly, and ensuring your machine sits on a stable surface. My lightbulb moment was realizing that consistency is less about flawless equipment and more about diligent maintenance.
Tools That Elevated My Home Espresso Game
I owe much of my success to a handful of reliable tools. A calibrated digital scale became my best friend, allowing me to measure shot weight precisely and catch deviations before they ruin my brew. Regular burr cleaning brushes keep my grinder performing at peak, preventing particle inconsistencies. For routine machine upkeep, a high-quality descaling solution has kept my boiler running smoothly, avoiding pressure fluctuations that can mess with shot volume. Lastly, a water quality testing kit helps me adapt to environmental changes, ensuring my water won’t sabotage my efforts. These tools might seem simple, but they pack a punch when it comes to elevating your home espresso.
Take Control and Brew Like a Pro
The journey to consistent shot volume isn’t about waiting for perfect gear—it’s about learning how your gear behaves and caring for it meticulously. Start inspecting your burrs regularly, calibrate your grinder weekly, and pay close attention to environmental factors like humidity. Remember, mastering home espresso is a continuous process; each small adjustment builds trust and skill. If you’re committed to making every shot count, dive deeper into techniques like proper tamping and distribution, which I found make a noticeable difference. The future of your home brewing depends on how much you’re willing to learn and care for your equipment—so roll up your sleeves, and let’s brew with confidence.