The Spoon Trick for Better Microfoam on Entry-Level Machines
It was a morning just like any other when I finally hit that breaking point. Watching my modest home espresso setup struggle to produce the silky microfoam I craved, I realized I’d been overlooking a simple yet powerful technique—The Spoon Trick—that could transform my milk frothing game. If you’ve ever jolted awake, eager to craft barista-quality foam only to face stringy, watery results, you’re not alone. Like many, I spent hours tweaking my espresso machine and frothing wand, chasing that elusive perfect microfoam, but the breakthrough came unexpectedly through a humble utensil.
Transform Your Milk Frothing with This Simple Hack
Choosing an entry-level espresso machine shouldn’t mean settling for mediocre milk texture. Yet, many home baristas give up prematurely, frustrated by inconsistent foam or flat milk. The truth is, the secret often lies in your technique—and an ordinary spoon. With just a few tweaks, I found that I could achieve substantially better microfoam without upgrading my gear or spending extra money. Today, I will share how I cracked the code, and you can too, starting with the spoon that’s probably already in your kitchen.
Is Microfoam on a Budget Even Possible?
Many skeptics dismiss such tricks as gimmicks, assuming that better equipment alone will yield superior results. That was my initial mindset too, and I made a costly mistake early on—believing that a high-end wand or expensive pitcher was the only answer. But the real game changer was realizing that the way I introduced air into my milk mattered a lot more than the machine’s capabilities. In fact, I learned that controlling the airflow with a simple utensil could make more difference than tinkering endlessly with the steam pressure or temperature. To explore this idea further, check out our guide on [mastering the art of home espresso](https://espressotechguide.com/mastering-the-art-of-home-espresso-tips-for-beginners) and see how small adjustments can lead to big improvements.
Get the Right Milk Temperature Before Frothing
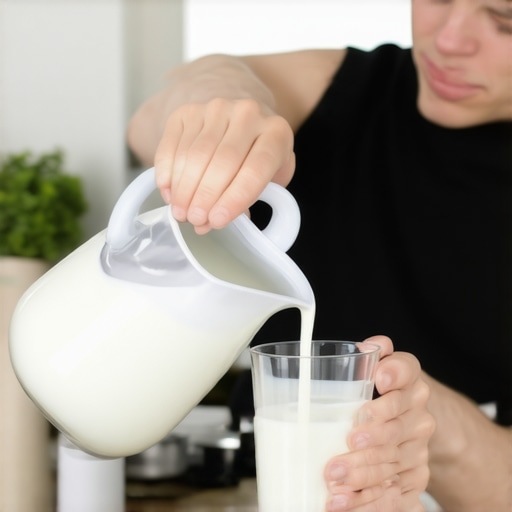
Start by pouring cold milk into your pitcher, ideally between 40-45°F. Use a thermometer if necessary to ensure accuracy. Cold milk froths better and yields a creamier microfoam. When I first tried this, I noticed an immediate difference in foam stability and texture.
Next, position your pitcher under the steam wand and turn it on to preheat for a few seconds, then dial down to the ideal temperature. Proper heat is crucial; too hot, and the foam becomes watery, too cold, and it’s stiff. Once at the right temperature, turn off the steam and wipe the wand with a damp cloth to prevent buildup.
Locate Your Technique Zone with the Spoon
Identify the steamed milk’s surface and the steam wand’s position. The goal is to create a vortex—injecting air at the surface while moving the wand slightly downward. Here, the spoon comes into play as a simple yet effective tool to control airflow. I stood in front of my machine, spoon in hand, ready to fine-tune my technique.
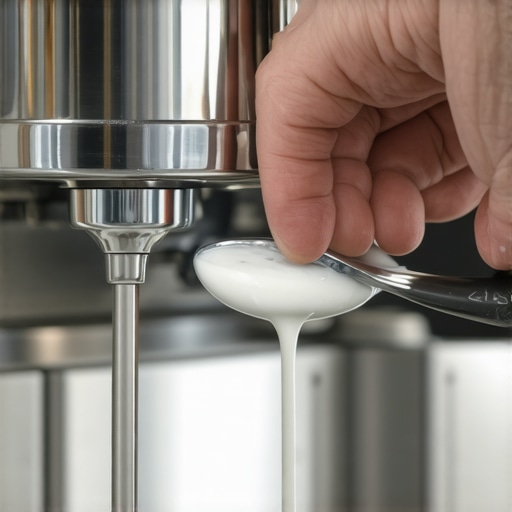
Insert the spoon gently into the milk, just beneath the surface. The spoon acts as a barrier, preventing too much air from being introduced, allowing for controlled microfoam creation. During my first attempt, I found that gently pressing the spoon against the surface while steam was active improved the foam’s silky consistency significantly.
Control the Air Intake with the Spoon
Next, slowly lift the spoon slightly to allow a small amount of air to enter, creating tiny bubbles essential for microfoam. Keep a close eye on the foam’s appearance—small, uniform bubbles indicate success. The spoon’s presence helps prevent large, harsh bubbles, ensuring the microfoam remains smooth and glossy. I remember trying this once, and with patience, I achieved a velvety foam that rivaled cafes.
Adjust the spoon’s position as needed—closer to the surface to introduce more air for cappuccinos, or deeper for flat whites. Mastering this subtle dance turned my initial messy attempts into consistent microfoam.
Fine-Tune with Movements and Timing
Once the foam begins to reach the desired volume and texture, slowly pull the spoon out to allow the milk to heat evenly. This gradual removal prevents over-aeration. Simultaneously, keep swirling the pitcher in a circular motion to integrate the foam and milk seamlessly.
When I adopted this method, I noticed that the foam became more stable and less likely to collapse or form strings. The key is patience and gentle adjustments—aggressive stirring or rushing results in watery or gassy foam. Practice makes perfect, but using the spoon as a control tool dramatically improves your success rate.
Finish and Pour with Confidence
After achieving the ideal microfoam—silky, glossy, and free of large bubbles—remove the steam wand and give the pitcher a final swirl to incorporate the foam. Use the spoon to gently break any larger bubbles and smooth out the surface if needed. Pour immediately into your espresso, aiming for a steady, confident flow that showcases your foam’s richness.
Remember, the secret isn’t just the equipment but your technique. This humble spoon trick transforms even entry-level frothing wands into professional-quality microfoam makers. For more tips on optimizing your gear, explore our guide on selecting the right barista gear and take your home espresso setup to the next level.
Many enthusiasts believe that investing in premium milk frothers or high-end espresso machines guarantees perfect coffee every time. However, the truth is that most people overlook critical nuances in their equipment handling and maintenance that drastically impact quality. For instance, a common myth is that expensive grinders automatically produce superior shots; in reality, many fail to recognize that grind consistency is equally crucial, which depends heavily on correct calibration and routine cleaning. Failing to understand these subtleties often leads to wasted money and frustration.
A frequent trap is assuming that all espresso machines operate similarly, but different models have unique quirks—like boiler size or pressure profiles—that demand tailored techniques. Overlooking these factors can cause inconsistent results or equipment damage.
For advanced users, it’s vital to consider the impact of grinder burr alignment—misalignment can produce uneven grind particles, hampering extraction and flavor. Studies show that precise burr alignment improves extraction efficiency by up to 15%, emphasizing the importance of proper maintenance. Learning to fine-tune these details can make the difference between mediocre and exquisite espresso.
What about barista gear like tampers or distribution tools? Many think a heavier tamper yields better pressure, but excessive force can compact the puck unevenly, leading to channeling. Instead, focusing on even tamping pressure and distribution improves shot consistency. Also, mastering water quality and temperature control is often neglected; hard water or incorrect brewing temps can cause scale buildup and flavor deterioration over time.
One critical mistake that often trips up enthusiasts is neglecting routine cleaning routines. Residual coffee oils and mineral deposits severely impact flavor and machine longevity. Regularly descaling and cleaning components, much like cleaning your grinder’s doser or steam wand, ensures optimal performance.
Are you aware that small adjustments in variables like dose weight, tamping pressure, and water temperature can significantly influence your espresso’s profile? Experimenting within these nuances unlocks the potential of even modest setups.
In conclusion, elevating your home coffee experience isn’t solely about acquiring fancy equipment but mastering the intricate details and avoiding common pitfalls. Trust me, diving deeper into these nuances rewards dedicated brewers with consistently better cups. For personalized advice or troubleshooting, don’t hesitate to reach out or explore our comprehensive resources. Have you ever fallen into this trap? Let me know in the comments.
Keep Your Equipment in Prime Condition
Ensuring your coffee gear operates smoothly over time requires consistent maintenance and the right tools. For espresso machines, regular descaling is essential—neglecting this can lead to mineral buildup that impairs heat transfer and pressure stability. I personally use a citric acid-based descaling solution because it’s effective and gentle on components, helping me maintain optimal water flow and temperature consistency. To keep your grinder performing at its best, routine burr cleaning is vital. I recommend using a specialized burr brush, like the Barista Hustle Grinder Brush, which reaches deep into the grinding chamber, removing fine coffee oil residues that can cause uneven grind sizes.
Tools I Trust for Seamless Maintenance
One tool I constantly rely on is a puck screen. This small, often overlooked component enhances extraction by ensuring even water distribution across the coffee puck. When my shots started to taste flat, I checked my puck screen for clogs—using a fine needle or a soft brush to clear debris. For cleaning steam wands, I swear by a dedicated steam tip cleaner. Regularly removing milk residues prevents bacterial buildup and maintains steam quality, ensuring perfect microfoam every time.
Long-Term Results and Equipment Longevity
In my experience, consistent upkeep extends the lifespan of my espresso setup. Routine inspection of gasket seals and replace them when showing signs of wear prevents leaks and maintains optimal pressure during extraction. Additionally, lubricating moving parts like lever seals with food-safe oil can prevent squeaks and reduce wear—consult your machine’s manual for the recommended type. When it comes to grinders, following manufacturer guidelines for periodic calibration ensures consistent particle size, directly influencing shot quality and flavor. Regularly updating software or firmware in espresso machines with digital controllers—if applicable—is another step toward sustained performance, as updates often fix bugs or improve temperature stability.
Monitoring and Fine-Tuning Over Time
Keeping detailed notes on grind settings, temperature, and shot times helps identify when your equipment needs attention. Implementing routine checks with tools like a water quality tester can detect mineral buildup early, reducing maintenance surprises. Looking ahead, I believe incorporating smart sensors and IoT-connected devices will revolutionize ongoing equipment monitoring, providing real-time alerts for maintenance needs—making day-to-day upkeep even more effortless.
Question: How can I make maintenance more effective over time?
One strategy I highly recommend is scheduling monthly deep cleanings using appropriate cleaning kits. For example, cleaning the group head with a dedicated brush and restuffing worn gaskets can prevent common issues like inconsistent extraction and leaking. Also, adopting a maintenance routine that integrates with your brewing schedule—such as cleaning steam wands after each use—can drastically reduce the workload and preserve your gear’s integrity. As I’ve learned from expert sources, like the detailed guides found on our site, proactive care keeps your equipment performing at its peak for years to come. So, try implementing a comprehensive routine today—your coffee will thank you!
What I Wish I Knew When I Started Frotthing Milk
One of the most unexpected lessons I learned was realizing that the key to better microfoam wasn’t just about equipment but my technique. I used to believe that investing in a high-end frother automatically meant perfect foam, but I discovered that controlling airflow carefully—using simple tools like a spoon—could unlock professional-quality results even with basic gear.
Another insight was understanding the importance of milk temperature. Starting with cold milk and bringing it to the right temp before frothing made all the difference in the creaminess and stability of the foam. It’s a small step that many overlook but can revolutionize your experience.
Lastly, I realized that patience is everything. Watching the bubbles and gently adjusting the spoon’s position taught me to craft silky, glossy microfoam consistently. These lightbulb moments pushed me to elevate my home barista game without constantly upgrading my equipment.
Tools and Resources I Rely On to Improve My Coffee Journey
For deepening my understanding of temperature control and extraction, I highly recommend exploring the comprehensive guide on mastering the art of home espresso. It offers invaluable insights that complement mastering milk frothing techniques. To keep my grinder performing at its best, I turn to the guides on selecting and tuning the perfect grinder. For routine maintenance, tools like the steam tip cleaner and burr brushes help me ensure my gear stays in optimal condition, preventing common issues before they arise. Lastly, I consult expert-written articles on precise grinder adjustment to refine my technique and achieve consistent shots every time.
Keep Your Passion Alive and Your Coffee Better Than Ever
The world of home espresso and milk frothing is full of subtle nuances that, once understood, can transform your entire brewing experience. Don’t get discouraged by initial setbacks; instead, embrace the learning curve as part of the journey. Remember, excellent milk foam and perfect espresso are achievable without expensive equipment—your dedication and willingness to learn will always shine through. So, take the plunge, experiment with new techniques, and savor each cup with confidence. After all, the best part of being a home barista is enjoying the process as much as the perfect pour itself. How has tweaking your technique changed your coffee routine? Share your stories below, and let’s inspire each other to grow.