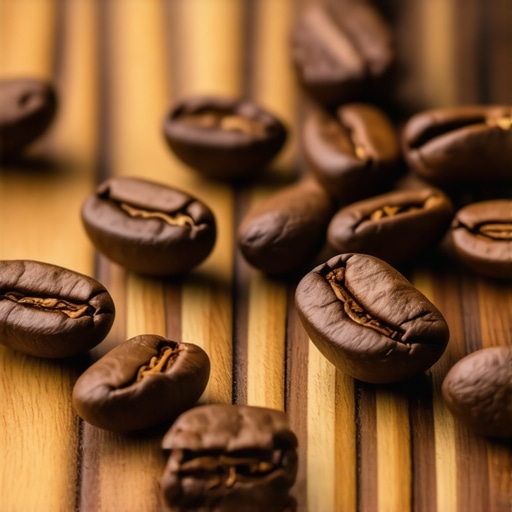
The Best Way to Degas Your Freshly Roasted Espresso Beans
Ever since I started brewing my own espresso at home, I’ve stumbled upon one persistent hurdle that always seemed to undermine my efforts: the pesky, lingering gases in freshly roasted beans. One morning, after rushing to pull a shot, I noticed an odd hissing sound, and my espresso tasted slightly sour—something I now realize was a sign of incomplete degassing. It was a lightbulb moment. Why was I sabotaging my own brew with unaddressed beans?
Why Freshly Roasted Beans Need a Breather
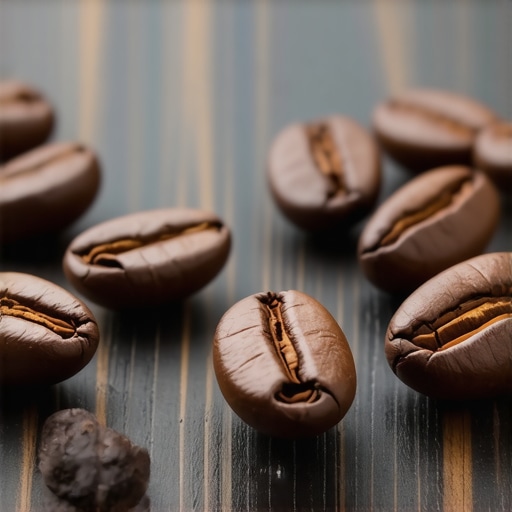
There’s a simple, often overlooked truth about espresso beans: they need time to release the excess carbon dioxide trapped inside after roasting. Freshly roasted beans can contain a significant amount of gases—sometimes up to 10% of their weight—that stubbornly linger and interfere with extraction. If you brew right after roasting, these bubbles can cause uneven extraction, bitterness, or a sour taste, and even make your espresso crackle as the gas escapes during brewing. Trust me, I’ve been there, and I didn’t even realize I was the culprit for a long time.
According to industry experts, for optimal flavor, beans should be allowed to degas for at least 24 to 48 hours after roasting, especially for espresso. Skipping this step is like trying to cook with a lid still on a boiling pot—you’re fighting against the natural process, and it shows in your cup. The good news? Once I understood the importance of degassing, I started experimenting with different methods, and my espresso improved remarkably.
In this post, I’ll share the tried-and-true techniques I’ve adopted, debunk some common myths, and help you breathe that perfect flavor into your freshly roasted beans instead of fighting against it. If you’ve ever faced a sour shot or a bubbling portafilter, keep reading—you’re about to master one of the most critical steps in home espresso making.
Is Waiting Longer Really Better for Every Bean?
Initially, I was skeptical—no one wants to wait days to brew their beans. But I made the mistake early on of roasting too frequently without giving the beans enough time to settle. That’s a mistake I see many home baristas making, and it can ruin the flavor profile of your coffee. Waiting a little longer, at least 24 hours, allows the gases to escape naturally, leading to a more balanced and rich extraction. Curious about how to tell if your beans are properly degassed? I’ll walk you through that next.
Time Your Roast Right and Prepare to Wait
Begin by roasting your beans to your preferred level, then immediately mark the date. Set a timer for at least 24 hours before brewing—preferably 48 hours for the best results. Use a timing app or a simple reminder on your phone to ensure patience. This initial delay allows the majority of the gases to escape naturally and prevents off-flavors.
Assess Bean Readiness with the Snap Test
Before grinding, perform the snap test: take a few beans and bend them sharply. If they fracture crisply and produce a sharp sound, the beans are likely degassed enough. If they bend or bend with a dull crack, give them more time. This simple test saves you from tasting sour or inconsistent shots caused by trapped gases.
Handle Beans Properly During Storage
Transfer roasted beans into an airtight, non-oxidizing container—preferably a opaque one—to slow further degassing. Store them in a cool, dark place. Avoid the temptation to constantly open the container; each time you do, you introduce oxygen and potentially disturb the degassing process. For more tips on storage, visit this guide.
Observe the Bubble Frequency and Size
Periodically check your beans for bubbling activity. Freshly roasted beans that are still releasing gases will produce small bubbles rising to the surface. As gases escape, bubbling diminishes. When bubbles are tiny or non-existent, your beans are ready for grinding. I once waited 36 hours and observed bubbles slowly reducing, which resulted in a smooth, balanced shot after brewing.
Use an Accurate Scale for Consistency
Weigh your beans before grinding to ensure you work with consistent quantities. Small variations affect how gases escape and your final flavor. Pair this practice with proper grind size adjustments—see this resource—to optimize extraction and flavor.
Avoid Rushing and Ruining the Flavor
Remember, patience during degassing is a crucial step often underestimated. Rushing to brew within the first few hours after roasting can lead to sourness, uneven extraction, and poor crema. Give your beans the time they need—trust me, it’s worth the wait. Once your beans are properly degassed, you’ll notice a marked improvement in espresso quality, with better aroma, flavor, and mouthfeel.
When it comes to espresso and coffee gear, many enthusiasts fall prey to misconceptions that hinder their progress. One widespread mistake involves assuming that all milk frothers are created equal; in reality, different types—like steam wands versus electric foaming devices—serve distinct purposes, and choosing the wrong one can lead to discouraging results, as discussed in [this guide](https://espressotechguide.com/milk-frothers-that-transform-your-coffee-experience). Another myth is that high-priced espresso machines automatically produce better coffee; however, a machine’s maintenance, proper pressure calibration, and accurate temperature control are often more critical factors, which are elaborated upon in [this resource](https://espressotechguide.com/top-rated-espresso-machines-for-coffee-lovers-in-2025). Many home baristas overlook the importance of grinder consistency, believing that a more expensive grinder always yields superior flavor. In truth, understanding the grinder’s calibration and static issues—addressed in [this article](https://espressotechguide.com/why-your-grinders-static-is-ruining-your-kitchen)—is essential for consistent results. A common beginner trap is over-tamping coffee grounds, thinking more pressure always improves extraction. Yet, pressing too hard can impede water flow, causing under-extraction and bitterness, which is thoroughly explained in [this post](https://espressotechguide.com/the-error-of-tamping-too-hard-when-using-a-precision-basket). For the advanced home barista, an often-neglected nuance is the impact of ambient humidity on grind size adjustments. High humidity can cause coffee grounds to clump and result in inconsistent extraction. Properly adjusting for this, as recommended in [this guide](https://espressotechguide.com/how-to-adjust-your-grind-size-based-on-the-humidity), can elevate your brewing game considerably. Be aware that many enthusiasts underestimate the importance of machine internal pressure stability; fluctuations can cause sour or off flavors, yet this is rarely addressed in beginner setup tutorials. Consulting experienced experts or performing internal pressure checks—as outlined in [this article](https://espressotechguide.com/how-to-check-your-espresso-machines-internal-water-pressure)—can prevent costly mistakes. Remember, jumping straight to advanced techniques without mastering foundational practices often leads to frustration. Ensuring your equipment is correctly calibrated, understanding the specific role of each component, and acknowledging environmental influences are key to elevating your home espresso experience. Have you ever fallen into this trap? Let me know in the comments.
Once you’ve invested in quality espresso machines, grinders, and frothing tools, the real key to consistent excellence lies in proper maintenance and choosing the right tools to support your brewing journey. Regular upkeep not only prolongs the lifespan of your equipment but also ensures each shot remains as delicious as the first. I personally swear by certain tools and routines that have transformed my home setup into a reliable coffee haven.
How do I maintain my espresso machine over time?
Consistent cleaning is non-negotiable. I recommend a monthly backflush with a dedicated espresso machine cleaner, such as Urnex’s Cafiza, to clear out coffee oils and residues. For daily upkeep, wipe down the steam wand with a damp cloth and purge it before and after steaming. Periodically descaling your machine with a mixture of water and citric acid helps prevent mineral build-up, crucial if you have hard water. Investing in a high-quality water filter and mineralizer, like the BWT Bestmax, drastically reduces scale formation and ensures stable temperature and pressure during brewing. According to this guide, routine maintenance directly correlates with shot consistency and longevity of your machine.
Key tools I recommend for home baristas
First, a precise digital scale such as the Acaia Pearl Model guarantees accurate dosing, critical for consistent extraction. Pair this with a burr grinder that offers micro-adjustments—my personal favorite is the Baratza Sette 270Wi—as it allows fine control especially when environmental factors change. For cleaning, a small brush with stiff bristles specifically designed for group heads helps maintain cleanliness without risking damage. To manage static and clumping in coffee grounds caused by humidity, anti-static brushes like the static reduction tools prove invaluable.
Future trends in maintenance and equipment longevity
Advances in smart tech will likely make routine maintenance more automated, with sensors alerting you to scale build-up or component wear. Companies are developing IoT-connected espresso machines that monitor usage patterns and suggest cleaning schedules, minimizing user error. As these innovations become more affordable, maintaining your setup will evolve into a seamless, hands-free process. In the meantime, establishing a scheduled maintenance routine using reliable tools remains your best bet for long-term success.
To get started today, consider calibrating your grinder’s adjustment dial to match your current humidity conditions—detailed in this article. It’s a small tweak that can dramatically improve shot consistency, especially during seasonal shifts. Remember, attention to these details elevates your brewing from routine to professional-grade. Ready to take your home espresso game up a notch? Try fine-tuning that grinder and see the difference it makes in your next cup.
How I Learned That Less Is More in the Fight Against Gases
One unexpected revelation came when I realized that obsessively trying to remove every bubble manually was futile. Instead, embracing patience and natural degassing led to more flavorful shots. This lightbulb moment reminded me that true mastery often involves surrendering control and trusting the process.
Why Picking the Right Tools Elevates Your Coffee Game
My go-to supplies, like the Acaia Pearl scale and Baratza Sette grinder, have transformed my brewing routine. They allow for consistent dosing and precise adjustments, which are crucial when fine-tuning for factors like humidity. Trusting curated tools ensures every cup is a reflection of the effort and quality I put in.
Believe in Your Coffee Journey: It’s About Progress, Not Perfection
I used to get discouraged when shots didn’t turn out perfect every time. But I learned that small improvements, like adjusting grind size based on daily conditions, accumulate over time. Celebrate these wins—each one brings you closer to those café-quality espresso moments at home. Stay curious and keep experimenting; your best shot is yet to come.