How to Stop Your Milk Pitcher from Sliding Off the Drip Tray
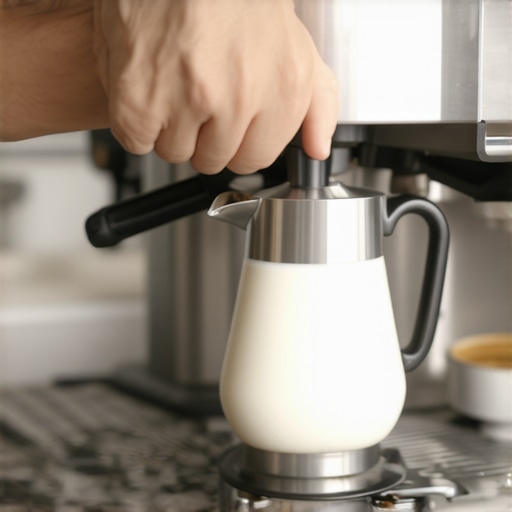
Have you ever just finished frothing your milk, only to watch your pitcher slide off the drip tray onto your floor? I’ve been there—clumsy moments that leave you sighing and cleaning up that sticky mess. It’s frustrating when your latte art dreams are derailed by something so simple yet annoyingly persistent. That lightbulb moment hit me when I realized this tiny issue was stealing minutes from my perfect brew rituals daily.
Why Does Your Milk Pitcher Keep Sliding Off?
This common problem seems trivial, but it’s more than just a nuisance. Your milk pitcher can slide if your drip tray isn’t providing enough grip or support. At first, I thought it was just my clumsiness, but after experimenting, I discovered several causes—everything from uneven surfaces to small design flaws of the drip tray itself. The real breakthrough was understanding how even minor changes in tray design or pitcher placement can make a big difference. According to some experts, slipping pitchers not only cause messes but can also lead to spills that damage your machine’s components over time. Make sure to check out this guide for tips on maintaining your drip tray to prevent scale buildup, which can affect grip too.
Is Budgeting for Better Gear Actually Worth It?
Early on, I made a mistake by assuming that any drip tray would do and that my skills were the real issue—an error I see many home baristas make. Investing in a high-quality drip tray or simple accessories transformed my workflow instantly. If you’re worried that solving this problem costs a fortune, think again. Sometimes, small adjustments or affordable upgrades provide the best return. For instance, using a different pitcher or adding a non-slip pad can make a world of difference—more info on selecting your gear can be found here.
How This Guide Will Help You Secure Your Milk Pitcher
In the next sections, we’ll explore practical, proven techniques to keep that pitcher firmly in place. No more accidental spills or floor cleanups. With a few tweaks, you’ll enjoy a more stable, safe brewing space—saving you time, mess, and frustration. Ready to take control of your setup? Let’s dive into what really works to stop your milk pitcher from sliding off that drip tray forever.
Now, ask yourself—have you faced this slipping pitcher problem repeatedly? If so, you’re not alone, and the good news is, fixing it is easier than you might think.
Choose the Right Drip Tray Material
Start by inspecting your drip tray. Opt for trays made of rubber or silicone instead of smooth plastic or metal, which provide better grip for your pitcher. I replaced my original tray with a rubber-lined version and noticed immediate improvement—the pitcher stayed put during my morning routines, even when I was distracted by my kids. For a more durable option, check out top-rated espresso machines.
Implement Non-Slip Pads or Mats
Place small non-slip pads or silicone mats under your drip tray to prevent movement. I used sticky-backed silicone drawer liners, which are inexpensive and versatile. Cut them to size, stick them beneath the tray, and place your pitcher on top—watch how your pitcher stays firmly in place even when you inadvertently nudge it. This quick fix is especially beneficial on uneven countertops or slick surfaces.
Increase Friction Between Pitcher and Tray
Apply a thin layer of silicone-based lubricant or non-slip tape to the bottom of your milk pitcher. I did this after noticing my aluminum pitchers were too smooth against my tray. The textured surface now grips better, reducing slips. Be cautious; avoid any lubricants that could stain or damage your pitcher’s surface. For tips on selecting safety accessories, visit barista gear guide.
Adjust the Pitcher’s Handle Grip
If your pitcher handle is slippery, wrap it with grip tape or a silicone sleeve. This method dramatically improves your control during steaming or pouring, and prevents accidental slips onto the floor. I found that wrapping modestly around my handle gave me a secure hold, even when my hands are damp. Consider trying different grip enhancements if you handle multiple pitchers.
Optimize Placement and Technique
Position your pitcher closer to the center of the tray and practice gentle, deliberate movements. I learned that rushing or reaching for the pitcher at awkward angles increases the risk of slipping. Use your dominant hand to steady the pitcher and keep your workspace clutter-free to reduce accidental bumps. Small but consistent adjustments like these help maintain control over the pitcher during busy moments.
Regular Maintenance and Surface Checks
Keep your drip tray clean and free of coffee grounds, scale, or residue that can reduce grip. I clean mine weekly with a mild vinegar solution, which restores its texture and cleanliness. Also, check for uneven surfaces or damage; replacing a worn tray can restore stable footing. For maintenance routines that can extend your gear’s lifespan, explore gear maintenance tips.

Why Do So Many Overlook the Impact of Material Choices in Equipment?
Contrary to popular belief, the material of your tools, such as portafilter handles or steaming wands, plays a crucial role in heat retention and grip stability. For instance, ceramic or silicone coatings may seem superficial but significantly influence performance and comfort. Some home baristas gravitate toward stainless steel for durability, but forget that thermal conductivity differences matter. A ceramic-coated tamper, for example, can help maintain consistent tamping pressure — leading to more even extraction. To choose the right accessories, check out this comprehensive guide that breaks down material benefits.
Another common myth is that premium coffee grinders are always superior; however, some budget models with sharp, well-aligned burrs can outperform pricier options if properly maintained. Regularly inspecting and cleaning your grinder with techniques detailed here ensures peak performance.
Be cautious, though, about falling into the trap of over-relying on gear upgrades. Instead, focus on mastering process nuances—like dose consistency and tamping pressure—that often matter more than equipment alone. Investing time and effort into calibration, as discussed here, can dramatically improve your shot quality.
Remember, the path to great espresso isn’t just about gear—it’s about understanding each component’s subtle impact and avoiding common pitfalls. Have you ever fallen into this trap? Let me know in the comments.
How do I keep my coffee equipment running smoothly over time?
Maintaining your espresso gear is crucial for consistent quality and longevity. I recommend investing in a high-quality cleaning schedule, including regular descaling and thorough cleaning of your grinders and machines. For instance, regularly calibrating your grinder using precise methods outlined here ensures your grind size remains optimal, directly impacting shot flavor. Using dedicated cleaning tools, like burr brushes and descaling solutions, minimizes downtime and prevents costly repairs.
Another essential aspect is choosing reliable tools tailored to your setup. I personally swear by a digital scale with pre-programmed shot timers, which allows me to perfect dosage and extraction time, leading to better flavors and consistency. Pair this with a quality milk frother, such as the recommended frothers, which offer easy cleaning and reliable performance. Adequate maintenance routines not only improve your beverage quality but also extend the lifespan of your equipment.
What tools are essential for a serious home barista?
Beyond the basics, certain tools make a significant difference. A precision tamping station ensures even pressure, and a silicone blind filter helps backflush and clean your machine’s internal components. I’ve found that investing in a good calibration card and a small toolkit designed for espresso machine repairs saves me trips to the repair shop. These tools empower you to handle minor issues promptly, reducing downtime.
Looking ahead, the trend in the industry suggests more intelligent, maintenance-aware appliances. For example, some newer espresso machines incorporate automatic descaling alerts and diagnostic functions. Staying proactive with your gear—like performing routine checks for scale and wear—prevents small problems from becoming major failures.
How do I maintain my tools and prevent long-term breakdowns?
Implementing a schedule for deep cleaning and inspection is key. Use natural descaling solutions, such as vinegar or citric acid, following manufacturer guidelines to avoid damaging internal parts. Regularly inspecting seals, gaskets, and electrical connections catches potential issues early. For grinders, cleaning the burrs from coffee oil buildup with a dedicated brush improves performance. As an added tip, regularly replacing worn parts like water filters and shower screens can prevent contamination and faulty operation.
Finally, I highly recommend trying advanced calibration techniques, which can be as simple as adjusting grind settings based on shot analysis or using a timed extraction. Improving your skill with calibration can unlock the full potential of your gear, making every shot better than the last. For detailed calibration insights, check out this guide. Take one tip today, like verifying your grinder’s burr sharpness with the paper towel test, and see how quickly your results improve. This proactive approach keeps your home espresso setup performing at its best for years to come.
Lessons I’ll Never Forget About Barista Equipment and Coffee Confidence
One of the most eye-opening lessons I encountered was realizing that consistent espresso excellence hinges on paying attention to minute details often overlooked—like the material of your drip tray or the grip on your milk pitcher. These seemingly small factors can drastically improve your workflow and shot quality. Another insight was understanding that gear investments pay off more when paired with proper technique and regular maintenance—skipping routine cleanings or calibration can negate the benefits of even the priciest machines. A third revelation was how essential patience and deliberate adjustments are—rushing to perfect that crema or milk microfoam often leads to messes and frustration. Lastly, I learned that sharing experiences with fellow enthusiasts accelerates growth—there’s always a new tip or trick waiting in online communities or local coffee workshops that can transform your approach.