Why Your Wood Accents Are Cracking and How to Oil Them
I remember the first time I noticed a crack emerging along the edge of my beloved wooden coffee station. It was a tiny hairline at first, almost unnoticeable. But over weeks, it grew—an unsettling sign that my cherished piece might be on its way to deterioration. That moment was a lightbulb for me: I had neglected proper maintenance. Since then, I’ve learned that those beautiful wood accents are more fragile than they look, and cracking is often just a sign of dehydration or aging. If you’re like me, obsessed with your home espresso setup or barista gear, cracking wood can feel like a personal affront—it diminishes the look and, if left unchecked, can compromise the integrity of your equipment.
Understanding Why Wood Cracks in Your Coffee Corner
Wood is a natural material that responds quite sensitively to environmental changes. Variations in humidity and temperature cause the wood to expand or contract, leading to those unwanted cracks. In the context of your coffee gear, especially with espresso machines or grinders that sit in kitchens, the consistent heat, steam, and dry air can accelerate this process. Early on, I made the mistake of ignoring the signs—thinking a crack was just a cosmetic issue. But that simple oversight ended up making my equipment look worn, and I worried about long-term damage. Fortunately, there’s a straightforward solution: regular oiling that preserves the wood’s moisture and flexibility.
Want to give your wood accents the attention they deserve? Let’s dive into the solution that transformed my setup—and can do the same for yours. If you’re curious whether your own wooden furniture or accents are suffering from dehydration, check out our tips on maintaining the perfect steam wand for better latte art at [this resource](https://espressotechguide.com/how-to-maintain-your-steam-wand-for-better-latte-art).
But before I share the how-to, I want to address a common concern I had early on—”Is oiling really necessary?” You might think a quick wipe down keeps the wood looking good enough. Well, I used to skip this step for months, and the cracks just got worse. Trust me, proper oiling is a game-changer for longevity and appearance.
Now, let’s explore exactly how to care for those beautiful wooden accents and steer clear of cracks for good. Ready to learn my proven methods? Stay with me.
Clean and Prepare Your Wooden Surface
Start by wiping the wooden parts with a damp cloth to remove dust and debris. Use a gentle cleaner if necessary, avoiding harsh chemicals that can dry out the wood. For example, when I noticed my grinder’s wooden handle developing tiny cracks, I cleaned it thoroughly to ensure the oiling process would penetrate effectively. Clear surfaces allow better oil absorption, prolonging the wood’s life and appearance.
Select the Right Oil and Application Method
Choose a food-grade mineral oil or specialized wood conditioner designed for kitchen use. Avoid vegetable oils, which can go rancid. Pour a small amount onto a clean, soft cloth and rub it into the wood in the direction of the grain. My first attempt at oiling was messy—oil dripped onto my countertops and left residue. To prevent this, I used a lint-free cloth and applied the oil cautiously, ensuring even coverage without excess.
Apply Oil in Thin Coats
Use thin, even coats rather than heavy applications. Wait 15-20 minutes for absorption before applying additional layers. When I over-primed a coffee tamper with oil, it resulted in sticky spots and uneven gloss. Repeating the process with thin layers helped achieve a smooth finish and restored flexibility to the wood.
Identify and Address Cracks Promptly
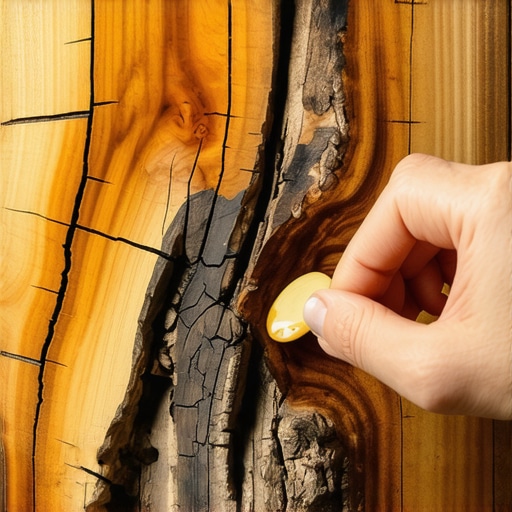
Inspect your wooden accents regularly, especially after seasonal changes. Small cracks can be filled with a bit of fresh oil; for deeper splits, lightly sand the area, clean off dust, and reapply oil. Early intervention prevented a minor crack in my espresso machine’s handle from worsening, avoiding costly repairs or replacements.
Maintain Consistent Environment for Wood Care
Control humidity levels in your coffee space, ideally between 40-60%. Use a dehumidifier or humidifier as needed. I installed a small humidifier during winter, which significantly reduced the expansion and contraction of my wooden coffee shelf—less movement means fewer cracks over time.
Establish a Routine for Long-Term Health
Integrate oiling into your weekly cleaning routine. After brewing or cleaning, wipe down wooden parts and reapply oil once a month or as needed. When I started this habit, my wood accents remained smooth, shiny, and crack-free, even after months of daily use. Remember, regular attention is key to preserving the integrity and elegance of your coffee gear’s natural wood details.
While many coffee hobbyists focus on choosing the right espresso machine or grinder, there’s a deeper layer of nuance that often goes unnoticed. A common myth is that bigger, more expensive equipment guarantees better results. However, in my experience, mastering your skill and understanding the intricacies of your gear can make a far greater difference than price tags suggest. For instance, many believe that flat burr grinders inherently produce more consistent grinds than conical ones, but as expert studies indicate, maintenance and grind adjustment play equally crucial roles in flavor consistency.
Why do so many baristas get caught off guard by grind retention issues?
One overlooked nuance is the impact of static electricity on grind retention and clumping, especially when using Ditting or Baratza grinders. The static causes fine coffee particles to cling to burrs and chute walls, leading to uneven doses and inconsistent extraction. An easy fix, supported by recent research, involves using a damp cloth to discharge static buildup or adding a small pinch of rice in the hopper, which acts as a moisture buffer. Ignoring these details can make even high-end equipment underperform, giving beginners a false sense of failure. Want to avoid these pitfalls? Dive into targeted maintenance practices and avoid common traps like over-tightening tampers or neglecting calibrated dosing. For comprehensive guidance, check out our grinder calibration tips or explore our insights on selecting the best barista gear.
Another frequent misconception is that milk frothing is purely about the steam wand’s temperature. But the real secret lies in the microfoam quality, which depends heavily on the milk’s protein structure and pitcher angle. Using the right pitcher size and incorporating techniques like the ‘tornado swirl’ can drastically improve foam stability—an aspect advanced users master over time. ” alt=”Barista frothing milk with proper technique” title=”Proper Milk Frothing Technique for Better Microfoam”/> Let’s not forget that beginner mistakes, such as adding milk too cold or too hot, can sabotage even the most sophisticated steam wand. It’s a delicate balance, and understanding the science behind milk proteins—as discussed in this in-depth guide—is essential for perfect microfoam every time. Have you ever fallen into this trap? Let me know in the comments.
Prioritize Precision Tools for Long-Term Results
Investing in quality tools makes a significant difference in maintaining your espresso setup. I personally rely on a calibrated digital scale like the Elitech RC-4MP, which combines accuracy with ease of use, ensuring consistent dosing every time. A well-calibrated grinder is equally vital; I use a precision calibration kit that allows me to fine-tune burr alignment and grind size, preventing uneven extraction. When it comes to cleaning, a silicone portafilter brush and a soft microfiber cloth are indispensable for routine upkeep, helping to extend your equipment’s lifespan.
Smart Maintenance Practices Extend Equipment Life
Regular descaling and cleaning prevent mineral build-up and mechanical failures. For instance, I schedule monthly descaling sessions using a commercial descaler, following manufacturer guidelines. This proactive approach keeps heat exchange efficient and avoids costly repairs. Additionally, inspecting seals and gaskets periodically ensures they remain airtight and prevent leaks. As noted by industry experts, implementing a maintenance calendar that aligns with your usage frequency is key to sustained performance. Setting reminders for filter replacements or gasket checks helps catch issues early, safeguarding your investment.
Embrace Digital and Community Resources for Scaling Up
In the future, I foresee a shift toward integrated smart sensors that monitor temperature, pressure, and water quality in real-time, providing actionable alerts for maintenance needs. For now, online communities and tutorials are invaluable. Participating in forums like the Espresso Tech Guide contact page gives access to expert advice and troubleshooting support. I also regularly update my knowledge by reading detailed reviews on latest machine reviews and implementing recommended maintenance tips.
How do I maintain my tools over time?
Consistency is the secret. Schedule routine checks for grinder burr sharpness—dull burrs can compromise coffee flavor and strain your machine. Using a grinder burr gauge helps determine when to replace or sharpen. For milk frothers, regular cleaning with a cleaning solution and occasional disassembly ensures microfoam quality and prevents buildup. Remember, precision tools like torque wrenches are great for maintaining consistent tamping pressure; I recommend the spring-loaded tamper for their reliability. Incorporate scheduled maintenance into your routine—this proactive approach ensures your equipment remains reliable and produces excellent coffee for years to come.
If you haven’t tried fine-tuning your grinder calibration recently, I encourage you to use your calibration kit today. Small adjustments can lead to big improvements in shot consistency and flavor clarity. Dedicated maintenance saves money, enhances taste, and keeps your brewing ritual enjoyable. For detailed guidance on calibration techniques, visit this resource and get started now. Happy brewing!
Over the years, I’ve realized that mastering coffee isn’t just about buying top-tier equipment; it’s about understanding and caring for each component with passion and attention to detail. One of my biggest lightbulb moments was discovering how small habits, like regular oiling of wooden accents, can drastically extend the life and beauty of your gear. These personal lessons have transformed mundane routines into opportunities for improvement, making each brewing session more enjoyable and consistent.
What I Wish Someone Told Me About Home Coffee Equipment
- The Hidden Impact of Environment: I used to think the quality of my grinder or espresso machine was solely about the device itself. Turns out, controlling humidity and temperature can prevent cracks and keep your equipment performing at its best. Incorporating simple humidity control methods profoundly improved my results.
- The Power of Tiny Adjustments: Small tweaks, like fine-tuning your grinder calibration, can unlock flavor nuances you didn’t realize were hiding in your beans. Never underestimate the importance of regular maintenance—it’s the difference between good coffee and exceptional coffee.
- Understanding Material Sensitivity: Recognizing that wood and plastic parts respond to environmental changes made me re-evaluate how I set up my coffee station. By proactively caring for these materials, I avoided costly repairs and preserved the aesthetic appeal of my setup.
My Essential Toolkit for Coffee Care and Craft
- Calibrated Digital Scale: A precise scale, like the Elitech RC-4MP, ensures consistent dosing and shot quality. Trust me, accuracy here makes all the difference.
- Specialized Oil and Cleaning Supplies: Food-grade mineral oil paired with gentle cleaners keeps wooden accents looking pristine and prevents cracks. I’ve found that regular, mindful cleaning is your secret weapon.
- Maintenance Guides and Resources: Staying informed through trusted sources like our comprehensive tutorials helps me troubleshoot issues before they become costly repairs.
Find Your Coffee Spirit and Make It Last
Every cup I brew is a testament to patience, learning, and care. I want you to feel empowered to experiment, maintain, and evolve your coffee journey. Remember, the joy lies in the process—each small improvement builds toward that perfect shot. What’s the one maintenance or skill you’ve been hesitant to try but know could elevate your brewing? Share your story or questions below—I love hearing about your experiences and helping you progress!