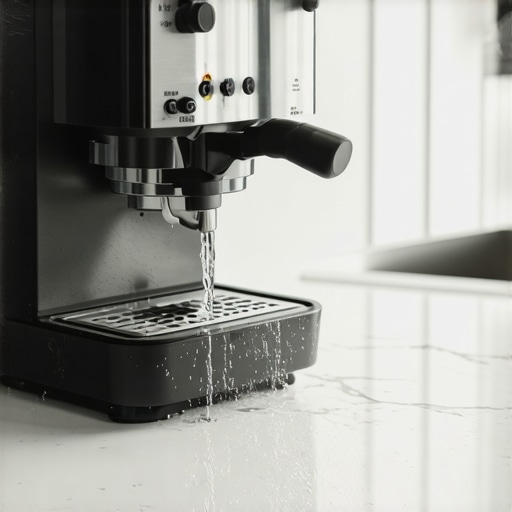
I remember the exact moment I realized my shiny new espresso machine was leaking water all over the countertop. It was a busy morning; I was eager for my first shot of espresso, but instead, I found a small puddle forming at the base. Frustration washed over me—I’d only had the machine for a few months, and now I was faced with an unexpected leak. Has this happened to you?
If you’re like me, you rely on your espresso machine to kickstart your day, and a leak can feel like the worst kind of home barista disaster. But here’s the good news: many leaks are fixable once you understand what’s causing them.
Why Your 2026 Espresso Machine Might Be Leaking Water
Leaking water from your espresso machine isn’t just a nuisance; it can be a sign that something’s wrong internally. Early on, I made the mistake of ignoring small drips, thinking they’d stop on their own. That was a costly error because ignoring leaks can lead to more severe damage or even voiding your warranty. After some digging, I discovered that leaks often result from three main issues:
1. Worn or damaged gaskets and seals. Over time, the rubber components that secure water within the machine can degrade, especially if your machine is used frequently.
2. Cracked or loose water reservoirs. Sometimes, the container that holds water develops cracks or isn’t properly seated, leading to drips and puddles.
3. Blockages or clogs in the drainage system. Build-up of mineral deposits or coffee oils can cause clogs, resulting in water leaking unexpectedly.
Understanding these common causes can save you time and money. For instance, I learned that regularly checking and replacing gaskets can prevent leaks before they start, which you can read more about on the [Ultimate Guide to Home Espresso Machines and Barista Gear for 2025](https://espressotechguide.com/ultimate-guide-to-home-espresso-machines-barista-gear-for-2025). That knowledge made me a better home barista—and kept my machine dry.
So, if your 2026 espresso machine is leaking water, don’t panic. We’ll walk through some straightforward steps to identify and fix the problem. Before diving into solutions, consider: Have you recently noticed water around your machine, or has the leak just started? Recognizing when it first occurred can help target the cause.
Now that you’re familiar with the most common culprits, let’s explore how to troubleshoot and repair your machine, ensuring you get back to brewing flawless cups without the mess.
Empty the Water Reservoir and Inspect for Cracks
Start by unplugging your machine and removing the water tank. Carefully examine it for visible cracks, warping, or deposits that might impair sealing. If you notice any damage, replacing the reservoir is essential—check out options for water reservoir replacements. Remember, a cracked reservoir is like a leaky boat—the source of the problem must be replaced rather than patched.
Check and Replace Worn Gaskets
Gaskets are the rubber seals that keep water contained within the machine. Over time, they become brittle or shrink, allowing leaks. Carefully disassemble the relevant parts—consult your manual or gasket maintenance guides. Remove the old gasket and install a new one, ensuring it fits snugly around the perimeter. Think of it like replacing the O-ring on a garden hose—it prevents water from escaping at the connection point.
Clear Blockages in Drainage Channels
Leaking can also stem from clogged drainage systems. Remove the drip tray and check the drainage channels—use a pin or thin brush to dislodge mineral build-up or coffee grounds that might cause water to back up and leak out. Regular descaling routines are vital; learn how to keep your machine in top shape through resources like descaling techniques. Clearing these pathways restores proper water flow, eliminating overflow points.

Secure Loose Connections and Fittings
Vibration and prolonged use can loosen fittings or connections—think of it as tightening the lug nuts on a wheel. Use a wrench or screwdriver to tighten any visible fittings gently. Be cautious not to overtighten, as plastic threads can strip. Refer to detailed installation tips, ensuring all internal joints are snug and secure. Proper tightening prevents water from sneaking out through gaps.
Replace or Recondition Internal Components
If the leak persists after these steps, internal parts such as valves or seals might need replacement. Consult the Make Your Repair guide or visit a qualified technician—sometimes a thorough reconditioning is more cost-effective than purchasing a new machine. Remember, regular maintenance—like replacing worn grinder components—extends your machine’s lifespan and prevents leaks.
Many espresso enthusiasts believe that simply owning the latest high-end espresso machine or multiple grinder burrs guarantees perfect coffee, but this is a misconception rooted in superficial understanding. A common myth is that more expensive gear automatically produces better results, yet even top-tier machines can underperform if not properly maintained or if user habits are flawed. For example, many assume that high RPM grinders always yield better extraction, but in reality, slower, conical burr grinders often preserve delicate coffee aromas better, as supported by recent studies indicating that slower grinding reduces heat buildup and static, resulting in more uniform grounds.
Another hidden nuance is the importance of grind size consistency; many neglect that even a $100 grinder can outperform premium models if it offers more uniform particle distribution. This aligns with findings from barista training experts who emphasize that grind uniformity has a more significant impact on shot quality than the grinder’s brand or price. Moreover, some home baristas fall into the trap of over-tamping, thinking that pressing harder increases extraction, but excessive tamping compresses the coffee unevenly, causing channeling and negative flavor extraction. It’s the subtle adjustments—like proper tamp pressure, calibration, and timing—that truly elevate espresso quality.
A frequently overlooked fact is that microfoam quality from milk frothers hinges on steam wand technique rather than the frother’s price. Many assume that expensive steam wands automatically produce silkier foam, but skillful wand handling—maintaining consistent tip position and pressure—is what creates velvety microfoam, regardless of the equipment budget. To master this, consulting resources on proper steaming techniques is essential, as outlined in the comprehensive barista gear guide.
Additionally, the real secret lies in routine maintenance and calibration—neglecting gasket replacements or ignoring local water quality can sabotage even the best gear’s performance. For example, gaskets should be replaced every six months to prevent leaks and maintain optimal pressure, a nuanced point that many overlook, leading to sour shots or inconsistent crema. Regular descaling is equally crucial, especially in areas with hard water, to avoid mineral buildup that can clog internal channels and alter pressure dynamics.
In essence, the most significant advancements in home barista excellence aren’t about new gadgets but mastering the subtle art of routine, calibration, and technique. For a detailed overview of how the right grinder can transform your espresso, consider exploring the top grinder picks. Remember—practice, patience, and understanding the nuances are what truly separate the casual maker from the home barista pro. Have you ever fallen into this trap? Let me know in the comments.Maintaining your home espresso setup over time requires more than just occasional cleaning; it demands a systematic approach to tools, preventative maintenance, and understanding the evolving needs of your gear. First and foremost, investing in high-quality cleaning supplies such as descaling solutions and gasket lubricants can extend your machine’s lifespan dramatically. Personally, I rely on specialty espresso cleaning tablets that are specifically formulated to tackle coffee oils and mineral deposits without damaging delicate internal valves. Regularly scheduled descaling using these products keeps internal pathways clear and ensures consistent pressure and temperature, which are critical for excellent extraction. You can learn more about optimal descaling routines in our comprehensive guide on milk frothers and machines. An often overlooked aspect is the condition of your grinder burrs. Sharp, well-maintained burrs produce more uniform grounds, which directly impacts shot consistency. I recommend checking burr sharpness every 1,000 grams of coffee or when you notice a decline in grind uniformity, and replacing or reconditioning as needed. For this, I use a burr grinder adjustment tool that allows me to calibrate grind size precisely, ensuring I’m not over-extracting or under-extracting. My personal practice is to keep a log of grind settings for different beans and roast levels, which helps in maintaining consistency over long periods. This approach is backed by research indicating that precise calibration plays a critical role in maintaining flavor profiles over time.
Beyond tools, I schedule a quarterly review of all seals, gaskets, and O-rings, replacing them proactively before leaks develop. According to this detailed gasket maintenance guide, proactive replacement can prevent common issues like water leaks and inconsistent pressure. To streamline this process, I keep a small toolkit with a set of precision screwdrivers, gasket removal and replacement kits, and a silicone-based gasket lubricant. Applying appropriate lubricant ensures that seals remain pliable and effective without over-application, which can cause issues.
Another essential habit involves firmware or software updates if your machine features digital controls. Manufacturers occasionally release updates that optimize performance or resolve known bugs. I make it a point to check the manufacturer’s website every few months.
Finally, scaling your setup progressively can help in managing long-term maintenance. As your skills improve and your collection of gear grows, integrating dedicated cleaning stations and storage containers for spare parts ensures your setup remains organized and functional. For example, having a designated basket for used filters, tampers, and calibration tools keeps your workspace tidy and reduces downtime.
Looking ahead, the trend is moving toward smart maintenance systems—machines that alert you when parts need replacement or cleaning. For now, adopting routine checks, quality tools, and proactive replacements will keep your espresso setup performing at its best for years to come. Why not try a detailed burr calibration today? It’s a simple step with a big payoff in shot consistency and flavor clarity.
The Hidden Lessons That Changed My Espresso Game
One of the most eye-opening lessons I learned was how tiny details make all the difference. For example, I used to ignore the importance of regular gasket replacements, thinking they were just minor parts. Discovering that worn gaskets are often the root cause of persistent leaks shifted my entire approach—preventative care is key to keeping your favorite machine running smoothly. Additionally, I realized that mineral buildup in the internal channels can lurk silently until it causes a major leak or pressure issues, making descaling routines non-negotiable. Lastly, the myth that high-end machines don’t need as much maintenance was shattered when I saw how neglecting simple tasks like tightening fittings or checking seals could cause expensive problems—so stay proactive, and your machine will thank you.
![Why 2026 AI Pressure Profiling Fails on Light Roasts [Fix]](https://espressotechguide.com/wp-content/uploads/2026/04/Why-2026-AI-Pressure-Profiling-Fails-on-Light-Roasts-Fix.jpeg)


Leave a Reply