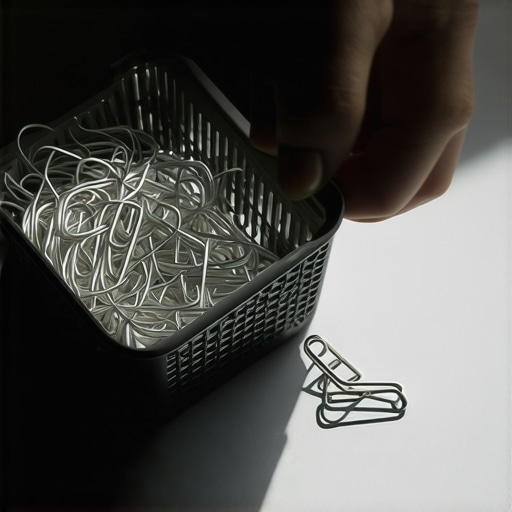
The Paper Clip Trick for Clearing a Clogged Basket in Seconds
There I was one Saturday morning, staring at my espresso machine with a look of pure frustration. The basket was clogged again, and my carefully pulled shot was stubbornly refusing to cooperate. I had tried every common cleaning hack, but nothing seemed to work quickly or effectively. It was in that moment of exasperation I remembered a quirky trick I read about—using a paper clip to clear out those stubborn clogs in seconds. I was skeptical but desperate enough to give it a shot.
Why Clearing a Clogged Espresso Basket Can Wreck Your Mornings
If you’ve ever experienced a lingering blockage in your espresso machine, you know how it can throw off your entire day. A clogged basket reduces extraction quality, ruins your shot, and often leaves a lasting mess. Regular maintenance helps, but sometimes, despite diligent cleaning, stubborn residues or build-up can cause frustration. That’s where the Paper Clip Trick comes into play—a quick, low-tech, inexpensive hack that can save you precious time and restore your coffee ritual.
Is a Little Metal Hack Really Worth the Hype?
Initially, I feared I might damage the delicate parts of my machine, especially after making the mistake early on of blindly poking around without understanding the mechanics. But with proper caution, I discovered this method could be surprisingly effective. It’s a simple act of gently dislodging trapped grounds or oil residues in the basket, which often are the culprits for those stubborn clogs. To avoid damage, I made sure to use a clean paper clip and work carefully, not forcing anything. My first attempt was a bit messy, but it worked like a charm, and I was back to brewing expertly in no time.
In fact, I found that many home baristas and even seasoned enthusiasts swear by this quick fix for minor blockages—saving hours of cleaning and costly service calls. If you haven’t tried it yet, you might be missing out on a secret weapon for regular maintenance—which could be the difference between a mediocre shot and a stellar espresso every morning.
Curious if others have faced similar frustrations? Keep reading, because I’ll walk you through how this simple paper clip trick can become your go-to for instant basket clearance. Trust me, once you get the hang of it, you’ll wonder why it took you so long to discover this hack.
Mastering the Art of Basket Maintenance
Before diving into the steps, it’s worth noting that not all clogs are equal. Sometimes, the blockage might signal an underlying problem, like scale buildup or worn-out parts. For a comprehensive guide on keeping your machine in top shape, check out my post on 3 Ways to Stop Static Cling in 2026 Moisture-Sensing Grinders
Prepare Your Workspace and Gather Supplies
First, ensure your espresso machine is turned off and unplugged to prevent any accidental activation. Remove the portafilter and detach the basket from the handle. Gather a clean, thin paper clip—preferably one with a slight curve—since its rigidity and size make it perfect for dislodging stubborn grounds without damaging delicate parts. I recommend cleaning the paper clip thoroughly with hot water before use. Remember, avoid using any metal tools that could scratch or deform your basket.
Positioning and Inserting the Paper Clip
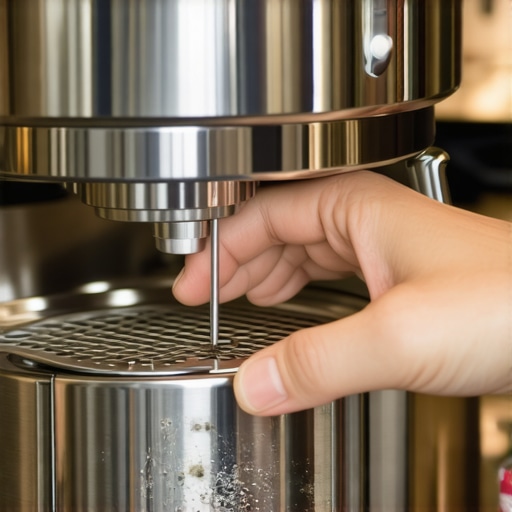
Hold the paper clip with a steady hand, gently inserting its tip into the small holes or channels inside the basket where the grounds or oils tend to accumulate. Think of the basket as a tiny maze where residues settle; the paper clip acts as a miniature crowbar to pry loose trapped debris. During my first attempt, I carefully navigated around the edges, slowly working the clip back and forth. It was a bit messy—the grounds dislodged and fell into the trash—but the process was effective. A key tip is to work slowly, avoiding any excessive force that could warp or crack the basket.
Dislodging and Extracting Clogged Residues
Gently wiggle and twist the paper clip to loosen tight blockages. Pay special attention to the corners and edges where residual coffee oils and fines tend to build up. The idea is to create enough space for water and coffee to flow freely during your next brew. If you encounter stubborn, hardened residues, soak the basket briefly in warm vinegar water (1:1 ratio) before reattempting. This softens the build-up and makes removal easier. I once left a basket soaking overnight, then used the paper clip with much less resistance, reducing the risk of damage.
Final Cleaning and Reassembly
After clearing the blockage, rinse the basket thoroughly with warm water to wash away loosened debris and vinegar residues. Use a soft brush to gently scrub any remaining oils or fines—something like a toothbrush can be very effective here. Once clean, dry the basket completely to prevent rusting, especially if it’s made of stainless steel. Reassemble the portafilter and attach it back to your machine, ready for brewing. Trust me, this quick fix took me just less than five minutes, yet it restored proper water flow and shot quality—saving me from costly repairs and wasted beans.
Regularly checking and maintaining your baskets using this method will extend their lifespan and improve your espresso consistency. For more insights on cleaning techniques and maintenance hacks, feel free to explore my post on how to remove rancid oil build-up. Remember, a little proactive care keeps your brew clean and vibrant every morning.
 Many enthusiast home baristas focus on selecting shiny new espresso machines or fancy grinders, but let’s shift the lens to what lurks beneath the surface of common wisdom. Contrary to popular belief, simply owning high-end gear doesn’t guarantee perfect espresso. An often-overlooked nuance is how the *calibration and maintenance of your equipment* can directly impact shot quality more than the brand or price. For instance, many assume that a grinder’s size or slow RPM automatically correlates with better extraction, yet without proper burr alignment and periodic cleaning, even premium grinders can produce inconsistent results. Regrettably, some tend to overlook the impact of static buildup in grinders, which can cause uneven dosing—a detail that’s crucial during light roasts where grind uniformity is more sensitive. To truly master your setup, understanding how to prevent issues like static or moisture in your grinder—more common than you think—is essential. For example, static can make dosing unpredictable, leading to channelling and under-extraction, which ruins the delicate flavor nuances of light roasts. Did you know that static issues can be dramatically reduced by techniques like humidifying your grinder environment or using anti-static accessories? This is just one of many nuances that espresso aficionados often miss. Additionally, many assume that milk frothers, especially automatic ones, automatically produce perfect microfoam. In reality, they often require precise *pitch and temperature calibration*, or even cleaning of frothing nozzles, to avoid large bubbles or scorched milk. Overlooking such details can turn a simple cappuccino into a disappointingly flat or scalded beverage. This misstep underscores the importance of understanding the advanced maintenance routines that keep your gear performing at its best, like regularly flushing boilers and checking for scale build-up—issues that might seem minor but can cause significant flavor deterioration over time. Have you ever fallen into this trap? Let me know in the comments. For example, scale buildup in boilers, often silent but deadly, can be detected early through signs like increased start-up time or hissing noises. Learning to identify and address these subtleties, such as flushing your boiler periodically or checking for scale with simple tools, can save you expensive repairs down the line. Ultimately, perfecting your home espresso experience isn’t just about buying the latest gear; it’s about understanding the hidden nuances and maintaining your equipment wisely. By paying close attention to details like grinder static, boiler scale, or calibration of your milk frother, you elevate your craft from amateur to barista-level mastery. Dive into my detailed guides on static reduction and scale detection to keep your equipment humming and your shots tasting sublime. Remember, mastery is a journey, not a destination—stay curious and vigilant in your maintenance routine.
Keeping Your Equipment in Top Shape for Consistent Results
Investing in high-quality espresso gear is only half the battle; the real challenge lies in maintaining it diligently over time. Regular upkeep ensures longevity, preserves flavor clarity, and keeps your setup performing at its peak. I personally swear by a combination of monthly deep-clean routines and real-time quick fixes that prevent minor issues from escalating. Using the right tools makes all the difference—think precision calibration instruments, specialized cleaning kits, and smart sensors that help diagnose problems early.
For example, a calibrated rotary pump can significantly reduce noise and improve pressure stability, ultimately leading to better extraction consistency. I’ve found that investing in a good digital scale with instant response time allows me to fine-tune dosing to the gram, essential for light roasts where precision is critical.
As technology advances, a trend toward smarter maintenance solutions is emerging. IoT-enabled machines can alert you to scale buildup or temperature inconsistencies, making preventative care easier than ever. Yet, I advise against leaning solely on automation; manual checks, like inspecting boiler pressure with a reliable gauge or periodically cleaning grinder burrs with a static bar, remain indispensable.
How do I maintain my espresso setup over time?
First, schedule regular deep-cleanings—at least once a month—using high-quality cleaning agents compatible with your machine. Keep a detailed maintenance log to track when each task is due, which prevents overlooking critical steps like descaling or inspecting electrical components. For boiler maintenance, I consistently check for signs of scale accumulation by monitoring startup time and performing the scale detection test. Implement water softening solutions if you notice increased buildup, as scale can dramatically impair thermal performance and flavor. Remember to replace worn-out seals and gaskets periodically, especially in high-use scenarios. Staying vigilant with these routines means fewer repairs and more time enjoying perfect espresso shots daily. For more in-depth techniques, I recommend exploring advanced calibration methods, like adjusting pressure profiling sensors, which can be explored in expert guides and forums dedicated to espresso machine maintenance.
Unlocking the Hidden Truths That Elevate Your Espresso Game
Over time, I realized that the most profound lessons about home espresso aren’t found in brand advertisements or glossy manuals, but in the subtle quirks and overlooked details of our gear. One lightbulb moment was discovering how tiny misalignments in grinder burrs could cause muddy shots, prompting me to refine my calibration practices. Another valuable insight was understanding how scale buildup inside boilers silently undermines thermal stability, emphasizing the importance of regular descaling routines. These lessons might seem small, but they can transform your brewing process entirely.
Learning to spot issues like static in grinders or microfoam inconsistencies in milk steaming has helped me troubleshoot quickly, saving time and beans—crucial when perfecting light roasts or complex blends. Embracing continuous learning, I dove into lesser-known topics like proper portafilter timing and pressure profiling, which paid off in consistent shots and rich flavors. The key takeaway? Being curious and attentive to your gear’s quirks often yields far more improvement than simply upgrading equipment or following standard advice. Your journey as a home barista is unique, and uncovering these hidden truths can set you apart in achieving espresso excellence.
Craft Your Own Espresso Symphony with Trusted Tools
My toolkit for maintaining and enhancing my setup has evolved into a curated collection of trusted resources. First, a high-precision calibrated rotary pump ensures steady pressure and quiet operation—vital for consistent extraction. Second, a professional-grade static reduction tool keeps fines from drifting into your dose, especially important for light roasts. Third, for me, regular reading of comprehensive guides like static mitigation techniques and scale management strategies have been game-changers. These resources help me stay ahead of maintenance pitfalls, ensuring my espresso remains crisp and flavorful.
Another cornerstone has been my trusted community of fellow enthusiasts—forums, articles, and recipes that push me to experiment and refine. Remember, investing in knowledge and quality tools constantly pays back in richer flavors and smoother workflows. Your home setup should be a canvas for your passion, enriched continuously by reliable sources and a curious mind.
Take Action and Create Your Espresso Legacy
Every espresso lover has the potential to turn mundane routines into moments of mastery. Don’t underestimate the power of small, consistent improvements—like a quick paper clip fix or routine descaling—that keep your gear performing at its best. By staying vigilant and embracing ongoing education, you carve a path toward barista-level results in your very own kitchen. Every shot is an opportunity to learn, adapt, and perfect your craft. Remember, the journey to superb home espresso is a marathon, not a sprint, and your dedication will pay off in cups full of joy and flavor. So, what step will you take today to refine your espresso ritual? Share your plans below and inspire others on their journey.