Stop Tapping Your Portafilter: 3 Errors That Actually Cause Channeling
Have you ever watched your espresso shot emerge with uneven streams, revealing the dreaded channeling that spoils your perfect brew? I remember the moment I realized my own habit of tapping the portafilter after tamping was actually making things worse. It was a lightbulb moment—turns out, the way I handled my portafilter was unintentionally inviting uneven extraction and bitter, weak shots.
Why Your Tapping Might Be Wreaking Havoc on Your Espresso
Espresso is a delicate dance of precision, and small mistakes can throw everything off. One common issue that many home baristas overlook is how they tamper with or handle their portafilter. Tapping or knocking on the portafilter after tamping might seem innocent, even helpful to settle the coffee grounds. But in reality, this habit can disturb the uniformity of your puck, creating paths of least resistance—the perfect breeding ground for channeling.
Prompted by my own struggles with uneven shots, I dove deep into troubleshooting. I found that many beginners and even seasoned amateurs make mistakes that they don’t even realize. These errors shape the consistency of their espresso, impacting flavor, texture, and ultimately, their daily coffee ritual. If you’ve ever poured a shot that tasted flat or looked like it was fighting to make it through the puck, you’re not alone.
The good news is, understanding and avoiding these common errors can unlock better extraction and more consistent results. Over the years, I’ve learned that small adjustments—like how you prepare your puck—make a big difference. Leaking group heads or improper tamping pressure often go hand-in-hand with how we handle our portafilters.
So, today, I’ll share the top three mistakes that could be causing channeling in your brew—and how to fix them for good. Ready to upgrade your home espresso game? Let’s get into it.
Is Over-Tapping Your Portafilter Actually Worth the Hype?
When I first started making espresso, I believed that gentle tapping was part of a proper tamping ritual. But I learned the hard way that aggressive, hasty taps can disrupt the coffee bed, creating uneven pressure points. A premature or excessive tap can cause the grounds to shift, leading to uneven extraction and channeling. This mistake tarnished my shots—and I was convinced that more tamping meant better tamping, which isn’t true. In fact, some research suggests that consistent, gentle tamping is far more effective than multiple firm taps, which risk breaking apart the puck’s integrity.
If you’ve faced similar frustrations with your espresso, or wondered why your shots sometimes run thin or uneven, I invite you to consider your tamping and handling techniques. Sometimes, fixing subtle habits can revolutionize your brewing results. Ready to learn how to perfect your puck preparation? Keep reading—next, I’ll guide you through the precise steps to prevent channeling and get that sweet, creamy shot every time.
Employ Consistent, Gentle Tamping Techniques
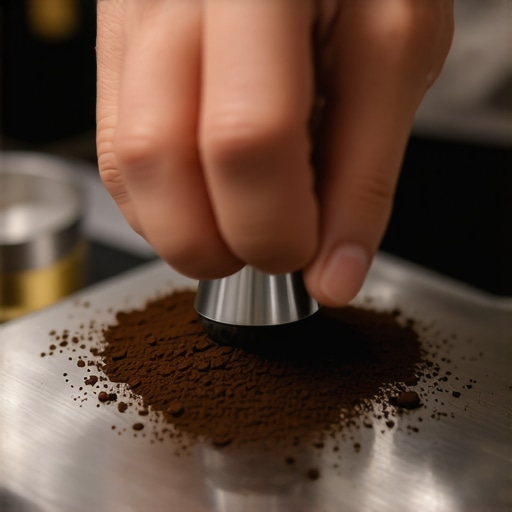
During my first few attempts, I quickly learned that pressing down with all my might did more harm than good, causing the coffee bed to shift and create uneven pressure points. Instead, I adopted a firm but gentle approach—pressing with about 30 pounds of force, akin to pressing a sneaker into a pillow. To achieve this, I used a calibrated tamper or a bathroom scale to practice applying uniform pressure. This prevents the puck from becoming distorted or uneven, reducing the risk of channeling. For precise tamping, consider using a tamper with a level indicator, ensuring consistent pressure every time. Remember, pressure consistency is more crucial than tamping speed or force. When I committed to gentle, uniform tamping, my shots became noticeably smoother and more balanced.
Ensure Even Coffee Distribution Before Tamping
Uneven distribution of coffee grounds can cause the puck to be lopsided, creating weak points for water to channel through. I started leveling my coffee with a distribution tool or even a simple back-and-forth tap with a spoon to settle the grounds evenly in the basket. Imagine pouring sand into a jar—if one side is higher than the other, you’ll get uneven settling. After distributing, I gently tapped the sides of the portafilter to settle the grounds further, then used a calibrated tamper to press down evenly. This sequence helps create a uniform puck, essential for consistent extraction. If you’re struggling with uneven shots, try incorporating a distribution step before tamping to smooth out these issues.
Use Proper Tamper Placement and Technique
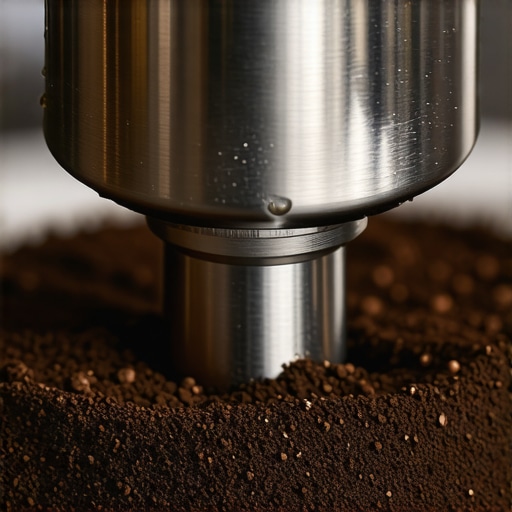
It’s tempting to start tamping immediately after distribution, but I found that centering the tamper perfectly is essential. Align the tamper squarely over the coffee bed, making sure it’s level and supported from all sides. Press straight down, avoiding tilting or applying uneven force, which can cause the puck to tilt or crack. Think of the process like pressing a button—the force should be steady, not hurried or uneven. To verify, you can lightly lift the tamper before pressing down to ensure it’s centrally aligned. When I paid attention to placement and technique, my shots became more uniform, greatly reducing channeling and improving flavor extraction.
Maintain a Tamped Puck with Minimal Disturbance
After tamping, I avoided the instinct to tap or knock on the portafilter—this habit can disturb the puck’s integrity. Instead, I gently wiped the surface with a dry cloth to remove any loose grounds, preventing bits from falling into the machine. If you need to level the surface, do so with a flat tool or your tamper, applying a gentle pressure to smooth out any uneven spots. Additionally, check that your tamping station is stable; a wobbling tamping mat or uneven work surface can introduce inconsistencies. In my experience, maintaining this steady process eliminated unnecessary puck disturbance, resulting in more consistent shots.
Optimize Your Grinder for Freshness and Uniformity
Beyond tamping, the grind size directly impacts how the coffee puck forms and extracts. I found that using high-quality burr grinders calibrated to a fine, consistent grind helped produce a uniform puck resistant to channeling. Regularly cleaning the grinder blades and burrs ensures even particle size, preventing weak spots in the puck. For fresh beans, I recommend storing them in a sealed bag or container, away from light and heat, and grinding just before brewing for maximum freshness. An inconsistent grind or stale coffee can lead to uneven extraction, regardless of your tamping technique. For specific details on grinder calibration, refer to the [light roasting calibration tips](https://espressotechguide.com/why-multi-modal-burrs-crush-flat-burrs-for-2026-light-roasts). When all these core steps are synchronized, you’ll notice a significant reduction in channeling and a richer, more balanced espresso.Many home baristas believe that owning top-tier espresso machines or fancy frothers automatically guarantees perfect coffee. However, even the most sophisticated gear can be undermined by overlooked nuances. For instance, a common myth is that high-end coffee grinders are foolproof; in reality, improper calibration or neglecting regular maintenance can cause uneven grounds, leading to inconsistent extraction. It’s tempting to focus solely on the machine’s specs, but small details—like grinder burr alignment or timing of descaling—often make a bigger difference in shot quality.
Another prevalent misconception involves milk frothing devices. Many assume that high-power steam wands alone produce perfect microfoam. Yet, without understanding how steam pressure and tip design influence bubble formation, even premium frothers can yield large, unwieldy bubbles. Proper technique, combined with gear understanding, is essential for restaurant-quality milk.
Advanced enthusiasts often stumble upon the trap of over-relying on barista tools without mastering their fundamentals. For example, attempting complex pressure profiling on an espresso machine without verifying sensor calibration can lead to mismatched results. It’s crucial to ensure your sensors and pressure valves are correctly calibrated—something overlooked by many, but vital for consistency. For tips on calibration, visit [this guide](https://espressotechguide.com/is-your-2026-multi-boiler-overheating-3-sensor-calibration-tips).
Have you ever fallen into this trap? Let me know in the comments.
A hidden nuance worth noting is how coffee grind quality directly impacts both extraction and equipment longevity. Using stale or inconsistent grounds can cause clogs, uneven wear, and ultimately, machine failures—especially in grinders with delicate burrs. Regularly updating your grind size and ensuring beans are stored properly can extend the lifespan of your gear and improve your espresso. To optimize your grinder settings for various roasts, consider reading [this detailed post](https://espressotechguide.com/why-multi-modal-burrs-crush-flat-burrs-for-2026-light-roasts).
Paying attention to these often-neglected details can elevate your home setup from good to professional quality. Remember, the devil is in the details—and in coffee, small nuances create big flavor differences.
Keep Your Equipment in Peak Condition with the Right Tools
Maintaining your espresso setup isn’t just about cleaning; it’s about investing in tools that extend the lifespan and performance of your gear. I personally rely on a few specific instruments to keep my machine running smoothly. For example, a high-precision calibrated pressure gauge helps me monitor pressure stability during extraction, ensuring consistent shots. Calibrating your grinder’s burrs with a professional gauge guarantees uniform particle size — a crucial factor in preventing channeling and uneven extraction.
Another essential tool is a cleaning brush kit designed for portafilters and group heads. Regularly removing coffee oils and residues prevents clogs and maintains optimal heat transfer. I also use a smart water filter to eliminate mineral deposits, notably prolonging boiler and internal component life.
Incorporate Advanced Maintenance Routines
Beyond basic cleaning, routine descaling is vital. I schedule descaling based on water hardness — typically every 1-3 months — using a specialized descaling solution. For dual boilers, which are common in high-end machines, sensor calibration checks are crucial for thermal stability, preventing overheating and thermal drift that can ruin shots over time. Additionally, inspecting rubber seals and gaskets periodically avoids leaks and maintains pressure integrity.
Planning for Long-Term Performance and Scaling
Scaling can significantly impact performance, especially in hard water areas. Investing in a quality water softening system or a reverse osmosis filter can defend your machine. I predict the trend toward more integrated smart maintenance systems, which monitor performance metrics in real time and alert you when preventive action is needed. This tech evolution promises fewer surprises and more consistent brewing experiences.
How do I maintain my espresso gear over time?
Consistent maintenance involves a mix of regular cleaning, part inspections, and calibration. For grinders, regularly cleaning burrs — even more frequently if you notice static or uneven grind sizes — is critical. Using a dry erase alignment tool can help verify burr positioning and ensure uniform grinding, which directly translates to shot quality. For espresso machines, descaling and checking thermal sensors—like with the sensor calibration tips—are key to longevity. And don’t forget to replace worn gaskets and seals, which can cause leaks and pressure drops.
Invest in quality tools and stay disciplined with your routine. For example, a monthly deep clean with specialized cleaning tablets can prevent the buildup of oils that degrade flavor and performance. As the home barista community advances, embracing these practices—alongside using recommended gear—will serve your espresso setup for years to come. To elevate your maintenance, try incorporating a weekly grinder detachment and cleaning session, which can dramatically improve grind consistency and shot clarity.
Unveiling the Quiet Wisdom Behind Better Shots
One of the most profound lessons I learned was that perfection in home espresso isn’t about investing in the fanciest equipment but mastering the subtle art of handling what you already have. I realized that consistent tamping pressure and careful puck preparation trump cranking up grind size or adjusting machine pressure endlessly. My lightbulb moment was understanding how small habits, like gentle handling and even distribution, could dramatically reduce channeling and bitter shots, turning my daily ritual into a moment of true craftsmanship.
Another revelation was recognizing how overlooked details, such as cleaning routines and water quality, silently sabotage even the most expensive gear. Regularly validating my grinder calibration with trusted tools and exploring water filtration options made my shots cleaner and richer, proving that maintenance is the backbone of quality espresso. This holistic perspective—seeing equipment care, technique, and routine as interconnected—reshaped my approach and deepened my appreciation for the subtle art of home brewing.
Lastly, I discovered that patience is a barista’s best friend. Rushing through the steps—distracted tamping, hurried distribution—inevitably leads to uneven extraction and disappointment. Embracing a mindful, deliberate process not only improved my shot consistency but also transformed brewing from a chore into a meditative craft. That slow, focused approach became the cornerstone of my espresso journey, inspiring me to continually refine my skills.
Tools and Resources That Elevate Your Home Espresso Side
My primary toolkit includes a calibrated tamper with a level indicator—trusting consistent pressure has made a tangible difference. For precision sharpening my technique, I rely on a digital scale capable of measuring tamping force, ensuring every shot starts with uniformity. The multi-modal burrs article provided insights into choosing grinder components that produce consistent, fine grounds vital for channeling prevention. Additionally, a high-quality water filter and routine descaling kit help maintain optimal machine performance, reducing unexpected issues down the line. These resources form the foundation of my baking, helping me achieve that elusive, velvety shot every morning.
Take Your Passion Further with Purposeful Action
Embrace the journey of mastering your espresso setup—every small, intentional adjustment compounds into a significant leap in quality. The more you understand and refine your process, the closer you’ll get to that perfect crema and balanced flavor. Remember, the true joy lies in the process—each shot becomes an opportunity to learn and enjoy. So, go ahead: experiment with distribution tools, check your tamping consistency, and embrace routine maintenance—your taste buds will thank you for it. Ready to elevate your home espresso game? Share your biggest challenge below, and let’s keep the conversation brewing.