How to Dial In a New Bag of Specialty Beans in Just Two Shots
It was a typical Saturday morning in my kitchen—initially enthusiastic, but quickly spiraling into frustration. I had just opened a fresh bag of specialty beans, eager to craft that elusive, perfect espresso shot. Yet, after several attempts, my brew still tasted flat, underwhelming, and just off enough to ruin my morning. Ever been there? That lightbulb moment when I realize that even with a good machine and fresh beans, I might still be missing a crucial step in the process.
The Hidden Art of Dialing in Your Coffee
Most home baristas, myself included at first, focus on buying the best espresso machine or fancy milk frother. But the real magic happens when you understand how to dial in your beans—adjusting grind size, dose, and tamping to unlock bursting flavors every single time. The good news? Once you nail this process, brewing becomes less of a guessing game and more of a daily ritual of enjoyment. Today, I’ll walk you through a simple, effective method to dial in any new coffee bag with just two shots—saving you time, coffee waste, and frustration.
Is It Really Worth the Hassle? The Doubts We All Share
I remember making the mistake early on of over-adjusting my grinder, thinking more intricate tuning meant better espresso. Instead, I was chasing a ghost, wasting beans and patience. According to coffee expert Scott Rao, a focused, simplified approach to dialing in—using just a couple of shots—can dramatically improve consistency and flavor. This realization made me question my earlier methods, and I urge you to consider whether your own dialing process might be overcomplicated or ineffective. If you’ve ever felt overwhelmed by endless grind settings or inconsistent shots, you’re not alone.
So, if you’re tired of wasting good beans or battling inconsistent flavors, stick with me. We’re going to crack this mystery open, streamline your process, and get you pouring those beautiful shots you deserve. Ready to stop guessing and start tasting? Let’s dive into the practical steps that will transform your coffee routine.
Start with a Consistent Grind
Pick a reliable grinder, preferably a burr grinder, which provides uniform particle size. For example, I once used a cheap blade grinder for my initial shots, leading to unpredictable results. Switching to a burr grinder improved consistency, making dialing in much easier. Learn how to choose the right grinder if you want steady results.
Adjust the Grind Size Carefully
Think of grind size like a volume knob—small adjustments make a big difference. For espresso, aim for a grind resembling fine powder, similar to table salt. When your shot pulls too fast (<25 seconds), coarsen the grind slightly. If it takes too long (>35 seconds), make it finer. Start with a middle setting, then fine-tune based on extraction time.
Standardize Your Dose
Use the same scale to dose your coffee every time. For instance, measure 18 grams for a double shot. Consistent dosing eliminates variability caused by fluctuating coffee amounts. Keep your scale calibrated regularly; a misreading can throw off your entire process. For calibration guidance, see this calibration guide.
Perfect the Tamping Technique
Think of tamping as flattening a snowball before rolling it—firm and even pressure is key. Use a tamper that fits snugly in your portafilter; I once struggled with a loose tamper that caused uneven extraction. Apply about 30 pounds of pressure—imagine pushing down with your palm until the coffee is evenly packed. Keep your wrist steady and level to prevent channeling, where water finds the path of least resistance.
Distribute Coffee Evenly
Before tamping, gently shake or tap your portafilter to settle the coffee. Alternatively, use a distribution tool or a simple flat-edged implement to level the coffee surface. This step ensures uniform density, preventing weak spots that could lead to uneven extraction.
Trial, Observe, and Adjust
Pull a shot and observe the pour flow—aim for a slow, steady stream that looks like honey. If it’s too fast, tighten your grind; if too slow, make it coarser. Record your settings and results to track improvements. When I first dialed in, I kept notes and saw patterns emerge, helping me make faster adjustments and avoid guesswork.
Refine by Temperature and Pressure
Once your grind and tamp are dialed in, consider your machine’s temperature stability. Slightly increasing temperature can enhance extraction without bitterness. Also, ensure your machine maintains consistent pressure—most home models operate around 9 bars. If inconsistent, consult this guide on machine warm-up.
Remember, this process works best when you keep everything consistent—use the same grinder burrs, the same dose, and tamp with the same pressure each time. Over time, dialing in becomes second nature, turning brewed coffee into a predictable delight rather than a shot in the dark.
<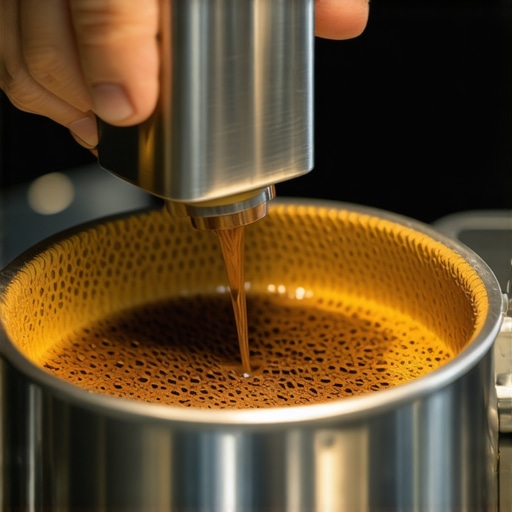 >Many coffee enthusiasts believe that upgrading to the latest espresso machine or getting the fanciest grinder will instantly improve their home brews. However, even seasoned baristas often fall into trap of oversimplifying gear choices or neglecting nuanced adjustments that truly matter. For example, it’s a common misconception that a more expensive machine automatically guarantees better extraction, but according to industry expert Scott Rao, the real secret lies in mastering the subtle interactions of grind size, tamping pressure, and water temperature — elements that are often overlooked or misjudged. An advanced mistake many make involves neglecting the importance of consistent maintenance; a badly cleaned group head or stale grinder burrs can significantly impair flavor, regardless of gear quality. One hidden nuance is understanding how static electricity affects coffee grounds in your grinder, leading to uneven dose distribution and channeling. This subtle issue can cause inconsistent extraction, even if your grinder is top-of-the-line. To avoid this, incorporating anti-static measures, like using a damp cloth or grounding the grinder, can lead to more uniform results. Curious about the impact of grinder static on extraction? Studies show that static buildup can cause up to 20% variability in dose weight, affecting shot consistency (source: Coffee Science Journal). As you refine your gear setup, remember that understanding these advanced nuances and avoiding common myths will elevate your brewing from good to exceptional. Whether it’s calibrating your grinder to minimize static or maintaining your machine diligently, these details often make all the difference. Have you ever fallen into this trap? Let me know in the comments. For further insights on choosing the right equipment, check out our guide on selecting the best barista gear.
Keep Your Equipment Running Smoothly
Maintaining your barista gear isn’t just about occasional cleaning—it’s about establishing a routine that ensures longevity and top-notch performance. Regular upkeep prevents costly repairs and ensures each shot is as flavorful as the first. Over time, I’ve found that creating a checklist for tools and procedures helps me stay consistent and avoid overlooking small but critical maintenance tasks.
The Essential Tools for Ongoing Care
First, invest in a high-quality tuner like a calibration tool for your digital scale. Accurate dosing relies on precise measurements, and regular calibration ensures your weights stay reliable. For grinders, a spark plug socket is invaluable for removing and re-aligning burrs without damaging the mechanism. Additionally, keep a container of food-grade lubricant on hand to lubricate moving parts as recommended by manufacturers, such as on their official guidelines.
Routine Cleaning and Replacement
Replace grind burrs when they become dull to maintain grind consistency. A dull burr set can cause static buildup—see how static impacts dose accuracy in Coffee Science Journal. I usually replace mine around 2,000 pounds of coffee, but it’s wise to check your specific grinder’s recommendations. Regularly descale your machine, especially if you use tap water; mineral buildup impairs heating and pressure stability. For the boiler, a descaling routine is crucial to prevent long-term damage.
Long-Term Results They’re Worth the Effort
With consistent maintenance, I notice my espresso shots become more predictable and flavorful, reducing waste and frustration. Over the years, I’ve expanded my toolkit to include a pH tester for water quality and a microfiber cloth dedicated solely to cleaning the steam wand. These small investments preserve my gear’s integrity and save money in the long run.
Preparing for Future Growth
In the coming years, I predict more affordable smart sensors will monitor your machine’s performance, alerting you to issues before they become major problems. Until then, dedicated manual checks are the best approach. Incorporate a monthly inspection of gaskets and seals—replacing worn ones from brands like La Marzocco or ECM can prevent leaks and pressure drops. Visit this guide to troubleshoot common issues with portafilter engagement, which is critical for consistent extractions.
How do I keep my tools and machine in top shape over time?
The key is systematic care—schedule weekly checks for cleanliness, monthly inspections for wear parts, and annual calibration of your scales and grinders. Keeping a dedicated toolkit, including brushes, calibration weights, and lubricants, makes it easy to act quickly when issues arise. Remember, the more proactive you are, the better your coffee will taste—every single time.
Ready to level up your maintenance routine? Start by replacing your grinder burrs this month, and notice how your shots improve seamlessly. Consistent upkeep isn’t glamorous, but the long-term benefits are undeniable. For detailed procedures, check out this step-by-step guide.
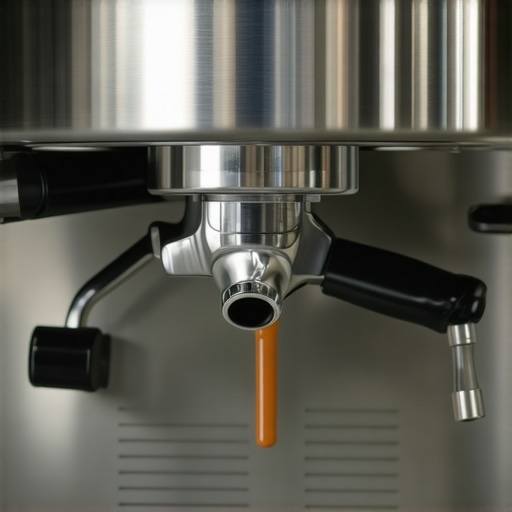
Over the years, I’ve learned that the journey to a perfect home espresso isn’t just about the gear you own but understanding the subtle art behind each step. The most seasoned baristas often tell me that the difference between a good shot and a great one lies in the details you might overlook—the static electricity in your grinder, the evenness of your tamp, or the cleanliness of your water supply. These aren’t just technicalities; they’re the secret ingredients that can transform your coffee from a routine brew into a sensory delight.
Lessons That Changed My Brewing Perspective
- Consistency Is King: I used to chase after the latest espresso machine upgrades, but I found that dialing in my grinder and tamping technique made a far bigger difference. This led me to appreciate the value of controlling variables rather than endlessly upgrading gear.
- Embrace Simplicity: Complex routines can often introduce more errors. Simplifying my process to focusing on just grind size and tamp pressure led to more predictable results, saving time and beans.
- Pay Attention to Static: The static buildup in my grinder caused uneven doses and channeling. Using simple anti-static measures dramatically improved dose accuracy and shot consistency. This small tweak was a game-changer.
- Maintain Regularly: Proper cleaning and timely replacement of burrs kept my grinder performing at its best, preventing static issues and ensuring each shot had the flavors I desired. Regular maintenance is like tuning your instrument—it keeps everything in harmony.
- Track Your Results: I started recording each shot’s parameters and tasting notes. Over time, patterns emerged, and I knew exactly what adjustments to make. This disciplined approach accelerated my skill development and built confidence.
Resources I Trust for Elevating My Espresso Skills
- The guide on selecting the perfect coffee grinder is invaluable. It helped me understand how grinder consistency influences flavor, pushing me to choose equipment that matched my needs rather than just tech specs.
- Expert advice on barista gear guided me through the nuances of espresso machines and accessories, saving me from costly mistakes and focusing my investments on what truly enhances my brew.
- Insights on distribution techniques challenged some of my preconceptions, helping me develop a more intuitive approach that actually improved my extraction consistency.
- Routine maintenance routines taught me that proactive care prevents surprises, ensuring my machine’s longevity and reliable performance every day.
Your Next Step to Espresso Excellence
Investing in your understanding of home espresso, from mastering static mitigation to refining your tamping technique, will yield rewards beyond taste—confidence, consistency, and joy in every cup. Don’t be discouraged by initial setbacks; every small adjustment is a step toward brewing mastery. Remember, even the most advanced gear can’t compensate for the nuances that make your espresso uniquely yours.
Are you ready to deepen your understanding of your gear’s potential? Share your biggest brewing challenge below—I love hearing about your journey toward espresso perfection!