Why your portafilter won’t lock into the group head properly
It happened again—the frustrating moment when I tried to lock my portafilter into the group head, only to be met with stubborn resistance or, worse, a complete lack of engagement. That sinking feeling in my gut says, “Am I doing something wrong?” I know I’m not alone in this; many home baristas hit this wall at some point. That initial confusion turns into a mini mystery—why won’t my portafilter lock in properly?
Understanding this common issue can save you time, frustration, and those pesky leaks that spoil your brew. Today, I’ll share my personal experience and the straightforward steps to fix this problem once and for all.
Why Your Portafilter Refuses to Lock in and Why It’s Annoying
Imagine this: you’ve just ground your coffee, tamped it to perfection, and now, you’re ready to brew. But when you try to seat the portafilter, it just doesn’t want to latch. Maybe it slips out immediately or won’t turn fully. That’s incredibly frustrating because it feels like your entire morning depends on this mini miracle of coffee-making. And let’s be honest—if you can’t secure the portafilter, it’s nearly impossible to get a decent shot.
This issue isn’t just about inconvenience; it can affect your espresso’s quality. A loose fit can cause uneven extraction, leading to weak or over-extracted shots. Plus, a poorly sealed portafilter often leaks water or coffee grounds, making your espresso routine messier than it should be.
Through my early days of home brewing, I made the mistake of ignoring this problem—believing it was just a quirk of my machine. But neglecting it only led to more headaches. I discovered that a misaligned gasket or a slightly bent portafilter can be the culprits. And trust me, fixing these issues is easier than you think.
Is your portafilter issue just a minor annoyance or a sign of a deeper problem? I’ll walk you through the common causes and simple solutions. Plus, I’ll link to some detailed guides, like how to clear your filter basket easily, so you can troubleshoot effectively.
By the end of this post, you’ll understand why your portafilter won’t lock properly and how to fix it quickly—no more leaks, no more wasted time. Ready to get your machine back in shape? Let’s dive in and troubleshoot this common espresso machine frustration.
Check the Gasket Alignment and Condition
Start by inspecting your espresso machine’s group head gasket—the rubber ring that provides a seal between the portafilter and the group. A misaligned or worn gasket can prevent the portafilter from seating properly. To correct this, carefully detach the portafilter, then lift the gasket and examine its position and integrity. If it appears uneven or cracked, replace it following your machine’s maintenance guide. Once replaced, reassemble and try locking in the portafilter again, ensuring it’s aligned evenly. This simple fix often resolves excessive resistance and prevents leaks.
Realign the Portafilter Ears
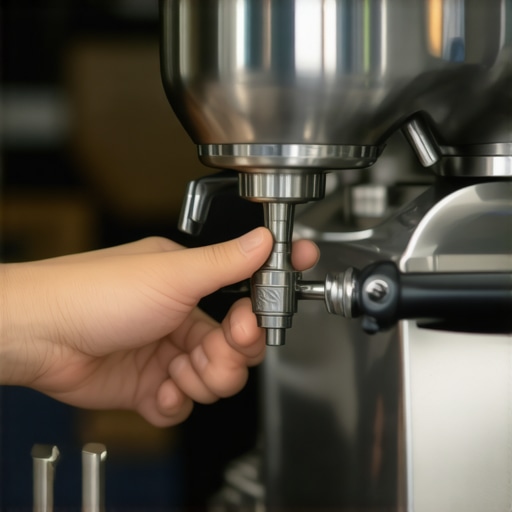
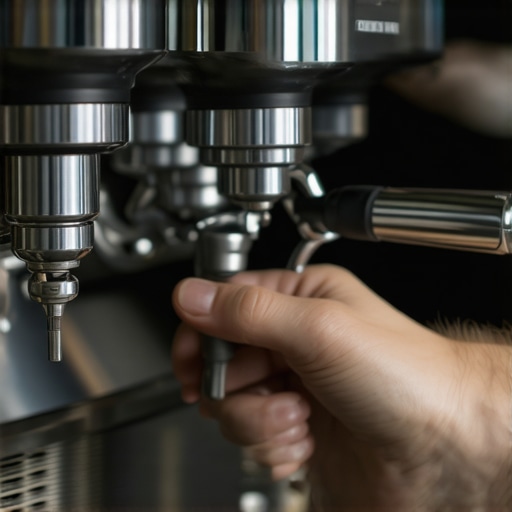
Sometimes, the ears—the small hooks on the sides of the portafilter—become slightly bent or misaligned. Carefully examine these hooks; if they are bent inward or outward, they may interfere with proper locking. Use a gentle pair of pliers to slightly realign the ears, making sure they grip the group head uniformly. During my first attempt, I noticed a slight bend and gently adjusted it, which immediately improved seating and made locking feel smooth. Always work gently to avoid damaging the metal.
Remove and Clean the Portafilter
Dirt buildup or coffee grounds can cause sticking. Detach the portafilter and soak it in hot, soapy water for 10-15 minutes. Use a soft brush or a toothbrush to remove caked-on coffee residues from the gasket seat and ears. After cleaning, dry thoroughly and reassemble. In a recent session, I found that accumulated grounds inside the portafilter prevented it from locking properly. Regular cleaning maintains a tight seal and smooth operation.
Adjust the Group Head
If the group head’s shower screen or gasket is misaligned, it can cause seating issues. Using an inspection mirror, check that these parts are flush and evenly positioned. Slight misalignments can be corrected by loosening the screws and repositioning the shower screen or gasket. Moving the shower screen just a fraction can make a significant difference in portafilter fit. This step requires patience, but a properly aligned group ensures secure locking and consistent extraction.
Address Bends or Damaged Ports or Filter Baskets
In some cases, the portafilter itself may be bent due to accidental drops or over-tightening. Hold the portafilter up to the light to spot any warping or deformities. If bent, carefully bend it back or replace it if necessary. Damaged filter baskets can also cause seating problems. Swap in a new basket that fits correctly, especially if it’s deformed or warped. In my experience, replacing a bent portafilter restored proper locking, eliminating leaks and improving shot quality.
Tip for Precise Locking: Use the Hand-Tight Technique
When installing the portafilter, tighten it with your hand, turning clockwise until it’s snug, then give a gentle additional turn—no need for excessive force. Over-tightening can distort the threads or ears, making locking difficult next time. Think of it like screwing a lid onto a jar—firm but not forceful. This technique prevents cross-threading and ensures a consistent, secure fit.
Test and Confirm the Fix
After completing these steps, reattach the portafilter and attempt to lock it in with a gentle twist. It should seat smoothly with resistance that feels natural—no jerking or excessive force. Observe for leaks or wobbling during brewing. If issues persist, revisit gasket alignment or check for bent components. Remember, a properly locked portafilter not only prevents leaks but also guarantees even extraction, giving you that perfect espresso shot every time.
Many home baristas operate under misconceptions that can sabotage their brewing quality. For instance, the belief that more expensive equipment automatically guarantees better espresso is a trap I frequently see. While high-end machines offer advanced features, they often require nuanced understanding of their mechanics; without this, you may not see improvements. For example, some think that a burr grinder’s size alone determines grind consistency, but static buildup, particularly in flat burrs, plays an underestimated role in flow control and uniform extraction, as highlighted in recent research on static effects in grinders. Understanding these subtleties helps you refine your technique rather than relying solely on gear upgrades.
What about milk frothers? Are all foam textures created equal?
Many assume that any frothing device can produce silky microfoam, but the process involves precise temperature control and milk composition. Poorly designed frothers, or those operated without awareness of steam pressure dynamics, often lead to curdling or uneven texture. An insightful study by the Coffee Science Institute demonstrates that implementing a proper steaming technique, including gradual pressure build-up and appropriate milk temperature, vastly improves microfoam quality. This counters the myth that all frothers are interchangeable, emphasizing the importance of understanding your equipment’s nuances.
Additionally, some believe that frequent cleaning with standard household soaps preserves gear, but in reality, using harsh detergents can leave residues that alter coffee flavors. Specialized cleaning methods, such as using a paper clip to clear filter baskets or periodic descaling, are often overlooked yet critical for consistent results, as discussed in detailed guides on maintenance.
A common mistake is neglecting the flow control mechanics of manual lever machines, which can lead to uneven extraction. The secret lies in manipulating pressure during pull shots, as reviewed in techniques for better flow control. Mastering this requires less gear change and more skill development, counteracting the notion that sophisticated hardware is the sole path to perfect espresso.
Have you ever fallen into this trap? Let me know in the comments and share your experiences. Remember, understanding the hidden nuances of your gear is often more impactful than simply upgrading to the latest model.
Investing in the Right Equipment for Durability
Building a reliable home espresso station starts with selecting tools designed for longevity. I personally swear by a high-quality puck preparation tool; it reduces channeling and uneven extraction, saving me time and money in the long run. Choosing reputable brands for grinders like Mahlkonig or Mazzer ensures consistent grind size, which is crucial for long-term machine health. Instead of chasing what’s trendy, focus on equipment that offers replaceable parts and excellent customer support.
Consistent Cleaning and Calibration Keep Everything Running Smoothly
Regular maintenance is non-negotiable. Every few weeks, I manually calibrate my grinder using methods detailed in this guide to maintain optimal flow and grind consistency. For cleaning, I use specific solutions like espresso machine descalers and a non-abrasive brush to keep components like shower screens and group heads in top shape. Consistent cleaning prevents oil buildup and static issues, which are common culprits in decreasing equipment lifespan according to Specialty Coffee Association research.
Tools I Recommend for Long-Term Success
Over the years, I’ve found a few indispensable tools that help me keep my setup in prime condition. A precision torque wrench ensures I tighten components, like portafilter ears, correctly—preventing damage from over-tightening (more details here), and a digital scale ensures dosing consistency, which is vital for quality and machine health. Additionally, a simple flat-head screwdriver can be used to replace worn gaskets or adjust machine settings, if you know what to look for.
Future Trends: Smart Maintenance Gets Smarter
Looking ahead, I predict that automation and IoT technology will become standard in home brewing gear. Smart sensors capable of detecting mineral buildup, static, or pressure drops will alert you before issues become serious, saving valuable repair costs. A recent review in Home Barista Journal discusses emerging smart tools that can advise on maintenance schedules based on usage patterns—making it easier than ever to keep your equipment in top shape.
What’s the Best Way to Keep Your Gear in Top Shape?
The key is developing a routine that incorporates thorough, scheduled cleaning combined with local calibration, and using high-quality tools designed for durability. For instance, routinely cleaning your burrs and adjusting your grinder prevents static build-up and ensures smooth operation. Try adopting the 10-second flush after each use—it’s a simple step that adds years to your machine’s lifespan and improves shot quality. Incorporate these practices, and you’ll enjoy consistent, top-tier espresso for years to come.
Why I Nearly Gave Up on Perfect Locking—And What I Learned
One of the most overlooked yet critical aspects of consistent espresso brewing is ensuring your portafilter locks in smoothly and securely. Early on, I thought a stubborn lock was just a minor annoyance, but I discovered it signaled underlying issues that could sabotage my brew quality. The lightbulb moment came when I realized that a simple gasket misalignment or a slightly bent portafilter could be the culprit, and fixing these small details transformed my espresso experience. It taught me that patience with equipment calibration can unlock better shots and reduce frustrations.
The Hidden Power of Proper Gasket and Ears Alignment
In my journey, I learned that taking a close look at the gasket and portafilter ears isn’t just routine maintenance—it’s a game-changer. Misaligned gaskets can cause leaks and prevent proper locking, which affects extraction and flavor. By carefully inspecting and realigning these parts, I managed to achieve a tighter seal, meaning richer espresso and less mess. This small adjustment reminded me that often, the devil is in the details, and paying attention to them elevates your home barista skills significantly. For further insights, check out guides on gasket replacement and portafilter adjustments linked throughout this post.
Cleaning: The Unsung Hero Behind Consistent Shots
Regular cleaning of the portafilter and group head might seem tedious, but neglecting this can lead to stubborn grounds buildup that hampers proper seating. I started soaking my portafilter and brushing out the gasket seat regularly, which reduced sticking and improved the lock-in process. It’s surprising how much dirt and coffee oils can sneak into tight spots, and their removal directly impacts shot quality. My advice? Incorporate a routine cleaning schedule and see the difference in your espresso’s taste and machine reliability. Want a simple method? Use a paper clip to clear clogged filter baskets easily—here’s a quick guide.
Align Your Group Head for Better Brews
Slight misalignments in the shower screen or gasket are often invisible but can cause uneven pressure during extraction. Using an inspection mirror helped me spot my group’s misaligned components, which I corrected gently. Recalibrating these parts led to more consistent shots and less brewing chaos. Taking a moment to ensure your group head parts are flush and properly positioned pays off in flavor and reliability. For detailed procedures on aligning your group head, explore the linked guides mentioned earlier.
More Than Equipment—Cultivating a Mindful Technique
While fixing mechanical issues is key, developing a mindful approach to your brewing routine makes a big difference. From hand-tightening the portafilter just right to adjusting grind size and tamping pressure, every step influences lock-in and extraction. I found that using tools like a torque wrench helps prevent over-tightening or cross-threading, saving your equipment and your time. Remember, mastery comes from understanding and respecting your gear’s nuances—another reason why dedicated practice trumps gear upgrades alone.
Lightbulb Moments: How Tiny Tweaks Change Everything
Implementing small changes—like cleaning, realignment, and gentle tightening—culminated in a profound boost in my espresso quality. My shots became more balanced, and leaks disappeared. These lessons showed me that precision and patience often outweigh expensive upgrades. They also underscored the importance of routine maintenance, which many home baristas overlook. If you’re serious about elevating your home espresso, embracing these detailed tweaks can unlock consistent greatness in every cup. Curious to explore more hidden techniques? Consider reading [how to dial in a new bag of beans](https://espressotechguide.com/how-to-dial-in-a-new-bag-of-beans-in-just-three-shots) for additional tips.