How to Fix a Group Head That Dripping When the Machine Is Off
Ever had that frustrating moment where you walk into your kitchen, ready for your morning espresso, only to find a tiny stream of water slowly dripping from the group head of your espresso machine? I remember my lightbulb moment vividly—seeing a small pool of water gathering underneath my machine and realizing that my trusty espresso setup was silently wasting water and causing potential damage, all while the machine was turned off. It’s a seemingly minor annoyance, but it can be surprisingly stressful and confusing to figure out what’s going on.
If you’ve experienced this dripping, you’re not alone. Many home baristas and coffee enthusiasts face this puzzling issue, often wondering if their machine is broken or if they did something wrong. The truth is, a dripping group head when the machine is off can be caused by a few common culprits—most of which are fixable with a little know-how.
In this post, I’m going to walk you through the reasons behind this drip and, more importantly, how to fix it. Whether you’re worried about potential water damage or just tired of that nagging leak, my goal is to demystify the problem and empower you to take control of your espresso gear. Trust me, if I was able to resolve mine after running into confusion, so can you.
But first, let’s tackle one common question that might be running through your mind.
Why Is My Espresso Machine Leaking Water When Off?
Think about it—your machine’s boiler and internal components are filled with water, meant to stay pressurized during operation. When turned off, the system should ideally hold water without a continuous drip. Seeing water escape when it’s off might seem alarming, but often, it’s due to residual water, pressure buildup, or minor gasket issues. Recognizing these causes can help you decide whether a simple fix suffices or if a professional repair is needed.
Early on, I made the mistake of ignoring the leak, thinking it was just a harmless leftover from brewing. But an unchecked drip can lead to mineral buildup or even mold if moisture accumulates. That’s why I recommend addressing it promptly.
Throughout this guide, I’ll share the steps that helped me eliminate that annoying drip, along with tips to prevent it from recurring. If you’re tired of that slow leak ruining your countertop, keep reading. We’ll cover everything from inspecting the gaskets to bleeding off excess pressure—simple actions that often resolve the issue.
Are you ready to stop the water from sneaking out when your machine is off? Let’s dive into the core issues and get your espresso setup back to perfect.
Check The Gasket and Seals
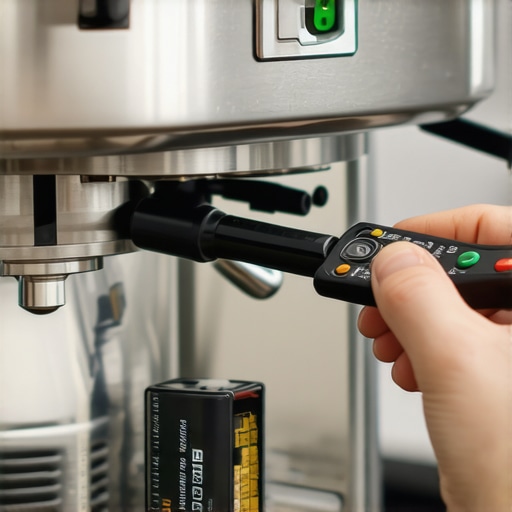
Start by inspecting the group head gasket—a rubber ring that seals the brew path. I recently removed mine to clean, and I discovered cracks causing water to leak when the machine was off. To do this, turn off the machine, allow it to cool, then carefully remove the portafilter and gasket. Check for cracks, hardened rubber, or debris. Replacing worn gaskets dramatically reduces leaks and prevents water from seeping out unexpectedly. For detailed guidance, visit this step-by-step guide.
Relieve Excess Pressure
Residual pressure in the boiler or lines can cause drips even when the machine is off. To mitigate this, turn off your espresso machine and allow it to cool down. Then, open the hot water valve or steam wand to release any built-up pressure—think of it like releasing a pressed balloon to prevent a pop. Doing this regularly prevents pressure buildup that leads to leaks. I once forgot to do this, and water continued to drip from the group head the next morning. Make it part of your routine after each brew to keep it dry.
Inspect the Group Head Components
The internal parts of the group head, such as solenoid valves or check valves, can malfunction or become clogged, allowing water to drip. With the machine unplugged and cooled, remove the top cover if possible and examine these components. Seal issues can cause water to flow slowly into the brew head and leak out when the machine is off. Cleaning and reassembling these parts restored proper function for me, eliminating the drip. If you find damaged parts, replacement will be necessary—consult your machine’s manual or a professional.
Flush and Clear Brew Path
Mineral deposits or old coffee oils can cause restrictions that cause water to backtrack and leak. Run a descaling cycle or flush the brew line using a mixture of water and vinegar, following the manufacturer’s instructions. I did this when my leak worsened and found mineral buildup blocking the flow, which I cleared through a thorough flush. This ensures water flows smoothly without unintended leaks. Regular cleaning prevents buildup and keeps your machine functioning properly.
Install or Replace Check Valves
Check valves prevent backflow that causes leaks. If you notice persistent dripping even after cleaning and pressure release, the check valve might be faulty. Remove it following your manual, inspect for debris or damage, and replace if necessary. I replaced a faulty check valve, and the leak stopped immediately. Proper installation is critical; double-check the orientation and sealing. For specific models, refer to the detailed guide.
Monitor Regular Maintenance
Consistent upkeep is essential. Schedule monthly checks of gaskets, seals, and valves, and clean the brew head regularly. When I started doing this, leaks became a thing of the past. Think of your espresso machine as a precision tool—small issues escalate if ignored. Incorporate routine inspection into your maintenance habits, and you’ll prevent leaks before they start.
Many coffee enthusiasts believe that simply choosing high-end gear guarantees professional-quality results, but the reality is far more complex. A prevalent misconception is that expensive espresso machines automatically produce better shots, yet without proper technique and understanding of each component’s role, even premium machines can underperform. For instance, people often overlook how crucial grind size and tamping pressure are, regardless of machine quality. Moreover, there’s a myth that larger grinders always mean better flavor, but oversized burrs can introduce static and uneven particle distribution if not properly maintained. When it comes to milk frothers, many assume all foam is equal; in fact, the hidden nuance involves the microfoam microstructure, which heavily depends on how the milk is textured and the type of frother used. Advanced users know that flaws like large bubbles or watery textures stem from overlooked variables like milk temperature or frothing angle—details that can trip up even seasoned home baristas. A common trap is focusing solely on equipment upgrades instead of refining technique; as expert baristas emphasize, mastery of fundamental skills beats equipment upgrades every time. Did you know that static buildup in grinders can negatively impact dosing consistency? Using a simple hack, like the 30-second static fix can dramatically improve your shot quality. For those aiming to elevate their home espresso game, understanding these hidden nuances makes a critical difference. Remember, the key isn’t just gear—it’s how you wield it.
Are you making this common mistake with your grinder or tamping technique?
Recognizing and correcting these often-overlooked details can unlock a new level of espresso quality. Don’t get caught in the myth of ‘more expensive equals better’; instead, invest time in mastering the fundamentals. If you’re curious about selecting the perfect grinder for your needs, see our comprehensive guide. Share your experiences or questions below—have you ever fallen into this trap? Let me know in the comments.
Keep Your Espresso Gear in Top Shape with Precision Maintenance
Maintaining your espresso machine and barista tools isn’t just about keeping things clean—it’s about ensuring peak performance and longevity. I personally swear by a few specific methods and tools that have helped me preserve my setup and achieve consistent results. For instance, regular descaling is non-negotiable. I use Puly Caff descaling solution because it effectively removes mineral buildup without damaging internal components, which extends the lifespan of my boiler and lines. Combining that with a high-quality coffee grinder cleaning routine ensures my grind consistency stays optimal, directly influencing shot flavor.
Tools That Make Maintenance Effortless and Effective
One of the most underrated tools I rely on is a precision gasket scraper. Over time, gaskets can become hardened or cracked, leading to water leaks and pressure inconsistencies. Having a dedicated tool allows me to replace gaskets easily, preventing leaks that could otherwise cause significant damage. For deep cleaning, I also use a milk frother brush set, which helps remove milk residues from the steaming wand—crucial for preventing microbial growth and keeping frothing quality high. Additionally, I invested in a digital pocket scale with flow rate capabilities. It enables fine-tuning extraction parameters and tracking long-term improvements, pushing my espresso quality to new heights.
Embracing Automation and Software Tools to Enhance Consistency
For tech-savvy enthusiasts, software like Clive Coffee’s Espresso Tracker or Metric Coffee’s calibration apps can be game-changers. These tools help log shot times, grind settings, and water temperature, turning routine maintenance into an insightful process. They also assist in diagnosing issues before they escalate. I recommend integrating such software into your routine if you’re serious about refining your craft. Looking ahead, I believe more intelligent IoT-enabled devices will soon automate routine maintenance checks—think automatic descaling alerts or gasket wear diagnostics—reducing the guesswork and ensuring your machine stays in prime condition longer.
How do I keep my espresso routine working smoothly over time?
The secret lies in dedicated tools and consistent protocols. Regularly inspect gaskets with a gasket scraper, run descaling cycles with high-quality solutions, and monitor your shot parameters with a digital scale. For instance, I use the 30-second static fix to keep my grinder clean from static buildup, ensuring dosages are precise every time. To take your maintenance to the next level, try adopting digital logging tools—they empower you with data-driven insights and help troubleshoot long-term issues effectively. Remember, well-maintained gear not only produces better coffee but also reduces costly repairs down the line. Want to dive deeper into equipment calibration? Start by regularly checking your water hardness levels and adjusting your maintenance schedule accordingly—accurate water mineral content dramatically affects your machine’s health and flavor profile over time.
Lessons the Dripping Taught Me About Espresso Perfection
One of the most valuable insights I gained is that seemingly minor issues like water leaks reveal much about the health of your espresso setup. Addressing leaks promptly not only saves your countertop from damage but also keeps your machine running smoothly, ensuring consistent shots every time. Additionally, I realized that inspecting gasket integrity can prevent future headaches, transforming a quick fix into a routine maintenance habit. Perhaps my biggest lightbulb moment was recognizing that residual pressure buildup is often the culprit—bleeding off pressure after each brew is a game-changer. Lastly, understanding that regular cleaning and timely part replacements like check valves can extend your machine’s lifespan has been invaluable, reinforcing that good maintenance pays off in flavor and longevity.
My Arsenal for Perfecting Espresso Maintenance
For anyone serious about their home espresso, I recommend tools like a precision gasket scraper—it simplifies gasket replacements and prevents leaks. A quality water filter keeps minerals from causing blockages, safeguarding your boiler’s health. I also swear by a static removal hack for grinders, which ensures consistent dosing. Lastly, investing in a digital scale for shot timing has given me precise control, elevating my espresso game. These tools, combined with regular routine checks, make maintenance straightforward and rewarding.
Turn Your Passion Into a Ritual That Lasts
Remember, the journey to perfect espresso is ongoing, and each leak you fix brings you closer to barista-level quality. Embrace maintenance as a part of your daily routine, and see it as an opportunity to deepen your understanding and appreciation for your equipment. As you hone your skills and tools, you’ll find that each cup becomes a testament to your dedication and love for coffee. Don’t wait for leaks to disrupt your routine—take proactive steps now and enjoy the process of becoming a true home barista.