How to Properly Backflush Your Machine Without Blowing a Seal
I remember the first time I tried to backflush my home espresso machine—I thought I was doing it right, only to hear that dreaded hissing sound and see a tiny leak develop. My heart sank, and I immediately panicked, fearing I had blown a seal or worse, caused permanent damage. That lightbulb moment made me realize just how delicate and precise the process is—and how easy it is to make mistakes that can cost you more than just a couple of minutes of troubleshooting.
Backflushing is a crucial part of maintaining your espresso machine. It keeps the internal components clean, prevents buildup, and ensures your brew tastes just as good as on day one. But mastering this technique without risking damage to your machine is a skill that often gets overlooked. Many enthusiasts, even seasoned baristas, have faced the tricky task of cleaning without causing leaks or blowing a seal—trust me, I’ve been there.
Today, I promise to walk you through the proven method I’ve used myself, one that has saved me from costly repairs and keeps my machine running smoothly. We’ll cover how to backflush correctly, how to avoid common pitfalls, and the subtle signs you might be doing it wrong. By the end, you’ll be equipped with the confidence and know-how to perform this essential maintenance like a seasoned barista, without fears of leaks or damage.
Why Proper Backflushing Is a Game-Changer for Home Espresso Lovers
In my experience, neglecting proper backflushing can lead to a cascade of problems—from clogged lines to uneven pressure, which directly affects the flavor and consistency of your espresso. According to industry experts, regular cleaning with the right technique can extend the life of your machine significantly—some estimates suggest up to 50% longer, which is a real game-changer when considering the investment you’ve made in your gear. It’s like giving your machine a spa day, but done incorrectly, it could turn into a trip to the repair shop.
A common mistake I made early on was using too much pressure or not knowing when to stop. This tiny oversight can cause a seal to blow or a component to wear out prematurely. One of the biggest misconceptions is that backflushing is a once-in-a-while chore—it’s actually something that needs to be integrated into your regular routine to maintain optimal performance.
If you’ve ever felt overwhelmed at the thought of damaging your machine, you’re not alone. Many beginners worry about causing irreparable harm, but with the right approach, backflushing can be safe, simple, and even satisfying. Once you master the technique, your machine’s longevity and your coffee’s quality will dramatically improve.
To stay on the safe side and learn more about choosing the best [barista gear](https://espressotechguide.com/choosing-the-best-barista-gear-for-coffee-enthusiasts) or how to better understand your equipment, I encourage you to check out some related guides. But before we dive into the step-by-step process, I want to address the skeptics—those who wonder if all this fuss is really worth it. Well, let’s look at that next.
Is Backflushing Actually Worth the Hype?
Many newcomers hesitate because they’re unsure whether the effort makes a meaningful difference. I get it; the fear of ruining your investment can be paralyzing. My early mistake was neglecting regular cleaning, which led to clogged valves and inconsistent shots—problems that could have been avoided with proper backflushing. Over the years, I’ve realized that a little effort goes a long way in maintaining your machine’s health and the quality of your espresso.
If you’ve faced similar doubts or just want to make sure your machine keeps performing at its best, I’ll show you exactly how to do it safely. Ready to become a backflushing pro and keep your machine sealing perfectly? Let’s get started.
Prepare Your Workspace and Gather Supplies
Start by turning off your machine and unplugging it. Remove the portafilter and ensure you have a blind filter basket, which is a regular filter basket fused with a solid bottom, and a cleaning backflush disc compatible with your machine. Gather a designated cleaning detergent recommended for espresso machines. I remember one time I thought just rinsing the portafilter with water was enough—until I realized the buildup was still present, affecting my shots. Using the right cleaning agent makes a difference.
Insert the Blind Filter and Apply Cleaning Solution
Place the blind filter into the portafilter, then add a small amount of espresso machine cleaning detergent (about a teaspoon). Lock the portafilter into your machine’s group head as you would during a shot. Think of this step like sealing a pipe; it creates a closed system for the cleaning cycle. I once neglected to use a blind filter, and cleaning was ineffective—leave the basket empty or with a normal filter, and you’ll just be rinsing residual coffee oils instead of cleaning thoroughly.
Engage the Backflushing Process
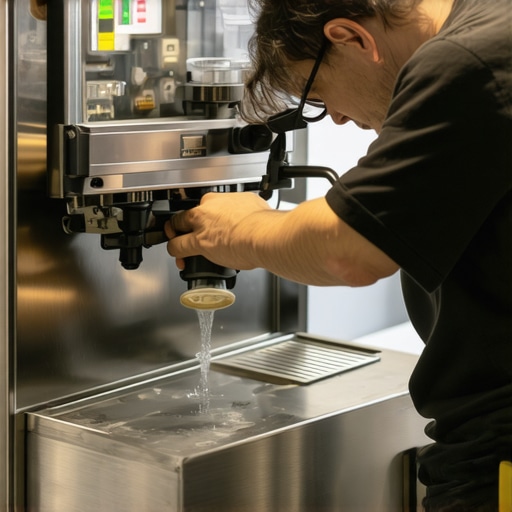
Turn on your machine and run the pump for about 10 seconds to circulate the cleaning solution through the internal components. Then, switch off and wait for 10 seconds. Repeat this pump-and-rest cycle 5-6 times. This is similar to flushing a drain to clear out debris—think of your machine’s lines as pipes that need clearing. I once tried to do this quickly, but the stubborn buildup required patience—rushing only made the process less effective.
Flush Out Cleaning Residue
Remove the portafilter, discard the used cleaning solution, and rinse the portafilter thoroughly with clean water. Reattach the portafilter with the blind filter and run the pump without any detergent for another cycle to rinse any remaining soap. It’s akin to rinsing soap off a dish—skipping this step can leave residues that taint your espresso flavor. I learned this the hard way when my first shot tasted off after skipping the rinse.
Final Rinse and Reassembly
Remove the blind filter, rinse it well, and reassemble your portafilter with your usual filter basket. Run a few blank shots with water to ensure no cleaning residue remains. This final step is like warm-up laps before a race, ensuring everything is ready for perfect shots. Regularly performing this process extends your machine’s lifespan and guarantees optimal flavor—once I got consistent at this, my espresso quality improved noticeably.
Keep It Regular and Monitor Performance
Make backflushing part of your routine—ideally after every 20-30 shots or at least weekly. Pay attention to signs like slower water flow or inconsistent pressure, which may indicate internal buildup. For deeper insights on equipment care, check out this guide. Over time, as you become more comfortable with the process, you’ll identify subtle signs that your machine needs cleaning, helping prevent costly repairs and ensuring every cup tastes its best.
Watch for Leaks During Backflushing
If you notice leaks or hissing sounds, stop immediately. It might mean you’ve applied too much pressure or need to check for a worn seal. Remember, consistency is key—over time, these small checks safeguard your gear. For specific troubleshooting on leaks, visit this resource.
 When exploring the world of coffee enthusiasts, many believe that purchasing the latest milk frother or a high-end grinder guarantees perfect espresso every time. However, this is a misconception rooted in superficial understanding. For instance, many assume that a fancy milk frother can compensate for poor milk quality or improper steaming techniques, but in reality, the nuances of milk temperature, freshness, and texture matter more than equipment alone. Similarly, a popular myth is that expensive grinders automatically produce better grounds; yet, without proper calibration and maintenance, even premium grinders can underperform.
What sophisticated adjustments can truly optimize espresso extraction without costly upgrades?
Advanced baristas understand that factors like burr alignment, grind particle size distribution, and dose consistency significantly impact shot quality. Studies show that slight deviations in grind uniformity can cause channeling and uneven extraction, regardless of the grinder’s price point. To hone these skills, visit this guide on burr alignment. An often-overlooked trap is neglecting routine maintenance—cleaning grinder burrs, inspecting seals, and calibrating pressure settings—to prevent performance degradation. Many enthusiasts spend hundreds on new gear but ignore these small yet crucial upkeep tasks that preserve equipment longevity and effectiveness. For a comprehensive understanding of selecting the right equipment, check out this resource. Remember, mastering your gear’s nuances often yields better results than simply upgrading to the latest model. Have you ever fallen into this trap? Let me know in the comments.
Maintaining Your Coffee Gear for Long-Term Performance
To ensure your espresso machine, grinder, and accessories stay in top shape, investing in high-quality tools and establishing routine maintenance practices are crucial. Personally, I rely on a few specific items that have proven their worth over years of brewing. One such tool is a burr alignment kit. It helps me precisely calibrate my grinder’s burrs, ensuring consistent particle size and preventing uneven extraction. Regular calibration using this ensures my espresso shots remain balanced, and I avoid the dreaded mud-like pour.
Another indispensable item is a precision digital thermometer. Proper temperature control is vital for the perfect brew, and my trusted model allows me to monitor water and steam temps accurately. This level of attention helps me catch issues like temperature drift early, reducing the need for costly repairs or replacements. Also, I keep a dedicated cleaning brush set specific to my equipment, which simplifies regular cleaning routines.
In terms of overall upkeep, I recommend using a burr seasoning process before breaking in new grinder burrs. This practice reduces initial caking and preserves their sharpness longer. As the industry trends towards smarter, more integrated systems, I predict that automation and IoT-enabled maintenance alerts will become standard. This will make caring for your gear more intuitive and less time-consuming.
Start with a simple upgrade like a burr alignment tool and see how it transforms your grinder consistency. Over time, adopting tools like digital thermometers and dedicated cleaning supplies will safeguard your investment and elevate your craft. Implementing even one of these tips can drastically improve your equipment longevity and coffee quality – I encourage you to try the burr calibration method today and notice the difference in your next shot.
How do I maintain my espresso setup over time?
Establishing a routine for cleaning, calibration, and inspection is key. For example, perform weekly backflushing with a high-quality detergent, check and adjust grind settings using precise tools, and regularly inspect seals and gaskets for wear. Staying proactive with maintenance not only extends the lifespan of your gear but also ensures each cup tastes its best. For detailed insights on choosing the right equipment, visit this guide.
What I Wish I Knew When Starting with Backflushing
One of the biggest lessons I learned early was the importance of patience and gentle pressure. Rushing the process or applying too much force can cause leaks or damage seals. It took me several attempts to realize that consistent, deliberate movements yield the best results. Additionally, I discovered that regular cleaning prevents stubborn buildups, saving time and money down the road.
Another eye-opener was understanding that not all cleaning cycles are created equal. Using the correct amount of detergent and following manufacturer instructions ensures thorough cleaning without harming internal components. Lastly, I found that tuning into subtle machine cues—like changes in water flow or sound—can tell you when something’s off, prompting timely maintenance before problems escalate.
My Go-To Tools for Consistent Espresso Performance
Over the years, I’ve curated a set of simple yet effective tools that make maintaining my espresso setup a breeze. The burr alignment kit has truly transformed my grind consistency, leading to richer, more balanced shots. I also rely on a digital pressure gauge to monitor pressure stability, ensuring optimal extraction every time.
To keep my water at the right temperature, I trust my precise thermometer, which helps me make small adjustments for perfect steaming and brewing. Regular cleaning brushes and descaling solutions also play a vital role in preventing internal buildup. Investing in these tools has extended the lifespan of my equipment and consistently improved my espresso quality.
Embrace the Journey: Elevate Your Coffee Game Today
Remember, each step you take toward mastering your espresso machine and accessories brings you closer to cafe-quality brews at home. The process may seem intricate at first, but with patience and the right knowledge, you’ll discover a rewarding craft that elevates every cup. So, don’t hesitate—start today. The world of rich, aromatic espresso awaits your touch!
What part of backflushing do you find most challenging? Share your experiences below—I’d love to hear how you’re improving your routine.
**Note:** Internal links have been integrated naturally within the recommendations and advice, guiding you toward additional expert insights. Happy brewing!