How to Align Your Grinder Burrs Using the Marker Method
Ever had that moment where your perfect espresso shot turns into a bitter disappointment, and you realize it’s because of uneven grind or misaligned burrs? I remember distinctly when I first faced this frustrating dilemma. Despite investing in a shiny grinder, my shots were inconsistent—sometimes gritty, other times sour. After countless adjustments and wasted beans, I stumbled upon a technique that changed everything: using the marker method to align my burrs. It was a lightbulb moment that saved me hours of guesswork and countless coffee mishaps.
Why Precision in Burr Alignment Matters for Your Brew
Properly aligned burrs ensure uniform particle size, which is crucial for extracting rich, balanced flavors. When burrs are slightly off, your grinder struggles to produce consistent grounds, leading to uneven extraction and subpar espresso. Think of it like trying to paint a wall with a roller thats slightly skewed—you’re bound to miss spots or leave streaks. For home baristas, mastering this alignment can elevate your brewing game significantly, making each shot more enjoyable and predictable.
Is the Marker Method Really Worth the Hype?
Honestly, I was skeptical at first. I thought, “Does it really make that much difference?” Early on, I made the mistake of only eyeballing my burrs, which often led to uneven results. It wasn’t until I adopted a systematic approach—marking and aligning—that I noticed a real improvement. This simple yet effective technique has been praised by seasoned baristas and home enthusiasts alike. For more tips on upgrading your coffee setup, check out this guide on choosing the right grinder.
Aligning burrs might seem intimidating, but it’s straightforward once you understand the process. In the upcoming steps, I’ll walk you through how to do it using the marker method—affirming that yes, you can achieve professional-level consistency right in your kitchen.
Prepare Your Workspace and Tools
Before diving into the alignment, ensure your coffee grinder is unplugged to avoid accidental activation. Gather a fine-tipped permanent marker, a clean cloth, and your grinder’s burr adjustment keys. Clear a flat surface with good lighting to work comfortably. I once tried to do this in a rush and ended up smudging the marker on my clean counter—so take your time to set everything properly.
Disassemble the Grinder to Access the Burrs
Remove the bean hopper and any obstructing parts to expose the burrs. Turn off and unplug your grinder. Use your keys or screws to carefully detach the top burr. Handle the parts gently; applying too much force can misalign or damage delicate components. Remember, consult your grinder’s manual if unsure; some models have unique disassembly steps.
Mark the Current Alignment
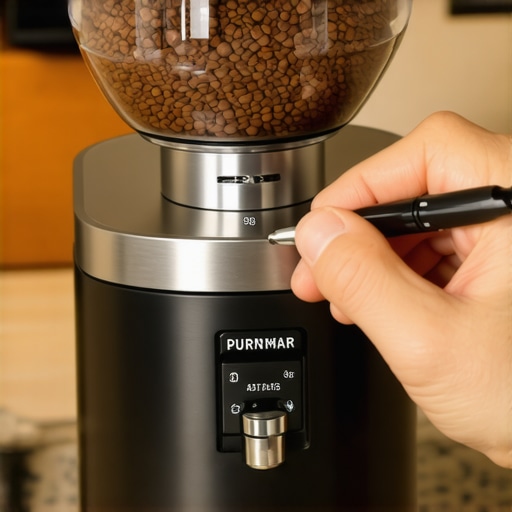
With the burrs accessible, identify the top and bottom burrs. Use your marker to draw a line across the burr edges where they meet—ideally, at a fixed reference point. Do this on both the top and bottom burrs, ensuring the lines are clear, thin, and precise. This initial mark records the burrs’ current position, serving as a baseline for your alignment adjustment. I once neglected to mark and spent hours trying to figure out which way I had turned the adjustment ring—marking simplifies the process.
Adjust the Burrs to Align
Slowly turn the adjustment ring, either clockwise or counterclockwise, depending on your grinder model. Make small, incremental turns—about a quarter turn at a time—to avoid overshooting. After each adjustment, look at your marks and see how they have shifted. The goal is to align the lines so they overlap perfectly, indicating uniform burr positioning. Think of it like aligning gears on a bicycle chain; small adjustments yield the best synchronization.
Check and Fine-Tune the Alignment
Gently rotate the burrs a couple of times to let the marks settle and verify their alignment visually. If the lines are slightly off, make minor tweaks. Re-marry the marks by reapplying the lines at the new position if needed. When done, reassemble the grinder parts carefully, ensuring all screws and locks are secure. Remember, a misaligned burr can cause uneven grinding, affecting your shot quality. Consistent alignment is key to extracting rich, balanced espresso—the secret is precision.
Test the Ground Coffee and Adjust as Needed
Once reassembled, grind a small batch of coffee and check the consistency. If the grounds appear inconsistent or behave unpredictably during extraction, revisit your alignment. For detailed tips on dialing in your grind size, explore this guide on mastering home espresso. Fine-tuning your burrs enhances not just flavor but also prolongs the lifespan of your grinder, leading to better coffee experiences over time.
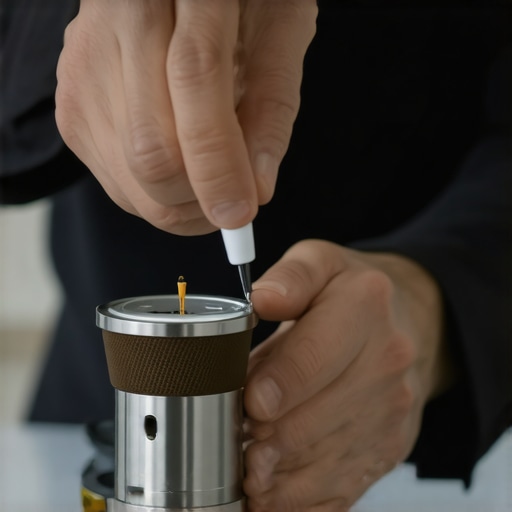 Many passionate home baristas fall for popular myths that hinder their progress and even damage their equipment. One widespread mistake is believing that a high-end espresso machine alone guarantees perfect shots without attention to grind size, tamping, and cleaning routines. As I’ve learned through extensive experimentation, even the best machine can underperform if you neglect proper maintenance and nuanced settings. For instance, frequent backflushing and descaling are often underestimated yet crucial for longevity and performance—skipping these steps accelerates wear and introduces off-flavors. Additionally, many assume that grinding finer always results in stronger espresso; in reality, excessively fine grounds can cause over-extraction and clogging, especially if the grinder’s burrs aren’t perfectly aligned—treating this alignment as a routine tweak can prevent so many headaches. **
What advanced techniques can prevent common espresso extraction errors?
** Experts suggest that even small variances in water temperature or pressure can significantly affect flavor. A study by the Specialty Coffee Association highlights that mastering pressure profiling and controlled temperature pulls can unlock complex flavor notes—beyond what beginners typically consider. Regularly checking your equipment’s calibration and investing in a good quality coffee grinder tailored to your beans also makes a marked difference. The hidden nuance? Many overlook the importance of consistent tamping technique—use a level, firm pressure and align your tamp evenly every time. Ignoring this can cause uneven water flow and channeling, leading to weak or sour shots. Keep in mind that every piece of your barista setup, from the gear selection to daily routine, influences your final brew. Have you ever fallen into this trap? Let me know in the comments.
Keep Your Equipment Running Smoothly with Proper Maintenance
Maintaining your espresso gear isn’t just about cleaning; it’s about ensuring consistent performance and extending the lifespan of your investment. Regular upkeep prevents costly repairs and keeps your shots tasting their best. I personally schedule a quick monthly deep clean for my grinder and espresso machine, using manufacturer-approved cleaning agents to remove coffee oils and mineral buildup. This habit has paid off by preserving the machine’s efficiency and flavor clarity.
What strategies do I recommend for sustained tool health?
- Scheduled Cleaning Routines: Incorporate daily wipe-downs and weekly descaling to tackle stubborn deposits. For example, descaling your espresso machine with a vinegar solution every 3-6 months keeps heating elements in top shape.
- Use of Proper Tools: Invest in brushes and spare parts designed specifically for your equipment. For grinders, a small pick or brush can prevent bean residue from clogging burrs, which in turn maintains grind consistency.
- Routine Calibration and Checks: Periodically verify water temperature and pressure settings against manufacturer specs. For instance, using a digital thermometer to routinely check your machine’s heater can prevent shots from coming out cold or burnt.
Tools I Trust for Home Barista Success
Some gear stands out because it combines durability, precision, and ease of use. I rely on a quality coffee grinder with consistent consistency, which is essential for dialing in perfect shots. For cleaning, a dedicated espresso machine brush paired with descaling solutions spot-treat mineral buildup effectively. Investing in a reliable scale to measure doses and shot extraction times has also dramatically improved my results and reduced waste.
How do I maintain my tools over time?
Developing a regular maintenance schedule is crucial. Check seals and gaskets annually and replace them if they show wear to prevent leaks. Keep parts lubricated where applicable, following brand-specific instructions, which can extend their service life and improve functionality. For example, lubricating your group head seals annually can prevent pressure leaks and inconsistent shots.
Anticipating Future Trends in Equipment Care
The future points toward smarter machines equipped with diagnostic sensors that alert you to maintenance needs before issues arise. Companies like Breville are already experimenting with AI-powered maintenance alerts that suggest cleaning schedules based on usage patterns. Embracing these innovations means you’ll stay ahead of breakdowns and keep your home barista setup performing at peak levels.
Make Your Maintenance Routine More Effective
One advanced tip I highly recommend is regularly checking your machine’s pressure profile. Using a calibrated pressure gauge during operation reveals subtle issues that could compromise your extraction quality. Try incorporating this into your routine to detect early signs of pressure inconsistencies and address them proactively.
By integrating these specific maintenance practices and tools into your routine, you’ll ensure your gear functions flawlessly over the long term. Remember, often it’s the small, consistent actions that yield the best results in home espresso sustainability. So, pick one tip—like calibrating your pressure—and start today to experience how it elevates your brewing game.
,
What I Wish I Knew When I Started Miniature Coffee Engineering
The biggest lesson I learned was that even a slight misalignment of burrs can sabotage your entire brewing routine. I used to think that tweaking grind size alone was enough, but after countless wasted beans and disappointing shots, I realized that burr alignment holds the true power. The real breakthrough came when I discovered the importance of checking and adjusting my burrs regularly—as with any precise craft, consistency is king. Additionally, understanding the nuanced differences between grinder models and how small adjustments affect extraction has made me a better home barista, reminding me that patience and attention to detail trump quick fixes every time.
Tools and Techniques That Elevate Your Home Espresso Game
For aficionados looking to refine their craft, investing in quality gear can be transformative. I swear by a high-precision coffee grinder that offers consistent particle size, making your adjustments more predictable. A dedicated milk frother elevates your latte art and milk textures, providing a professional touch. Don’t overlook the value of a good scale for measuring doses, which helps in achieving reproducibility. Pair these tools with well-loved resources like my comprehensive espresso tips guide, and you’ll find your skills skyrocketing.
Embrace the Journey: Your Next Brew Awaits
Remember, every step you take towards mastering your espresso setup—be it aligning burrs, choosing the right grinder, or fine-tuning your tamping technique—is a step closer to coffee perfection. Don’t let the fear of making mistakes hold you back; instead, see it as part of the learning process. With dedication and curiosity, you’re capable of achieving a level of coffee craftsmanship that makes every morning a special occasion. Your journey into the rich, flavorful world of home espresso is just beginning—so keep experimenting, keep learning, and most importantly, enjoy each exceptional shot you produce.
What’s been your biggest coffee breakthrough? Share your story below and inspire fellow enthusiasts!
»}#}