Why Your Coffee Puck Is Always Soggy and How to Get a Dry Knock-Out
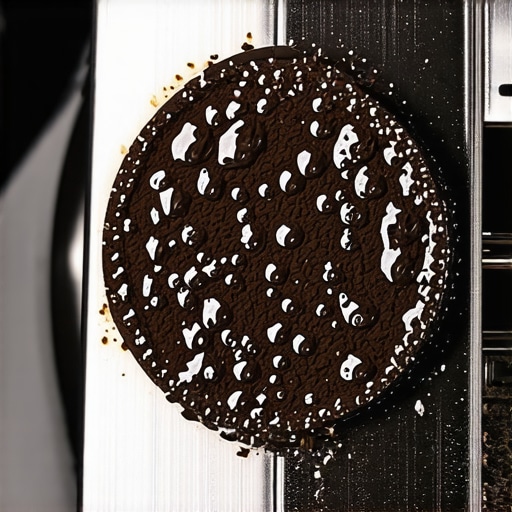
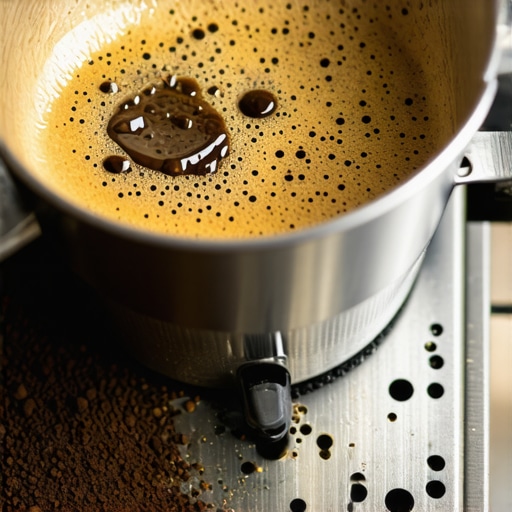
It was a dull Sunday morning when I finally had enough. I clenched my fists around the portafilter, staring at that wet, muddy mess lingering where my coffee had just been extracted. No matter how I tamped, adjusted, or fussed, I kept ending up with a soggy puck that seemed to absorb more water than it should. Frustrating? Absolutely. But over time, I realized this soggy disaster wasn’t just afluke—it was a telltale sign that something fundamental in my brewing process was off.
Mastering the Art of the Dry Knock-Out
Getting that perfect dry knock-out isn’t magic. It’s science, consistency, and a bit of patience. Today, I want to share the insights and practical hacks I’ve collected that transformed my espresso game. From understanding the crucial role of tamping pressure to breather techniques, we’re going to tackle why your puck refuses to dry and how you can fix it once and for all.
Is Your Coffee Extraction Worth the Hype?
In my early attempts, I made the mistake of rushing the process. I thought that harder tamping meant better extraction, but I overlooked how uneven pressure can cause water to channel and weaken the puck’s structure. Plus, I was guilty of neglecting machine calibration—tripping over variables like temperature fluctuations or grinder settings. According to expert baristas, inconsistent tamping or uneven grind distribution can increase moisture retention, leading to soggy pucks. What about you? Have you ever blamed your grinder or machine when all it needed was a little tweak?
What I learned early on is that small missteps in prep—like tamping with inconsistent force or ignoring maintenance—compound into soggy, unpleasurable shots. This kind of mistake can trap unnecessary water in the puck, making it soggy instead of crisp and dry. You can get around this by mastering fundamentals like proper dose, grind size, and tamp pressure. And for more technical tips, you might want to check out how fixing your smart scale latency can lead to more consistent flow tracking.
Getting this right is the cornerstone of producing that satisfyingly dry, brittle puck that signals a well-executed shot. But understanding the ‘why’ is just the first step. Next, we’ll delve into practical, step-by-step techniques to troubleshoot and fix this common issue—so stay tuned.
Adjust Your Tamping Pressure for Consistency
Begin by placing your freshly ground coffee into the portafilter, then tamp with steady, even pressure—about 30 pounds, like pressing down on a sturdy smartphone. I recall a time I used my palm to gauge pressure, and the puck was uneven, causing moisture retention. Using a calibrated tamper or a small scale to measure consistent force helps achieve a uniform tamp, reducing water channels that trap excess moisture. Consistent tamping ensures the puck forms a compact, uniform bed that promotes even extraction and easier dry knock-out.
Optimize Grind Size and Dose Accuracy
Next, zero in on your grind size. For a drier puck, aim for a slightly finer grind, which resists water flow and builds resistance in the basket. I once increased my grind size too coarsely, resulting in a soggy puck. Use a high-quality grinder with a consistent grind (like those with hybrid burrs) and measure your dose precisely—usually between 18-20 grams for a single shot. Accurate dosing prevents weak spots in the puck that retain moisture and hinder dry knock-out.
Control Extraction Variables and Machine Settings
Preheat your espresso machine adequately—at least 10 minutes of warm-up—to stabilize temperature, essential for consistent water flow. I once neglected this, and my shots fluctuated wildly. Make sure your machine’s pressure is set correctly—around 9 bar—and monitor your flow rate with a smart scale (see scale calibration tips). Regularly run cleaning cycles to keep the brew path clear; any buildup can cause water retention. Keep an eye on your water temperature—ideally between 90-96°C—to prevent under- or over-extraction, which affects puck dryness.
Manage Timing and Pressure for Better Results
When extracting, aim for a shot duration of 25-30 seconds. A longer shot often leads to over-saturation and sogginess. I remember adjusting my grind finer and slightly increasing tamp pressure to tighten resistance. Using flow profiling or pressure profiling can significantly improve the puck’s dryness; just ensure your machine supports these features. If you notice the water pockets in your puck, try reducing your dose slightly or adjusting tamp pressure—small tweaks matter.
Perform Final Checks with the Puck
After brewing, inspect the puck: it should be dry, brittle, and uniformly compact. If it’s soggy or sticky, revisit your grind, dose, and tamp steps. Over time, developing a tactile sense for the right resistance during tamping—like pressing a spring—ensures each shot hits the mark consistently. Remember, small adjustments can make the difference between a soggy mess and that perfect, dry knock-out.
When it comes to brewing perfect espresso at home, there’s a common misconception that simply owning the latest high-end equipment guarantees success. Many enthusiasts believe that upgrading to a fancy grinder or machine automatically elevates their results. However, seasoned baristas know that understanding the intricacies of your gear—the nuance—is what truly makes or breaks consistency. For example, many people overlook the fact that hybrid burrs can fail on ultra-light roasts if not properly maintained, which is often misunderstood as a product defect rather than a maintenance issue. Dive into this detailed insight to avoid common pitfalls and master your equipment.
Is Your Grinder’s RPM Rotation Causing Bitter Shots?
Contrary to popular belief, low RPM grinders aren’t always better. While slower burr rotation might seem gentler on beans, it can cause bitter extraction if not calibrated correctly, especially with delicate roasts. Studies suggest that variable RPM grinders can produce inconsistent particle sizes, leading to bitter, over-extracted shots. I experienced this firsthand when my low-RPM grinder started causing bitterness, prompting me to reassess my grind settings and machine calibration. For more on this, check out how calibration plays a vital role in ensuring your grinder performs optimally.
Perfecting espresso isn’t just about the machine—it’s understanding how nuance and advanced mistakes influence the final cup. For instance, many home baristas don’t realize that their smart scale might have latency issues causing inaccurate flow tracking, leading to inconsistent pours. Mastering these detailed nuances differentiates good from excellent.
Another sneaky trap involves over-reliance on factory zero points of burr alignment. Most believe that these factory settings are perfect, but neglecting to periodically recheck can result in uneven grind size, thus impacting extraction and flavor. Regularly performing precise calibration, possibly using tools like the flow measurement, can prevent this error from creeping in.
Furthermore, advanced enthusiasts should question whether their burr type is suitable for their roast profile. Hybrid burrs excel with certain beans but may underperform with ultra-light roasts, leading to uneven extraction and bitterness. Recognizing these subtleties can elevate your brewing from average to exceptional.
Finally, avoid overlooking the thermal stability of your espresso machine. Many users neglect that thermal recovery can influence extraction quality. After periods of heavy use, a few minutes of warm-up can dramatically improve shot consistency.
Remember, genuine barista-level results require more than just good equipment—it’s about mastering these hidden nuances and avoiding advanced mistakes that even seasoned enthusiasts sometimes miss. Each detail, from grinder RPM to burr calibration and machine heat management, impacts your final cup.Maintaining your coffee gear is essential for consistent, high-quality brews. One of my go-to tools is the smart scale. I chose it because it provides real-time flow measurements and helps me fine-tune extraction timing, which is critical when dialing in tricky light roasts. Regular calibration of this device is a game-changer—simply following the manufacturer’s instructions or the detailed guide I linked ensures accurate readings over time. Look out for latency issues; they can throw off your flow tracking and lead to inconsistent shots, especially during complex pressure profiling.
How do I keep my grinder performing at its best?
Consistent maintenance is key. I personally recommend periodically replacing the hybrid burrs—particularly on models prone to failing on ultra-light roasts—to maintain grind consistency. I also clean my grinder’s chute and dosing chamber weekly to prevent static buildup and clumping, which can cause uneven particle sizes. For even longer-term health of your grinder, ensuring it’s free of old coffee residues and oils extends its lifespan and keeps your shots sharp. A brief wipe with a damp cloth and a dedicated cleaning brush goes a long way, especially when combined with deep cleaning cycles recommended by the manufacturer.
Many enthusiasts overlook the importance of machine thermal stability. I’ve found that giving your espresso machine a solid 10-minute warm-up before pulling shots helps prevent temperature fluctuations that can alter extraction and leave you with inconsistent puck moisture levels. For dual boiler models, regularly calibrating the sensors can prevent over- or under-heating, which I detailed in a recent post. You might want to review this guide on thermal recovery for best practices.
 Next, consider the longevity of your burrs. I recommend following the rule of changing hybrid burrs after processing approximately 5kg of beans, as they tend to wear differently than titanium ones. If you notice a decline in grind uniformity or brewing clarity, it might be time for an upgrade. Also, pay attention to your water quality; using filtered water prevents scale buildup in the boiler and brew circuit, which is crucial for maintaining optimal temperatures and pressure over the long haul. Regular descaling, guided by sensor calibration checks, ensures your machine operates smoothly and prevents costly repairs. For those using semi-automatic machines, I suggest setting a routine—weekly or bi-weekly—to clean and check all fittings and seals. This prevents leaks and maintains pressure consistency, which directly impacts puck dryness and shot quality. Finally, investing in a quality cleaning kit helps keep your brew path clear and free of residual oils. I encourage you to pick one aspect of your maintenance routine—like calibrating your smart scale or replacing burrs—and commit to it this week. Trust me, these small adjustments will have a big impact on your everyday espresso experience.
Throughout my journey with home espresso crafting, one of the most frustrating moments was battling soggy, wet puck issues that stubbornly refused to dry out. Yet, over time, I uncovered some subtle but powerful lessons that transformed my approach. Sharing these insights can help you avoid common pitfalls and elevate your brewing consistency.
The Hidden Lessons I Learned About Perfect Puck Dryness
- Not all tamping pressure is equal. I used to believe pressing harder would improve the shot, but I learned that consistent, moderate pressure—around 30 pounds—is key to forming an even, dry puck. Learning to measure and calibrate tamping force was a game-changer for me.
- Grinding finesse impacts moisture retention. Fine-tuning your grind size to resist water flow helps build resistance, promoting a drier puck. Upgrading to a grinder with hybrid burrs and maintaining it regularly ensures particle consistency.
- Calibration of your machine’s temperature and pressure matters. Giving your espresso machine proper warm-up and maintaining pressure set points around 9 bar help achieve a stable brew environment. Regularly reviewing thermal recovery practices minimizes fluctuations that cause sogginess.
- Extraction timing influences puck dryness. Aim for a shot duration of about 25-30 seconds. Longer shots tend to saturate the puck, making it soggy—so monitor flow and adjust grind or dose accordingly. Techniques like pressure profiling can enhance this further.
- Post-brew inspections reveal your process quality. Look for a puck that is dry, brittle, and uniformly compact. If it’s sticky or soggy, revisit your grind, dose, and tamp steps. Developing a tactile sense during tamping helps replicate successful shots consistently.
Beyond these basics, I discovered that paying attention to equipment nuances—such as smart scale calibration or burr maintenance—ensures your setup supports your efforts effectively. Remember, small consistent adjustments make a world of difference in achieving that ideal dry knock-out. Keep experimenting and refining, and your espresso puck will become a reliable indicator of your skillful craft.
Insider Wisdom for Espresso Enthusiasts
- Lighting and temperature in your workspace matter more than you might think. I found that a cooler, well-lit area prevents coffee from absorbing excess moisture from the environment, helping puck dryness.
- Don’t overlook the impact of water quality. Using filtered water reduces mineral buildup in your machine, maintaining consistent pressure and heat—both critical for a dry puck.
- Patience is your best friend. Rushing the process or ignoring calibration checks leads to ongoing issues. Regularly revisit your technique and equipment health, especially when tackling persistent soggy puck problems.
Your Path to Espresso Confidence Starts Now
Achieving the perfect dry knock-out may seem subtle, but it’s really about mastering the nuances—being attentive to detail, ensuring consistency, and respecting your equipment’s needs. Every small step you take moves you closer to the espresso experience you crave. You hold the power to turn every shot into a satisfying success story—your next perfect puck awaits in your diligent practice.
What’s the most unexpected thing you’ve learned about dialing in your espresso puck? Share your story below—I’d love to hear it and help troubleshoot any stubborn issues you face!