How to stop your portafilter from sneezing coffee grounds
You know that feeling when you’re all set for your morning espresso, eagerly pressing down the tamp, only to be met with a cloud of coffee grounds splattering everywhere? That sudden bloom of stray grounds escaping your portafilter is not only messy but also frustrating. I’ve been there—believing I was doing everything right, only to watch my countertop become a tiny coffee battlefield with grounds flying in every direction.
Why Does Your Portafilter Sneeze Coffee Grounds?
This sneezing, as I like to call it, happens when the grounds aren’t compacted tightly enough or when the tamping pressure is uneven. Think of it like trying to squeeze a sponge—you need even pressure. If the grounds are too loose, water finds the easiest path, creating channeling and splattering grounds all over the place. Over time, I realized that the main culprit was inconsistent tamping. I was applying pressure randomly, sometimes too soft, sometimes too hard, thinking it wouldn’t make a real difference. But that mistake, early in my barista journey, led to frequent messes and poor shot quality. It’s a common rookie error, and one I want to help you avoid.
The good news? With just a few tweaks, you can keep your grounds contained and your shots tasting perfect. This guide will walk you through the simple steps that transformed my espresso routine. Ready to finally put an end to portafilter sneezing? Let’s dive into how to achieve a perfectly tamped, tight coffee puck every time.
Is This Problem Really Worth Fixing?
At first, I questioned whether this mess was just part of the process. But I quickly learned that small details, like tamping pressure and distribution, significantly affect both cleanliness and flavor. An early mistake I made was rushing my tamp and ignoring even distribution, which caused uneven extraction and, consequently, grounds flying everywhere. Trust me, taking a moment to perfect these small habits makes a huge difference. If you’ve ever faced this issue, you’re not alone—and the fixes are more straightforward than you think. Want to learn how to make your tamp perfect every single time? Keep reading, and you’ll be amazed at how much cleaner and better your espresso can be.
Apply Even, Consistent Pressure
Press down the tamper with steady, uniform force, aiming for 30 pounds of pressure—think of pressing a car door close rather than squishing a sponge. I once used a luggage scale to gauge my tamp, and after a few tries, I could consistently hit the mark, resulting in cleaner grounds and less mess. This precision ensures water flows evenly through the coffee, preventing channeling and grounds splattering.
Use a Tamper with a Pressure Gauge
If you want to take guesswork out of tamping, invest in a tamper with a built-in pressure gauge. This tool gives real-time feedback, allowing you to develop a feel for the right pressure without relying solely on guesswork. During my first few attempts, it was messy—grounds escaping and clogging the drain—until I realized how vital the right force was.
Practice Proper Distribution of Coffee Grounds
Before tamping, ensure the coffee bed is evenly distributed across the basket. Use a distribution tool or the back of a teaspoon to level the coffee surface. I found that a quick circular motion with a distributor helped me avoid uneven puck density. Uneven grounds are a common cause of grounds flying out during tamping because water finds the path of least resistance, causing channeling and splattering.
Check for Channelling Sources
After tamping, look at the puck for any cracks or inconsistencies. A uniformly compressed puck reduces the chances of water bypassing coffee particles. When I ignored uneven tamping, my espresso would taste sour or bitter, and grounds would spray during extraction. Correcting tamp pressure and distribution greatly improved shot quality and cleanliness.
Maintain a Steady Workspace
Keep your tamping area at waist level and on a flat surface. Use a consistent technique each time. During one early morning session, I placed my cup in a slightly tilted position, which threw off tamp pressure and caused grounds to escape. Ensuring stability and consistency in your technique prevents accidental slips and poor puck formation.
Use a Programmable Tamper for Precision
For ultimate consistency, consider a programmable tamper that applies the same pressure every shot. I tried one after a few weeks of manual tamping and noticed a drastic reduction in grounds splattering and shot variability. This gear is a worthwhile investment if you’re serious about home espresso precision.
Regularly Calibrate Your Equipment
Set a reminder to check your tamper and grinder calibration monthly. Differences in grinder settings can influence tamping consistency. When I recently calibrated my grinder, I noticed that my tamping pressure became more effective, and my shots improved. Consistent equipment settings mean consistent tamping, reducing the chances of grounds escaping during extraction.
Practice with Live Feedback and Adjust
Record your tamp pressure and puck appearance to track your progress. Use a scale or a pressure gauge as feedback tools to make incremental improvements. Over time, practicing with these tools turned my routine into a precise art, leading to cleaner shots and less mess.
By applying these concrete steps, you’ll develop a tamping technique that minimizes grounds escape, ensuring a cleaner workspace and better-tasting espresso. Remember, consistency is key—practice these steps regularly, and you’ll see noticeable improvements in every cup.
Many coffee enthusiasts dive into the world of home barista gear with high hopes, but there’s a surprising amount of misinformation that can hold you back from truly mastering your craft.
The Hidden Flaw in Popular Milk Frothers
It’s a common belief that all milk frothers produce equally plush and creamy foam, but in my experience, many users overlook the importance of the frothing technique and milk temperature. Cheaping out on a frother often leads to disappointing results—not because the device isn’t capable, but because users don’t understand the nuances of milk proteins and heat. According to a study published in the Journal of Dairy Science, milk foam stability depends heavily on protein structures that are affected by temperature and aeration methods. So, choosing the right equipment is only part of the story; mastering the process is crucial.
Advanced Tip: How does milk temperature influence foam quality?
Using milk that’s too cold or too hot can cause the foam to be coarse or break apart quickly. Experts recommend heating milk to around 150°F (65°C) for optimal microfoam, which is essential for latte art. Failing to control this aspect often results in a dry, unstringy foam or one that collapses before pouring. Many home baristas get caught in this trap because they focus on their espresso shot and neglect milk prep—don’t make that mistake. For a detailed guide on milk frothing techniques, check out this resource.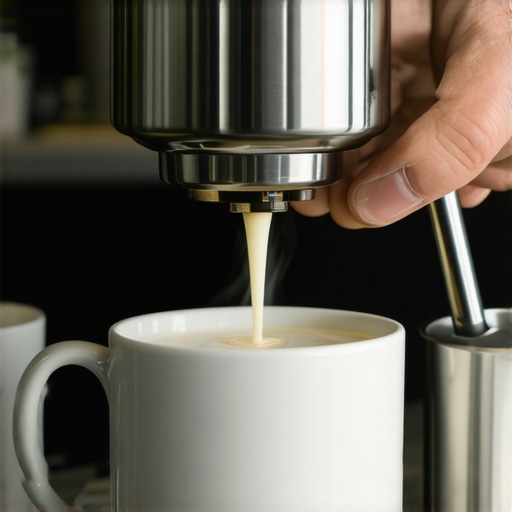
Keep Your Equipment in Peak Condition for Better Coffee
Investing in quality espresso machines, grinders, and frothers is only part of the journey. To truly enjoy consistent, high-quality brews, regular maintenance and proper tooling are essential. Personally, I swear by specific tools that have transformed my home setup, ensuring my gear always performs at its best.
Embrace Precise Calibration with the Right Tools
Calibration is vital, especially for grinders. I use a digital scale paired with a calibration weight to fine-tune my burrs regularly. This ensures the grind size remains consistent, which directly impacts shot extraction and flavor. Regular calibration with dedicated tools prevents uneven wear and keeps my grinder running smoothly for years.
Invest in Durable Cleaning Equipment
Clogged espresso machines or milk frothers can sabotage your efforts. My go-to tool is a high-quality cleaning brush designed specifically for group heads and steam wands. It helps me remove coffee oils that accumulate over time, preventing blockages and ensuring optimal performance. Deep cleaning at least once a month maintains flavor clarity and prolongs your equipment’s lifespan.
Streamline Routine with Automation
Automation can be a game-changer. I recommend integrating programmable timers for pre-heating your espresso machine or using smart temperature controllers. These tools reduce manual effort and help maintain stable brewing conditions. Furthermore, smart sensors that monitor water quality or machine pressure can alert you to potential issues before they become costly repairs. As technology advances, I predict these smart tools will become standard in home espresso setups, making maintenance easier and more precise.
How do I keep my gear functioning over time?
Developing a routine maintenance schedule that includes descaling your machine, replacing worn gaskets, and lubricating moving parts is critical. For example, I follow a monthly checklist that includes backflushing my espresso machine with descaling tablets and inspecting seals. This proactive approach prevents breakdowns and maintains product quality. For detailed techniques, I often reference trusted sources like this site for trusted advice and tools tailored to each component.
Tools I recommend for long-term maintenance
- Digital grinder calibrator: Ensures your burrs are precisely aligned, maintaining consistent grind size.
- Sanitary cleaning brushes: Specially designed for group heads and steam wands, preventing buildup.
- Calibration weights and scales: For precise tuning of grinder settings and espresso volume.
- Smart sensors and timers: Automate temperature control and pre-heating routines for efficiency.
By integrating these tools into your routine, your gear remains reliable, and your coffee experience stays premium. Advances in smart monitoring hint at a future where machine health is maintained automatically, reducing downtime and repair costs. For now, developing a disciplined maintenance habit and investing in quality tools is the best way to keep your barista setup running flawlessly. Don’t hesitate to try using a digital calibrator—it’s a small step that yields big results in your daily brew.
What I Wish I Knew When I Started Tuning My Espresso Gear
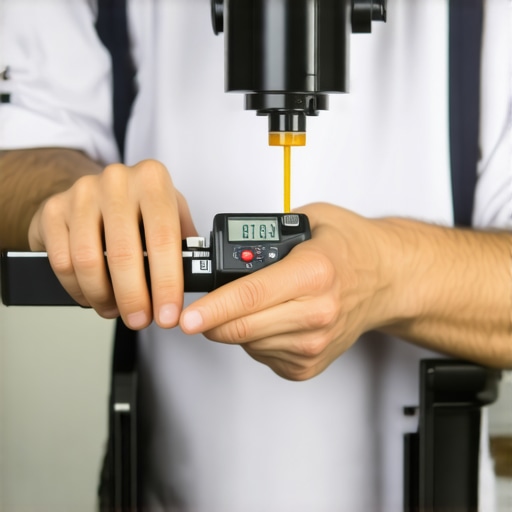
One of the toughest lessons I learned was that equipment calibration isn’t a one-and-done task; it’s an ongoing process that keeps your coffee tasting consistently excellent. Small adjustments, like recalibrating your grinder or pressure settings, can make a world of difference. I used to think that once my machine was set, I was done—and that mistake often led to uneven shots and frustration. Staying vigilant with regular checks has transformed my coffee routine.
Another insight came from understanding that even the best milk frother needs finesse. It’s not just about turning on the device but mastering milk temperature and aeration. Achieving that silky microfoam relies on subtle control, not just equipment quality. I discovered that heating milk to around 150°F and using the right frothing technique makes all the difference in latte art and drink texture.
Finally, I realized that the most overlooked aspect is a clean machine. Routine maintenance like backflushing, descaling, and cleaning wands prevent flavor off-notes and equipment breakdowns. I used to neglect deep cleaning, but now I schedule monthly deep cleans—my equipment runs smoother, and my espresso tastes better. Small, consistent efforts built this mastery and gave me confidence behind the barista setup.
My Essential Arsenal for Home Barista Excellence
Over the years, I’ve curated a toolkit that ensures my gear performs at its best. My top choice is a digital grinder calibrator—precision in grind size is fundamental for consistent extraction. I also swear by high-quality cleaning brushes that exactly fit my espresso machine’s components. For fine-tuning, I use a digital scale with calibration weights—that way, I know exactly how many grams I’m extracting, leading to perfect shots.
For ongoing maintenance, a smart temperature sensor helps me monitor brewing stability, and a reliable descaling solution keeps mineral buildup at bay. The investment in these tools might seem small but pays dividends in shot quality and equipment longevity. Embracing smart tech and precision tools has made my single-dosing process faster and more predictable, enabling me to focus more on technique and less on troubleshooting.
Believe in Your Barista Journey—The Power of Consistency
Embarking on a home espresso adventure can be intimidating, but remember—every expert was once a beginner. The real magic happens when you commit to regular practice, continuous learning, and equipment upkeep. Each time you perfect your tamp pressure or milk temperature, you inch closer to drink perfection. Your dedication will not only improve your coffee but also deepen your appreciation for this craft. Don’t be afraid to experiment, embrace your mistakes, and celebrate small wins—you’re building your own coffee mastery every day.
What’s the one barista skill you’re eager to perfect? Share your goals below—I’d love to hear your journey!