The Secret to Pouring a Perfect Swan in Your Latte
I stood in my kitchen at 6:00 AM, surrounded by three failed lattes and a sink full of milky residue. I had the [IMAGE_PLACEHOLDER] fancy machine and the designer beans, but every time I tried to pour that elusive swan, it ended up looking like a discouraged pigeon. It was frustrating. I’d watch world-class baristas on my phone make it look effortless, then I’d step up to my own machine and produce a blob that even my dog wouldn’t recognize. But then, after weeks of ‘accidental onions,’ I realized I wasn’t failing because I lacked talent; I was failing because I was fighting the physics of the milk itself. If you’ve ever felt like throwing your pitcher across the room, trust me, I’ve been there.
Stop Aiming for Hearts and Start Thinking About Flow
We all start with the heart. It’s the gateway drug of latte art. But the swan is a different beast altogether. It requires a level of control over your barista gear that most beginners haven’t mastered yet. Today, I’m going to share the exact breakthrough I had regarding pitcher positioning and flow rate. We aren’t just dumping milk into a cup; we are drawing with fluid dynamics. If you’ve noticed that your latte art foam always slumps to one side, you’re likely struggling with the same alignment issues I had for months. We are going to fix that by focusing on the ‘wing’ first.
Is Mastering the Swan Actually Worth the Frustration?
You might be wondering if it’s even worth the gallons of milk you’re going to pour down the drain. Honestly? Yes. Not just because it looks incredible on a guest’s saucer, but because the discipline required to pour a swan actually makes every other drink you make taste better. When you master texture this fine, your microfoam is at its peak. According to the Specialty Coffee Association, the ideal temperature for milk sweetness is between 55-65°C, and hitting that sweet spot while maintaining the perfect ‘wet paint’ texture is the real challenge. Have you ever managed to get the texture right only to mess up the very last flick of the wrist?
The One Mistake That Kept My Swans Looking Like Puddles
When I first started, I thought more foam was better. I used one of those basic milk frothers and tried to force it. I ended up with ‘shaving cream’ foam. You can’t draw a swan with shaving cream; it just sits on top like a heavy cloud. The secret is ‘microfoam’—bubbles so small they are invisible to the naked eye. I spent way too long ignoring the tilt of my cup, not realizing that the way you hold your equipment affects the symmetry of the pour before the milk even touches the espresso. I’m going to show you how to find that perfect angle so the neck of your swan actually looks like a neck and not a broken stick.
Turn Your Milk Into Liquid Silk
Before you even think about the swan, your milk needs to look like wet paint. If it’s too thick, it is a marshmallow; too thin, and it is just hot milk. You want that glossy, reflective surface. The secret lies in the trick to getting the perfect swirl in your milk pitcher. You need to position the steam tip just off-center to create a literal tornado. If your steam feels sluggish, you might need to learn how to fix a steam wand that only blows out weak air to get that necessary force. Once the milk is spinning, keep it there until the pitcher is almost too hot to touch. #IMAGE_PLACE_HOLDER_B#
Stop the Bubbles Before They Start
I used to spend half my time tapping the pitcher on the counter to break big bubbles. It was a waste of time. I learned that if I incorporated the air early—within the first three seconds—and then spent the rest of the time just grooming the texture with the vortex, the bubbles disappeared on their own. If you find your foam is separating into a dry cap, you need to learn how to stop your milk foam from turning into a big bubble before it ruins the pour. Consistency in the aeration phase is what separates a hobbyist from a professional.
Tilt the Cup Like You Mean It
You cannot pour a swan into a flat cup. You have to tilt the cup at a 45-degree angle toward the pitcher. This creates a deep pool of espresso for the milk to dive into without splashing back. I remember a specific morning when I was trying to show off for a friend; I kept the cup too level and the milk just bounced off the crema, creating a muddy mess. The moment I committed to a steep tilt, the milk started gliding under the surface. This is a fundamental part of mastering the art of home espresso tips for beginners because it controls the physics of the liquid canvas.
The Rhythmic Sway That Creates the Wing
The swan’s base is essentially a very controlled rosetta. Start your pour in the center of the tilted cup, keeping the pitcher spout close to the surface. Use a side-to-side rocking motion from your wrist, not your whole arm. As the wings start to spread, slowly back the pitcher away toward the edge of the cup while maintaining the sway. If you move too fast, the wings will look jagged and uneven. Many people do not realize why your milk pitcher position is ruining your texture until they see how a slight misalignment makes one wing larger than the other.
Slow Down to Finish the Neck
Once the wings are set, stop the swaying motion. Lift the pitcher slightly to thin out the stream and draw a line through the center of the wings—this is the body. Then, move the pitcher toward the top of the cup in a graceful curve to create the neck. At the very end, pause for a micro-second and give a small flick to create the head and beak. I used to rush this part because I was afraid of overflowing the cup, but rushing is what kills the elegance. Take your time; the milk will wait for your hand to lead it.
Let’s dig deeper into the mechanics because, while the swan looks like magic, it’s actually the result of high-precision engineering and chemistry. A common myth in the home coffee world is that a five-thousand-dollar espresso machine is the only way to get café-quality results. I’ve seen people drop a fortune on a high-end setup only to realize their shots still taste like battery acid. The truth is, your machine is just a fancy water heater if you haven’t figured out how to select the perfect coffee grinder for your brew. If your grinder produces inconsistent particle sizes, you’ll never get the flow rate right for a swan, no matter how much you practice. I spent months frustrated by why your bottomless portafilter shows channels every time, only to realize my grinder was creating ‘fines’ that clogged the basket. Consistency is the only thing that matters, and that comes from the burrs, not the boiler. Have you ever fallen into this trap? Let me know in the comments.
Invest in the Grinder Before You Upgrade the Machine
Everyone focuses on the shiny stainless steel of the machine, but your grinder is the real hero. When you understand why your coffee grounds are clumping together, you realize that static and heat are your biggest enemies. High-end grinders dissipate heat better, preventing the oils in the beans from gumming up the works. If you are using a dual boiler, you might think you’re safe from temperature swings, but the secret to getting consistent shots on a dual boiler still relies on the quality of your puck prep. 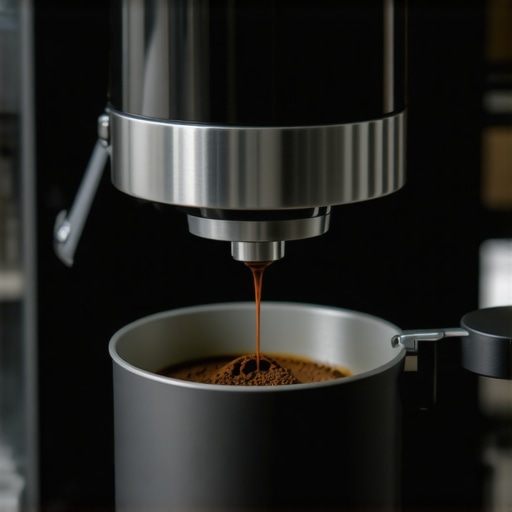
Is Your ‘Freshly Roasted’ Coffee Actually Too Fresh?
This is the ultimate ‘oops’ factor for beginners. We are taught that fresh is always better, but in the world of espresso, ‘freshly roasted’ can be a nightmare. When beans are roasted, they trap CO2. If you pull a shot with beans roasted yesterday, that gas escapes violently during extraction, creating a thick, bubbly crema that is impossible to draw a swan on. You’ll find that why your freshly roasted beans are making your espresso taste like grass is often due to this lack of degassing. According to the Specialty Coffee Association (SCA), most roasts need at least 7 to 10 days of ‘resting’ to stabilize. If you try to pour art with unstable beans, your foam will simply collapse into a grainy mess.
Stop Obsessing Over Tamping Pressure
There is a massive misconception that you need to press down with exactly thirty pounds of pressure. I used to use a bathroom scale to calibrate my arm! It’s a waste of energy. The water pressure from your machine is significantly higher than anything your arm can produce. What actually matters is levelness. If your tamp is slightly slanted, the water will find the path of least resistance, leading to a watery, uneven shot. This is why choosing the best barista gear often means looking for a self-leveling tamper rather than a heavy one. If you’re struggling with dark roasts, keep in mind why your coffee grinder is stalling with dark roast beans—oily beans require more frequent cleaning and a lighter touch. Mastering the swan isn’t about brute force; it’s about removing the variables that cause inconsistency so your talent can finally shine through.
I’ve learned the hard way that a dirty machine is the ultimate enemy of a perfect swan. You can have the steadiest hand in the world, but if your equipment is fighting you, that microfoam will never cooperate. I used to think a quick wipe of the steam wand was enough, but after my milk started smelling slightly ‘off’ and the texture became inconsistent, I realized I was ignoring the internals. Maintenance isn’t just about chores; it’s about preserving the precision of your barista gear so your skills can actually shine.
Don’t Let Old Coffee Oils Kill Your Creativity
Your grinder is the heart of your workflow, and it’s also the most neglected part of the setup. I personally make it a habit to learn how to clean your grinder’s discharge chute with a pipe cleaner every single week. Why? Because coffee oils are incredibly sticky. When those oils sit in the chute, they trap old grounds, which then go rancid and clump together. This is exactly why your coffee grounds are clumping like little rocks and ruining your extraction. If your grinder isn’t outputting a fluffy, even pile of grounds, you’re never going to get that syrupy espresso base needed for high-level art.
How do I maintain my espresso setup over time?
Consistency comes from a clean path, from the water reservoir to the steam tip. I follow a strict ‘backflush and brush’ routine after every session. As noted by coffee scientist Christopher Hendon in the seminal research ‘Water for Coffee,’ even slight variations in mineral buildup can drastically change how your machine’s internals scale over time, affecting thermal stability. To prevent this, I always use the best way to descale a boiler without using harsh vinegar, ensuring that the heating elements stay efficient. If you have an E61 machine, you also need to know how to properly lubricricate your e61 group head cam so the lever action remains smooth and doesn’t grind down the metal parts over years of use.
Stop Ignoring the Inside of the Steam Wand
We’ve all seen that crusty milk on the outside of a wand in a bad cafe, but the real danger is inside. Every time you finish steaming and turn off the pressure, a tiny amount of milk is vacuumed back into the tip. If you don’t purge properly, that milk cooks inside the pipe. I recommend learning how to clean the inside of your steam wand pipe with a dedicated cleaning solution once a month. This prevents the flow from becoming restricted, which is a major reason why your foam might suddenly start feeling ‘thin’ or ‘spluttery’ despite your best efforts. 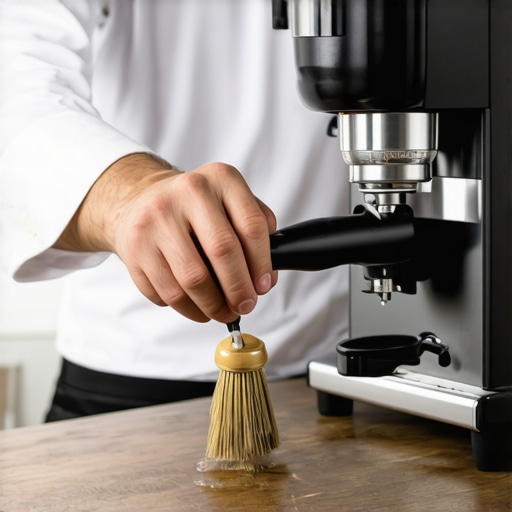
The Future of Home Espresso Tech
Looking ahead, I suspect we are moving toward a ‘smart’ era where sensors in the portafilter will communicate directly with your perfect coffee grinder, adjusting the micron size in real-time based on the previous shot’s flow rate. We are already seeing this with high-end telemetry, but it will eventually trickle down to home machines. Until then, the best ‘sensor’ is your own attention to detail. Catching a small issue early, like knowing how to spot a failing solenoid valve before it floods your kitchen, will save you thousands in repairs and weeks of frustration. My big tip for you this week? Take five minutes to pull your shower screen off and scrub the backside of it; you’ll be shocked at the sludge hiding there. Your next swan will thank you.
Lessons from a Sink Full of Failed Pours
After months of trial and error, I realized that the swan isn’t just one movement; it’s a choreography of flow and friction. My first real ‘aha’ moment came when I stopped trying to move my hand and started moving my soul—cliché, I know, but once I relaxed my grip on the pitcher, the milk flowed naturally. I also learned that consistency is your best friend. If you use a different milk type or temperature every time, you are resetting your learning curve to zero. Stick with one brand and one fat percentage until you nail the pattern.
Another hard truth: your equipment matters, but your technique matters more. However, having a machine that can actually produce consistent dry steam is a game-changer. If you’re looking to upgrade, I recommend checking out these top-rated espresso machines for coffee lovers in 2025 to find a unit with the steam power you need. Finally, remember that even a ‘bad’ swan still tastes like a delicious latte—don’t let the quest for perfection ruin your morning brew.
My Personal Toolkit for Perfect Microfoam
I’ve spent thousands of hours and dollars testing different gadgets, and these are the ones that actually made a difference in my art. First, a high-quality, lightweight pitcher with a pointed spout is non-negotiable for the fine details of a swan’s neck. [IMAGE_PLACEHOLDER] Second, I always refer back to my own notes on mastering the art of home espresso tips for beginners because the fundamentals of the shot are the foundation of the art.
I also trust specific resources for technical maintenance. Since a clogged machine is a slow machine, I keep a close eye on my gear’s health. For anyone serious about the hobby, choosing the best barista gear for coffee enthusiasts means investing in tools that last. And don’t forget the grinder; it’s the most important part of the chain. If you’re still using a blade grinder, you need to see how to select the perfect coffee grinder for your brew to elevate your espresso texture from gritty to silky.
Your First Successful Swan is Closer Than You Think
The transition from a simple heart to a complex swan is the most rewarding part of the home barista journey. It marks the moment you stop being a casual drinker and start becoming a craftsman. Every failed pour is just data, helping you adjust your tilt or your speed for the next cup. Don’t be discouraged by the ‘blobs’—they are the stepping stones to masterpiece. With the right home espresso setup and a bit of patience, you will soon be serving gallery-quality drinks from your own kitchen. Have you ever managed to pour a perfect heart only to fail at the swan? Let me know your biggest struggle in the comments below!