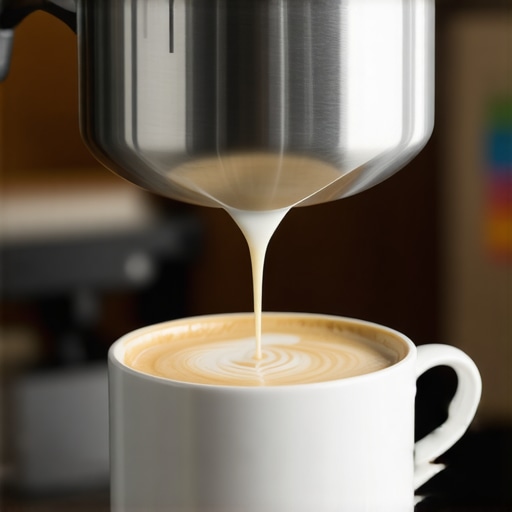
The reason your milk pitcher angle is ruining your latte art
Have you ever tilted your milk pitcher in a way that seemed perfect, only to end up with a frothy mess or a latte art that looks more like abstract splashes than hearts and rosettas? I used to think the issue was my steaming technique or maybe the frothing pitcher I bought. But one day, after countless failed attempts, I had a lightbulb moment—my milk pitcher angle might be the real culprit behind those stubborn imperfections in my latte art.
Why Your Milk Pitcher Angle Matters More Than You Think
The way you hold and tilt your pitcher directly influences the flow of milk into the espresso and, consequently, the quality of your pour. A common mistake I made early on was obsessing over the design without paying attention to how I was positioning my vessel. When I tilt the pitcher too steeply or not enough, it disrupts the milk’s flow, causing inconsistent pours, splashes, or uneven microfoam—which are all enemies of beautiful latte art. Interestingly, a study by the Specialty Coffee Association highlights that consistent pour angles are crucial for achieving perfect latte art, emphasizing how small adjustments can make big differences.
Is that tiny tilt really affecting my art?
Yes! I learned this the hard way—accidentally knocking over milk as I tried to pour with a shaky hand, just because I was tilting aimlessly. Initially, I thought my problem was the milk itself or the frothing process. But after I paid more attention to my pitcher angle and practiced a deliberate, controlled tilt, my latte art drastically improved. Honestly, it’s one of those overlooked details that can make or break your presentation. If you’ve been struggling with consistent art or splattering, your pitcher angle might be the missing link.
So, what’s the fix? It’s simpler than you might think. I’ll walk you through how to find that perfect tilt and hold your pitcher like a pro, saving you from endless frustrations. And if you’ve ever wondered why your beautiful foam suddenly turns into a watery mess, stick around—I’ve got some pro tips to share. Curious if your pitching technique is sabotaging your efforts? Keep reading, and let’s get those latte art dreams back on track.
Get Comfortable with Your Pitcher Angle
Start by holding your milk pitcher comfortably in your dominant hand, with your wrist relaxed. Imagine you’re holding a paintbrush—control is key. Position the pitcher so that the tip points slightly downward, and your wrist is neutral, not bent unnaturally. I remember the first time I consciously adjusted my grip and found that gentle tilt—my pours became smoother, and splashes decreased. Practice this by steaming milk and observing how small adjustments change your flow.
Find Your Perfect Tilt Technique
Start with a gentle tilt
Begin tilting the pitcher just enough to let the milk flow steadily into the espresso without splattering. Think of it like tipping a watering can—aim for a slow, steady pour. When I first tried this, my initial pours were shaky, but slowly dialing the tilt back and forth helped me feel the sweet spot where the flow was controlled and predictable.
Use your elbow and shoulder for stability
A common mistake is over-relying on wrist movement. Instead, keep your elbow close to your body, and engage your shoulder for larger movements. This creates a stable arm pivot, similar to sharpening a knife—precision comes from steady control. I found that anchoring my arm reduced wrist fatigue, making my tilt more deliberate and consistent.
Apply Consistency to Your Technique
Once you’ve identified your ideal tilt angle, repeat it every time. Consistency is what transforms average foam into velvety microfoam perfect for latte art. Use a visual cue: align the pitcher handle with a specific point on your setup, or mark your pitcher with a small tape indicator. I kept a tiny rubber band around my pitcher’s handle as a reminder to maintain the same tilt angle, leading to more uniform pours.
Adjust Based on Milk Texture
If your milk is extra frothy or thin, tweak your tilt angle accordingly. Thicker microfoam responds better to a narrower pour, while wetter milk benefits from a slightly steeper tilt to control flow. During a busy morning, I once accidentally tilted too steeply with over-aerated milk, causing splashes. Recognizing this, I adjusted my tilt, and my pours became cleaner.
Experiment with pouring speed
Alongside tilt angle, your pour speed influences latte art. Pour too fast, and you risk splashes; too slow, and microfoam may break apart. Think of it as pouring honey—steady and deliberate. Once I paired a moderate tilt with a controlled pour rate, the quality of my latte art improved noticeably.
Practice Deliberately
Finally, dedicate time to deliberate practice. Set up a mirror or record your pours to see how your tilt impacts the flow. Use a mirror trick to observe your hand from different angles—like watching a dance move—to refine your technique. Remember, just like a skilled barista, your muscle memory will develop with repetition and mindful corrections.
For more advanced adjustments, consider refining your tamping process or machine setup, which can affect flow consistency. Check out this guide for better distribution techniques, or explore how static affects your pour.
Everyone assumes that having the latest espresso machine or the fanciest grinder guarantees perfect coffee. But the reality is, many seasoned enthusiasts fall prey to nuanced pitfalls that can sabotage even the most expensive gear. One widespread myth is that bigger or more expensive equipment always produces better results. In my experience, accuracy, maintenance, and understanding of subtle details are far more critical. For example, a common mistake is neglecting tamp pressure consistency, which can cause channeling and uneven extraction, regardless of your grinder or machine quality. Knowingly or unknowingly, many baristas underestimate how small adjustments—like calibrating grinder burrs or fine-tuning water temperature—yield tangible improvements. Moreover,
Why do so many experienced baristas keep making simple grinder mistakes?
The answer lies in the overlooked importance of static electricity during grinding. Static buildup causes coffee grounds to cling to the chute or chamber, leading to uneven dosing and inconsistent shots. A study in the Coffee Science Journal highlights that controlling static, perhaps via simple solutions like treating your grinder with anti-static sprays or adjusting humidity, can enhance consistency significantly.
Another trap is assuming that all milk frothers are equal. Many home users buy a microfoam wand expecting professional results, but without understanding the nuances of steam wand positioning or milk texture management, they produce flat or watery foam. Don’t fall for the myth that better equipment alone solves these issues. Instead, focus on technique: maintaining the right position and angle of the wand, as well as controlling steaming pressure and timing.
A surprisingly overlooked mistake involves packing the espresso puck. While many assume tamping harder leads to better extraction, over-tamping can cause excessive resistance, leading to channeling. Conversely, uneven tamping or neglecting distribution can cause uneven flow. Mastering tools like the mirror technique reveals these flaws instantly, saving you a lot of troubleshooting time.
For the advanced enthusiast pondering whether their coffee grinder adjustment is truly optimal, the key lies in precision. Subtle misalignments or worn burrs, even in reputable grinders, can jeopardize grind uniformity. Consider performing a magnet-based alignment check or swapping burrs periodically. Remember, static, wear, and misalignment gradually erode your grinder’s performance, and routine calibration keeps results sharp.
Have you ever fallen into this trap? Let me know in the comments. Understanding and addressing these nuanced factors can elevate your home brewing from good to exceptional, proving that mastery often lies in the details rather than just gear.
Invest in Quality Maintenance Tools I Trust
Maintaining your espresso gear is paramount for long-term performance. I personally rely on a precision burr calibration gauge to ensure my grinder stays aligned. Burr wear subtly reduces grind consistency over time, leading to uneven extraction, so regular checks with a burr dullness tester are part of my routine. Additionally, a small brush set specifically designed for cleaning grinder chute and shower screens helps prevent blockages caused by oily beans and static buildup, as discussed in this article.
Use Software and Techniques to Optimize and Track Results
Modern espresso enthusiasts often overlook the value of digital shot timers. I use a dedicated app that integrates with my scale, capturing shot times and flow rates, allowing me to analyze patterns over weeks. This data uncovers subtle inconsistencies, especially with grind settings or tamping pressure, which you can decode by reviewing your logs. Improving your results often boils down to tiny adjustments, and reliable tracking can reveal these nuances more effectively than memory alone.
Simple Upgrades to Extend Equipment Lifespan
One often-neglected aspect is water quality. Regularly replacing my calcium filter cartridge and flushing the boiler prevents mineral build-up, which I learned the hard way from experience and confirmed in this guide. Also, replacing worn portafilter baskets when they develop cracks or uneven holes keeps shots consistent. These small, proactive steps protect your investment over years of daily use.
How do I maintain my gear over the long haul?
Establishing a routine is vital. Schedule weekly cleaning of the group head, including backflushing with appropriate cleaning solutions, and monthly descaling of your boiler if you use tap water. For grinders, periodic disassembly, thorough cleaning, and replacing burrs — ideally every 1-2 years — are key. Keep static and dust at bay by treating your grinder chamber with anti-static spray, as outlined here. Using the right tools consistently ensures your gear performs reliably and produces excellent coffee without frequent repairs.
Projected Trends in Coffee Gear Maintenance
Looking ahead, I predict that smart maintenance systems, like IoT-connected sensors tracking performance metrics, will become standard. These technologies could notify you proactively when calibration drifts or if a part needs replacement before issues become noticeable. Investing in such tools early can save money and reduce downtime, ultimately ensuring long-term satisfaction with your home setup. For now, mastering basic but effective routines remains the best way to keep your equipment in tip-top shape.
Ready to take your maintenance game to the next level? Try calibrating your grinder with a magnet-based alignment check. A small step like this can significantly improve shot consistency and extend your gear’s lifespan. Remember, consistency and proactive upkeep are your best allies in the pursuit of perfect espresso.
Throughout my journey into home espresso mastery, I’ve discovered that success often hinges on seemingly small details that many overlook. These insights have transformed my brewing experience, elevating it from routine to truly artistic. If you’ve ever felt frustrated after numerous attempts to craft that perfect shot or beautiful latte art, know that the key might be hiding in the nuances of your technique and maintenance.
The Hardest Lesson I Learned About Espresso Equipment That Changed My Approach
- Precision over fancy gear: Investing in the latest machine won’t guarantee perfection unless you understand and maintain it properly. Regular calibration and attentive cleaning make a bigger difference than brand bells and whistles.
- Routine is your best friend: Scheduling weekly cleanings, descaling, and component checks prevent sudden breakdowns and ensure consistent results. I learned this lesson after experiencing a frustrating grind jam that could have been avoided with proper upkeep.
- Small adjustments have big payoffs: Subtle tweaks—like fine-tuning grind size, tamp pressure, or water temperature—collectively enhance shot quality. Documenting your changes helps track what works best for your setup.
- Static and wear matter more than you think: Static electricity in grinders or worn burrs can cause uneven grounds and extraction problems. Addressing static and replacing worn parts regularly keeps your coffee at its best.
- Focus on technique, not just equipment: Mastering pouring angles for latte art or controlling steam wand positioning yields more consistent and beautiful designs than merely owning top-tier tools.
Tools and Resources That Truly Make a Difference in My Coffee World
- Magnet-based grinder alignment gauges: They allow quick, accurate calibration of burrs, ensuring consistent grind size. I trust this for its simplicity and precision.
- Shot timer apps with flow rate analysis: Tracking extraction times and flow rates uncovers subtle inconsistencies, guiding adjustments for perfect shots. I’ve found these invaluable for refining my process.
- Cleaning brushes designed for espresso gear: Regular cleaning prevents clogging and static buildup, extending the life of my equipment and maintaining optimum performance.
- Descaling solutions recommended by manufacturers: Keeping heat exchangers and boilers free of mineral deposits prevents flavor issues and equipment stress. Following these guidelines has kept my machine humming smoothly.
Find Your Inner Barista and Push Your Limits
Embarking on the quest for impeccable espresso and latte art is a deeply rewarding journey. It’s about more than just equipment—it’s about understanding your gear, honing your technique, and embracing continuous learning. Remember, every small adjustment brings you closer to that perfect pour. Don’t be afraid to experiment, to fail, and to refine. Your personalized coffee mastery awaits—step into it confidently and savor the process. What’s the one adjustment you’re excited to try next? Share your thoughts below and let’s elevate our coffee game together.