The Mirror Trick for Spotting Espresso Channeling Instantly
Ever stood in front of your espresso machine, watching your shot extract, only to be met with a disappointing burst of water—mingling with stubbornly uncooperative crema? I’ve been there, feeling my heart sink as I see uneven flow, knowing I’ve likely just wasted a perfectly good shot. That frustrating moment when your espresso refuses to cooperate can really ruin your day. But here’s the truth—once I discovered the mirror trick for spotting channeling instantly, my espresso game changed completely.
Why Spotting Channeling Instantly Matters for Your Coffee Quality
Channeling happens when water finds the easiest path through the coffee puck, leading to uneven extraction, bland flavors, and wasted beans. Early detection is crucial because the longer you wait to identify it, the more likely you’re brewing a subpar shot—without even realizing it. This is where the masterful art of visual cues comes into play. By using a mirror, I learned I could catch irregularities in real time, making adjustments before the shot’s even finished. The best part? It’s simple, affordable, and incredibly effective—once you know what to look for.
Is the Mirror Technique Really Worth the Hype?
Initially, I was skeptical, thinking it might be just another trick—like those gimmicky tools that promise miracles but deliver nothing. I even made the mistake early on of ignoring the importance of *proper* puck prep, which could be just as critical as the visual cues. But as I experimented, I realized that watching the espresso flow through a mirror gave me immediate feedback—allowing me to tweak tamping pressure or grind size on the fly. This method wasn’t just hype; it was a game-changer. For more tips on perfect puck prep that minimizes channeling, check out this guide.
Are you tired of brewing shots that come out looking uneven or tasting inconsistent? Have you faced the same frustration I did, wondering what went wrong even after following all the “rules”? If so, keep reading. I’ll walk you through exactly how to spot channeling instantly using nothing but a mirror and a keen eye—saving you time, beans, and your love for a good espresso. The secret’s simple: it’s about training your eye for those subtle visual signals before your shot ends. Let’s get you set up for espresso success.
Position Your Mirror for a Clear View
Start by placing a small, adjustable mirror to the side of your espresso machine, angled so you can peek in as your shot pulls. Think of it as giving yourself a backstage pass to the extraction process. When I first tried this, I used a compact, handheld mirror—similar to what you’d carry for makeup—to get that perfect angle. This setup allows you to observe the flow directly through the portafilter or even from inside the drip tray, offering an unobstructed view of the puck’s behavior.
Watch for Uneven Flow and Breaks
As the shot begins, monitor the visible flow for irregularities. Look for sudden gushes, splashes, or uneven streams—these are telltale signs of channeling. I remember a morning when I noticed a tiny, almost imperceptible split on the puck’s edge through the mirror. Instantly, I realized the tamp was uneven, and I corrected it before the shot finished. This real-time observation saves beans and helps you dial in your grind or tamp pressure right away. For a deeper understanding of distributing grounds evenly, check out this guide.
Identify the Sign of Channeling
Channeling manifests as quick flashes or splashes of water and coffee that alternate irregularly. Through your mirror, if you observe water escaping from a narrow section of the puck or erratic flow patterns, you’re witnessing a channel. At one point, I saw a distinct stream dart from the side of the puck, which immediately told me the tamp pressure was inconsistent. Recognizing these visual cues before the shot ends allows for immediate adjustments, boosting flavor clarity.
Make Corrections During Extraction
Once you see signs of uneven flow, tweak your method on the fly. Reduce tamping pressure if you notice water rushing through, or grind finer to slow down flow. I recall a shot where I paused the extraction briefly, adjusted the grind, and resumed—resulting in a perfect flow and vibrant espresso. Practice this dynamic feedback process repeatedly—it’s like reflex training, but for home baristas.
Practice and Record Real Results
Consistency comes with repetition. Keep a log of how each visual cue correlated with your adjustments and flavor outcomes. Over time, your eye will naturally catch the signs of channeling, making your pours more reliable. Remember, the goal isn’t just spotting issues but using those insights to refine your technique continually. For advanced puck prep to minimize channeling, explore this resource.
 Many home baristas believe that the key to perfect espresso lies solely in choosing high-end gear or following popular recipes, but in my experience, misunderstandings and overlooked details often sabotage even the most enthusiastic amateurs. A frequent myth is that a more expensive grinder guarantees superior flavor, but the reality is that grind consistency, burr material, and maintenance matter just as much— for instance, ceramic burrs can offer better flavor clarity than steel where properly maintained, as detailed in this expert comparison. Another misconception is that upgrading to a dual boiler automatically results in better espresso; however, many users underestimate the importance of proper calibration and water quality, which can lead to persistent temperature swings or scale buildup, reducing efficiency. When it comes to milk frothing, many assume that any frother will suffice— but over-aired milk results from incorrect steam wand technique or using dirty steam tips, often overlooked until the texture and temperature suffer. A simple fix is using a frozen spoon to prevent over-aired milk, explained here. Advanced enthusiasts often overlook the impact of group head cleaning, mistakenly thinking that rinsing once a day is enough; in reality, residual oils and coffee oils can affect flavor and machine longevity. Regularly performing a quick flush prevents buildup and preserves freshness. Moreover, many users are unaware that the issue with noisy machines is frequently due to a hidden valve or internal blockage— this isn’t about upgrading components but understanding your machine’s intricacies. The small details like burr alignment, tamper pressure, or the timing of your pre-infusion cycle all influence your shot’s flavor, yet these nuances are often ignored in favor of flashy gear. Did you know that even the orientation of your grinder’s static shield affects grind flow, especially on dry days? Addressing static can make a substantial difference, as outlined here. An often unrecognized issue is water hardness; many think about descaling as a routine task, but untreated hard water can promote rapid scale buildup leading to poor steam pressure and flavor deterioration— assessing your water quality is essential. All these hidden details and myths reveal that espresso mastery isn’t just about equipment; it’s about understanding and maintaining every component and process, from burrs to water. Dive into this deeper knowledge to truly elevate your home brewing. Want to make your equipment run smoother? Check out this insight. Have you ever fallen into this trap? Let me know in the comments.
Maintaining your coffee gear is essential to ensuring consistent, high-quality espresso shots over the long term. From grinders to espresso machines, having the right tools and a disciplined maintenance routine can make your home brewing more enjoyable and economical. One of the most underrated practices is regular cleaning of critical components such as group heads and grinders, which directly impacts flavor clarity and machine longevity. For example, performing a 30-second flush after each brew session helps prevent oil buildup, ensuring your machine operates at peak performance.
Invest in Quality Cleaning Tools
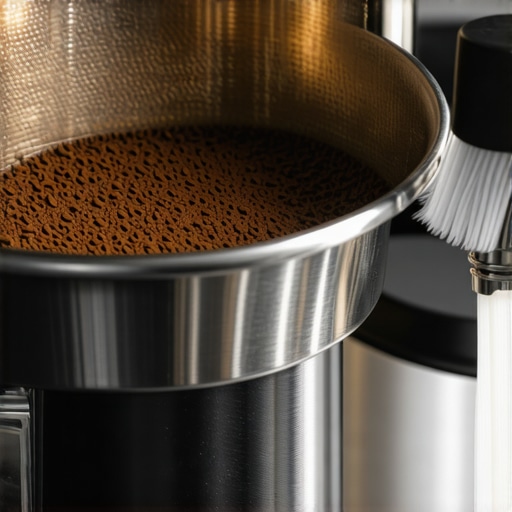
Personally, I swear by a dedicated group head brush with stiff nylon bristles for removing residual coffee oils. Combining this with a daily quick flush ensures your machine stays clean and free from rancid buildup that can taint your shots. For grinders, a small brush designed specifically for burrs really helps dislodge trapped grounds, maintaining consistency—I’ve found that static-cling grounds are often the root cause of uneven extraction.
Prioritize Proper Grinder Maintenance
Grinding performance deteriorates over time due to burr dullness and misalignment. I recommend regularly testing for dull burrs using the paper towel test—it’s quick and gives clear insight into whether it’s time for a replacement. Additionally, keeping your burrs properly aligned and free of static build-up contributes to uniform grind size, which is critical for a balanced extraction. Static issues, especially on dry days, can be mitigated with simple anti-static measures, avoiding uneven dosing or clumping.
Don’t Forget Routine Equipment Checks
Beyond cleaning, inspecting seals, gaskets, and valves periodically can save you from unexpected breakdowns. For instance, a leaking group gasket might seem minor but can cause inconsistent pressure and poor shot quality. If you notice any irregularities, consider replacing worn parts using guides from trusted sources like this tutorial. Staying proactive with such maintenance ensures your gear continues to perform optimally and prolongs its lifespan.
Plan for Long-Term Results and Scalability
As you refine your setup, investing in tools such as a dedicated scale for dosing precision or a temperature data logger for PID calibration can elevate your craft. Additionally, establishing a scheduled cleaning ritual—say, weekly descaling and monthly deep cleans—sets the foundation for consistent long-term performance. With attention to detail and regular upkeep, your equipment will serve you reliably, allowing you to focus on perfecting your shots rather than troubleshooting equipment issues.
What’s the Best Way to Keep Your Espresso Gear Healthy Over Time?
Implementing a disciplined schedule for cleaning, inspecting, and replacing parts is key. Keep your tools handy, such as a dedicated brush and descaling supplies, and stay vigilant for signs of wear or buildup. By doing so, you’ll avoid costly repairs and enjoy consistently excellent espresso. Want to optimize your grinder maintenance? Try applying the 10-second purge technique—it’s simple but highly effective for preserving fresh grind quality and flavor clarity. Consistency in maintenance is your best tool for coffee success.
Over the years, I’ve realized that the journey to exceptional home espresso isn’t just about fancy equipment—it’s about the nuanced lessons that only come from hands-on experience. One thing that truly transformed my brewing was understanding that even perfect-looking puck preparations can hide hidden flaws. I learned the hard way that two identical shots can taste worlds apart, emphasizing the importance of paying attention to details like static buildup in grinders or subtle water hardness issues. These insights, often overlooked, have made my mornings more gratifying and my espresso truly personal.
Lessons That Changed How I Brew Every Day
– The biggest breakthrough came when I stopped trusting my eyes alone and started observing flow patterns through simple tools like a mirror. Seeing irregular water streams during extraction revealed inconsistencies I couldn’t detect by taste or sight alone, leading me to fine-tune my tamping and grind settings. This real-time feedback loop became my secret weapon, and I wish I’d discovered it sooner. Remember, tools like a handheld mirror can offer the instant insights you need to elevate your espresso game. Check out this guide for more about perfect puck distribution techniques.
– I used to believe that equipment quality was all that mattered, but I learned the significance of routine maintenance. Simple tasks like a 30-second flush after each shot prevented rancid oil buildup, preserving flavor clarity and extending machine life. Over time, I started to see my machine as an extension of my craft—requiring care and attention to perform its best. Regularly checking components like gaskets and valves ensures your gear isn’t secretly sabotaging your efforts. For detailed steps, see this resource.
– My journey also taught me the importance of understanding water quality. Hard water can silently sabotage your persistent efforts, causing scale buildup that impairs steaming and flavor. A simple test and the use of water conditioners changed everything, making my system more reliable and my espresso more consistent. If you haven’t considered your water’s role, it’s time to look—because, sometimes, the secret to better shots lies in something as overlooked as your tap water. Explore this article for tips on water and milk frothing issues.
The Hidden Truths No One Tells You About Home Barista Wins
- Chasing the latest gear without mastering process details often leads to frustration. High-end machines won’t fix fundamentally misaligned tamping or static in grinders. Mastering simple maintenance and observation techniques are your true tools for consistency.
- Small adjustments—like reducing static by anti-static measures—can prevent large, costly repairs down the line. I found that static causes uneven grind flow, which leads to inconsistent extraction. A small anti-static brush and proper grounding transformed my grinding experience.
- Understanding your equipment’s quirks and regularly inspecting parts helps you avoid downtime. Worn seals or clogged valves are silent killers of flavor. Regular checkups, guided by trusted tutorials, are worth every minute spent.
Tools and Tips That Turn Amateur Into A Pro
This hobby is as much about the right mindset as it is about tools. I swear by a few essential resources that took my home espresso to a new level:
- Quality brushes: For thorough group head and grinder cleaning—keeps flavor pure and equipment working smoothly.
- Calibration guides: Properly calibrating your grinder after replacing burrs ensures consistent grind size—learn more in this article.
- Water testing kits: For diagnosing hardness and scaling risks, which can silently decrease performance over time.
- Maintenance checklists: Scheduled weekly or monthly routines keep your gear in peak condition, much like a professional barista’s regimen.
Your Next Step Towards Espresso Excellence
Now that you’ve grasped some of the deeper truths behind home brewing, it’s time to implement what resonates most with you. Whether it’s practicing with a mirror, refining your grinder maintenance, or testing your water quality—these small changes can lead to significant improvements. Remember, the pursuit of perfect espresso is a continuous learning process, and every subtle tweak brings you closer to barista-level results. Your perfect shot is within reach; it’s all about paying attention to the details that truly matter. What technique will you try first to enhance your espresso craft? I look forward to hearing your story below.