The Rubber Band Hack for Slippery Grinder Dials
I vividly remember the moment I first wrestled with my grinder dial, desperately trying to dial in that elusive perfect grind. Every twist of the knob felt like turning a smooth, but utterly uncooperative, enemy. Frustration mounted as I watched my shots become inconsistent, making me question if I’d ever find that sweet spot again. It was a lightbulb moment when I realized that **slippery grinder dials are a common—and surprisingly frustrating—problem** among home baristas and professionals alike.
What’s Behind the Slippery Grip on Your Grinder Dial?
Grinding coffee precisely requires steady hands and a reliable dial. But over time, many of us encounter those pesky, slick dials that refuse to stay put. It turns out, this is often due to a combination of factors like wear, low friction surfaces, or even the design choice of smooth, glossy materials that make grip a challenge. And if you’re like me early on, you might have tried everything from brute force to endless cleaning routines, only to find the problem persisted.
Admittedly, I made a big mistake early in my journey by ignoring the importance of grip. I believed that a clean, shiny dial was ideal—until I realized it was a slipping hazard. Ever since, I’ve been experimenting with simple, affordable solutions to improve grip and control. If your dial is feeling more like a spinning wheel than a precise tuning knob, hang in there. You’re about to discover an easy hack that transformed my setup.
Are Rubber Bands Worth the Hype for Your Grinder?
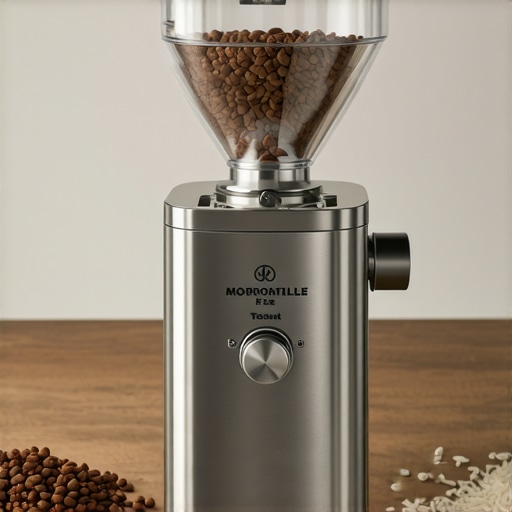
This hack isn’t some secret superpower, nor does it require advanced tools or modifications. It’s a straightforward trick: wrapping a small rubber band around the dial to instantly improve grip. Sounds simple, right? But the impact is undeniable. It gives just enough friction to prevent unwanted slipping, and it’s so cheap and easy that anyone can do it in minutes. I’ve applied this trick on several grinders, and the difference is remarkable—more consistent dialing, fewer missed marks, and even less frustration.
Of course, some skeptics wonder if a rubber band could cause damage or interfere with the mechanism. From my experience, if you choose a standard, non-adhesive rubber band and keep it snug but not tight, it won’t harm your grinder. Plus, as I’ve learned, maintaining control over your grind size is crucial—think of it as fine-tuning your espresso to perfection rather than battling a slippery enemy. If you want to learn more about how to care for your grinder and prevent static issues, check out this guide on static and grinding issues.
So, if you’ve ever wrestled with those elusive dial adjustments, know that you’re not alone. This simple rubber band hack might just be the game-changer you need. Ready to see how this trick can make your espresso routine smoother and more predictable? Let’s dive into how to implement it and share tips to maximize your control—and your coffee’s flavor. After all, precision in grind size is the foundation of a good shot, and a better grip on your dial is the first step toward that.
Wrap the Rubber Band for Instant Grip
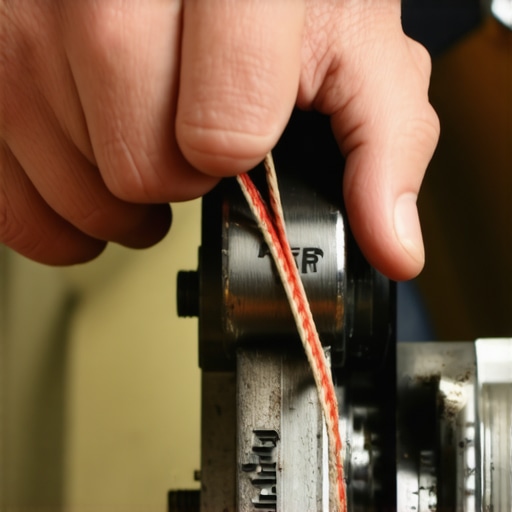
Start by selecting a standard non-adhesive rubber band, about 1/4-inch wide. Take your grinder and identify the dial that feels slippery. Loop the rubber band around the base of the dial, ensuring it sits snugly without covering any critical markings. The goal is to create a textured surface that increases friction without hindering rotation. I once used a colorful rubber band on my Baratza Virtuoso, which instantly made dialing in espresso shots smoother and more precise. This quick fix eliminates slipping without any permanent modifications.
Adjusting and Securing the Band Properly
Gently stretch and position the rubber band so it sits evenly around the dial. Make sure it doesn’t bunch or slip off during use. If the band feels loose, you can double it or choose a slightly thicker one. The key is achieving a balance—firm enough to prevent slipping but loose enough to turn comfortably. During my first attempt, I realized that if the band is too tight, it makes turning difficult, so I adjusted accordingly, ensuring consistent grip.
Fine-Tuning for Maximum Control
Rotate the dial slowly and observe the grip improvement. You should feel a noticeable increase in resistance, reducing accidental slips. Repeat the process if necessary, replacing or repositioning the rubber band. Experiment with different band widths or textures—some prefer foam bands or those with ridged surfaces for extra grip. After applying this hack, I gained better consistency when adjusting grind size, which improved shot extraction and flavor clarity.
Maintenance Tips and Considerations
Check periodically to ensure the rubber band remains secure and hasn’t degraded or lost elasticity. Clean the band for hygiene—wipe with a damp cloth if needed. Avoid using bands with adhesive or rubber based on latex if you have sensitivities. Also, keep in mind that some grinder designs with exposed or textured dials respond better to this hack. For deeper modifications, explore options like adding grip tapes or pads—just ensure they won’t interfere with the mechanism.
If your grinder’s static issues or slipping are caused by other factors, consider static fix methods, but for quick, reliable control, the rubber band trick is unbeatable. Remember, improving grip directly translates into better control over your grind size, which is fundamental to a perfect espresso shot.
When it comes to crafting the perfect cup at home, many enthusiasts fall prey to widespread misconceptions that can hinder their progress. One prevalent myth is that expensive gear guarantees better espresso, but in reality, understanding the nuances of each component often has a greater impact on your brewing results. For instance, while a high-end espresso machine might seem like a must-have, proper maintenance—such as avoiding rust by ensuring your machine base isn’t compromised—is more critical than price tags suggest. Check out this guide for tips on keeping your equipment in top shape.
Keeping Your Espresso Gear in Peak Condition
If you’re serious about home brewing, understanding how to maintain your equipment is crucial. Regular upkeep not only prolongs the lifespan of your espresso machine, grinder, and accessories, but also ensures consistent results with every shot. One of the simplest yet most effective practices is inspecting your machine for rust, especially on the base, which can severely affect performance and safety. For detailed guidance on preventing and addressing rust issues, check out this comprehensive guide.
Invest in Precision Tools for Consistent Results
Beyond your machine, the right tools transform the home barista experience. A high-quality digital scale, for example, helps you measure doses precisely, reducing wastage and improving shot consistency. I personally swear by the espresso scale with built-in timer to monitor extraction times accurately. It’s worth noting that cheap, mechanical scales often lag and can lead to misjudged doses, so investing here pays off in flavor clarity.
Fine-Tune with Proper Water Filtration
Remember, water quality impacts not just taste but also machine longevity. Regularly replace or maintain your home water softener, or consider a dedicated water filter system optimized for espresso brewing. If mineral buildup occurs, it can clog gicleurs and cause inconsistent brewing temperatures. Learn more about protecting your equipment from hard water effects at this detailed article.
Tools I Recommend for Effortless Maintenance
In my workflow, I rely on a few specialized tools to keep everything running smoothly. A puck prep toolset helps in distributing grounds evenly, which is critical for avoiding channeling. Also, a soft-bristle cleaning brush preserves the grinder’s burrs and reduces static buildup—something that’s often overlooked but essential for consistent grind size. To clear clogs in your basket quickly, I suggest the paper clip trick. These small investments can dramatically increase your machine’s lifespan and your daily espresso quality.
How do I keep my equipment working effectively over time?
Regular cleaning, timely filter replacements, and diligent part inspections are your best bets. For example, checking for leaks in steam wands or replacing worn gasket seals before major issues arise saves money and frustration. Plus, staying informed about emerging maintenance techniques—like DIY steam wand repairs—empowers you to handle problems swiftly. Consider setting a maintenance schedule; I personally set monthly reminders to descale boilers and inspect gaskets, ensuring uninterrupted shots and taste consistency.
Future Trends in Home Barista Tools
Looking ahead, I predict a rise in smart diagnostic devices integrated with home espresso setups. These could automatically alert you to worn parts, water quality issues, or calibration needs. Already, some scales and machine interfaces provide Wi-Fi updates with maintenance tips, streamlining long-term care. Embracing these innovations now—as expensive as they may seem—can save time and money in the future, making your home barista journey more rewarding.
If you want to boost your maintenance game, try recalibrating your grinder with a precise burr setting procedure. It’s a small step that results in significantly better extraction and flavor clarity and keeps your grinder performing at its best. Remember: meticulous care today ensures you consistently craft espresso masterpieces tomorrow.
Lessons That Changed My Home Barista Journey
One of the most eye-opening lessons I encountered was realizing how a simple grip hack could dramatically improve grind control. I used to believe that expensive grinders or sophisticated tools were the only ways to get consistent shots, but discovering the rubber band trick taught me that sometimes, simple solutions truly make a difference. Additionally, I learned that maintenance routines—like checking for rust or calibrating your grinder—are the unsung heroes of a reliable espresso setup. Recognizing my tendency to overlook these small upkeep tasks was a crucial step toward elevating my brewing game. Finally, I discovered that understanding the mechanics behind static buildup and how to address it can unlock smoother grinding sessions, reducing wasted beans and frustration. Every one of these revelations came with a ‘lightbulb moment’ that reinforced the importance of personal experimentation and mindfulness in my home espresso routine.