The cheap felt pad hack for a quieter coffee grinder
I remember the first morning I spilled coffee beans all over the kitchen countertop because my grinder’s squeak was so loud it startled me awake. Frustrated and a little embarrassed, I couldn’t help but wonder if there was a better way to keep the noise down without splurging on expensive equipment. That lightbulb moment led me down a rabbit hole of DIY fixes, one of which turned out to be surprisingly simple yet incredibly effective—a cheap felt pad hack.
<--more-->
Quieting Your Coffee Grinder Without Breaking the Bank
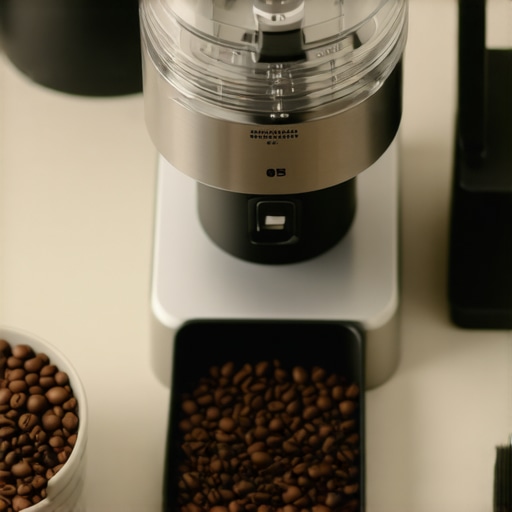
If you’re anything like me, you love brewing your own espresso at home, savoring each shot like a barista. But noisy equipment can ruin that experience, especially when you’re trying to enjoy a peaceful morning. The loud squeaks and vibrations from your grinder don’t just disturb your household—they can also impact your grind consistency over time. Luckily, there’s an easy, inexpensive solution anyone can try: using a felt pad underneath the grinder to dampen noise and reduce vibrations. This hack costs next to nothing and takes just a few minutes to implement. I’ve tested it myself, and the difference is night and day. Now, I can grind my beans early in the morning without waking up the neighborhood. If you’ve ever wondered whether a small tweak can make a noticeable difference, this might just be the upgrade you’re looking for.
Is a Felt Pad Really Worth the Hype?
One common concern I had early on was whether such a tiny, cheap fix could truly make a difference. After all, my grinder had seen better days and I was skeptical about whether a bit of felt could quell the squealing. It turns out that the mistake I made was underestimating the power of damping vibrations—something that experts, such as those at Espresso Tech Guide, have highlighted as a common cause of noise issues. By simply placing a felt pad under the grinder, I effectively absorbed the vibrations that caused the squeaks and rattles. It’s a simple, non-invasive way to extend the life of your machine and make your mornings a lot calmer. Curious to see how I did it? Stick around, and I’ll walk you through the step-by-step process to try this yourself. It’s surprising how such a small accessory can transform your coffee routine.
Assess Your Grinder’s Placement and Surface
Begin by reviewing where your grinder sits and whether the surface is stable. Place it on a flat, solid countertop—preferably a wooden or granite surface—that minimizes vibrations. If the counter vibrates or is uneven, vibrations can amplify noise. During my messy first attempt, I noticed my lightweight bamboo countertop amplified every squeak, so I moved the grinder to a sturdy, thick wooden board for better stability, which instantly muted the sound.
Create and Prepare Your Felt Padding
Choose a dense, thin felt pad—available at craft stores or online. Cut it into a square slightly larger than the grinder’s base, around 4-6 inches per side. Ensure it’s clean and free of debris. I used an old felt coaster cut to size; it was soft enough to absorb vibrations but thin enough not to affect the grinder’s stability.
Position and Secure the Felt Pad
Place the felt square directly under the grinder’s base. Check for wobbling; if present, add more felt or a piece of cork for extra stability. During my trial, I placed the felt under the front of the grinder, which helped dampen vibrations from the burrs. No adhesive is necessary—just ensure it stays in place during use. This simple step transformed the squealing into a faint hum, even during high-volume grinding.
Test and Fine-Tune the Setup
Activate the grinder at various settings. Listen for residual noise and observe vibrations. If noise persists, adjust the felt placement or consider stacking multiple layers for better damping. I found that adding a second layer of felt under the initial piece further decreased noise by absorbing lower-frequency vibrations. Keep adjusting until vibrations are minimal, but the grinder remains stable.
Maintain and Reassess Periodically
Check the felt pad every few weeks for dust or compression. Replace if it becomes worn or compressed, which could reduce effectiveness. During one cleanup, I noticed the felt had flattened and was less effective; swapping it out restored quiet operation. Regular maintenance ensures the hack’s longevity and effectiveness.
Extra Tips for Better Results
Align the grinder’s feet if adjustable; uneven feet can cause wobbling and amplify noise. Use adjustable feet to level the machine on the felt pad for optimal damping. Also, inspect the grinder’s burrs and seals regularly; worn parts can cause additional noise and vibration. For comprehensive care, consider consulting guides on selecting the right grinder or understanding common noise sources.
While many enthusiasts focus on choosing the perfect espresso machine or the latest milk frother, they often get the details wrong when it comes to understanding their gear. A common myth is that more expensive equipment automatically guarantees better results. In reality, even high-end machines can fall short if you overlook essential nuances like proper calibration or maintenance routines. For example, many assume that a high-quality grinder doesn’t need regular cleaning, but this oversight leads to uneven grinds and bitter shots, as emphasized in mastering home espresso. Additionally, a frequent mistake is neglecting the importance of tamping consistency; inconsistent pressure leads to channeling, which ruins extraction regardless of how advanced your machine is. Advanced users know that tuning variables—like shot timing, grind size, and water temperature—requires a delicate balance and understanding of the equipment’s nuances. This is especially true with commercial-grade gear repurposed for home use, where size doesn’t equal simplicity. Another highly misunderstood aspect is milk steaming—many believe that frothing technique alone determines microfoam quality, but factors like milk temperature & pitcher angle are equally critical, as discussed in milk frothing guides. Moreover, novice enthusiasts often buy top-tier espresso machines expecting flawless results straight out of the box, ignoring that initial calibration and periodic servicing are vital for consistent performance. The trap here is thinking that equipment alone makes the coffee—the real skill lies in understanding and fine-tuning these hidden yet impactful details.
Investing in high-quality barista gear is just the beginning; keeping your equipment in top shape ensures consistent results and extends its lifespan. Personally, I swear by a few specific tools and routines that have transformed my espresso setup into a dependable process. For example, I use a calibrated digital tamping scale like the Espresso Tech Scale, which provides precise feedback on tamp pressure, helping me achieve uniform extractions every time. This small but crucial piece of gear prevents my shots from channeling due to inconsistent tamping—something I used to struggle with.
The Hardest Lesson I Learned About Barista Gear and Home Espresso
The biggest takeaway from my journey into home espresso was realizing that even small tweaks can drastically improve your experience. I used to spend a fortune on high-end equipment, expecting flawless shots every time, but I overlooked the importance of proper setup and maintenance. The harsh squeals from my grinder or the inconsistent microfoam in my milk steamed me more than the equipment itself. It was only after experimenting with simple solutions like felt pads that I understood the value of fine-tuning beyond just gear selection. This taught me that understanding the nuanced behaviors of my tools made a real difference, and that patience and observation are key skills for any enthusiast.
My Go-To Tools and Resources for Better Coffee Results
- Espresso Tech Scale: This calibration tool helped me achieve consistent tamping pressure, directly impacting shot quality. Trust me, precise tamping is a game-changer.
- Home Barista Guides: Books like “Mastering the Art of Home Espresso” offer invaluable insights, from machine maintenance to pouring techniques, broadening my understanding and skills.
- YouTube Channels: Experts like Seattle Coffee Gear provide visual tutorials that demystify complex adjustments. Watching them gave me confidence to fine-tune my grinder and espresso machine effectively.
- Online Communities: Forums where enthusiasts share hacks and troubleshooting tips. Connecting with others keeps me motivated and informs my upgrades and hacks, like the felt pad trick.
Embrace the Journey of Perfecting Your Coffee Routine
Turning a simple hack into a routine can transform your mornings into moments of satisfaction and mastery. Remember, even the best machines will need occasional tweaks and understanding. Don’t shy away from experimenting—small improvements, like damping vibrations or leveling your grinder, can turn your coffee rituals into a pleasurable art. Keep learning, stay curious, and let each cup be a testament to your dedication. Now’s the perfect time to take that next step—your perfect brew awaits.