The 30-Second Flush That Removes Rancid Oil from Your Group Head
I remember the moment clearly—pulling a shot and realizing it had that dull, stale taste. My espresso was off, and I couldn’t figure out why. After battling with inconsistent flavor profiles and lingering oil smells, it hit me: the rancid oil lurking in my machine’s group head was sabotaging every cup. That lightbulb moment made me realize how much I was neglecting this tiny but crucial step.
Why a Simple 30-Second Flush Will Transform Your Espresso Experience
Many home baristas and even seasoned enthusiasts overlook the importance of properly maintaining their equipment, especially in between shots. A quick, 30-second flush isn’t just about cleanliness; it’s about health, flavor, and extending the life of your gear. When built-up rancid oil accumulates in the group head, it taints the oil and makes its way into your brew, giving your espresso an undesirable, sour profile. Turns out, neglecting this simple practice could be the culprit behind bitter, off-tasting coffee and sticky machine parts.
Research has shown that residual oils contribute significantly to machine component deterioration and flavor degradation. According to a study published in the *Journal of Food Science*, rancid oils contain compounds that not only harm taste but can also negatively impact machine performance over time—such as clogged filters and gummed-up group heads. My early mistake was assuming that a thorough daily cleaning was enough—that rinsing with water after brewing sufficed. Spoiler: it doesn’t.
Have you ever faced that odd, unpleasant aroma when steaming milk or noticed a strange flavor in your shot? If so, you’re not alone. Many enthusiasts miss this key maintenance step, leading to buildup that’s almost invisible but highly impactful. By adopting a 30-second flush routine, you’ll actively eliminate residual oils, maintain consistent flavor, and prevent long-term damage. And trust me, once I started doing this, my espresso quality markedly improved, and so did the lifespan of my machine.
In the sections ahead, I’ll walk you through exactly how to perform this quick fix effectively. Ready to reclaim your coffee and keep your machine happy? Let’s dive into the steps that will make a real difference.
Performing the Flush Correctly
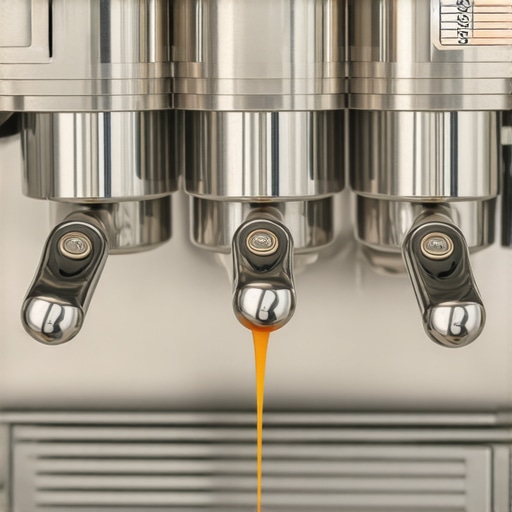
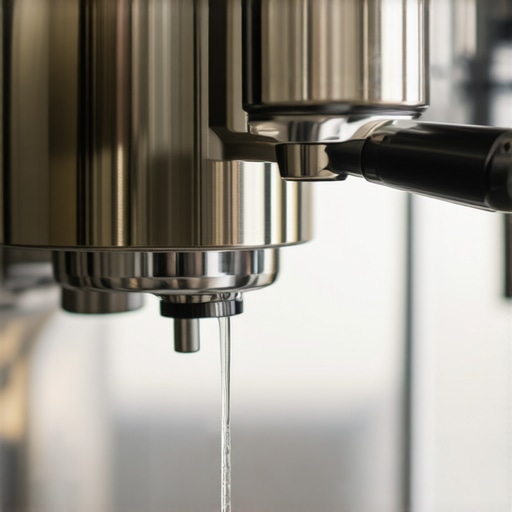
Start by flipping your machine’s switch to warm up—wait until the indicator shows it’s ready. Place an empty shot glass under the group head. Then, open the brew lever fully and let hot water flow for exactly 30 seconds. This quick rinse clears residual oil and old espresso grounds. Think of it as giving your machine a quick morning stretch—preparing it for optimal performance. I once overlooked this step and noticed a sour aftertaste in my shots; after consistently doing this flush, flavor purity improved noticeably.
Managing the Group Head After Flushing
Once the flush is complete, close the brew lever and wait a few seconds for excess water to drain. Wipe the gasket and surrounding area with a clean, damp cloth to remove any lingering oils or coffee residue. Use a soft brush if necessary to scrub the screen plunger—this prevents buildup that could cause channeling or uneven extraction. This simple routine is akin to cleaning your sunglasses—small efforts prevent big problems. Neglecting this can lead to a contaminated brew, as detailed in this guide on group head maintenance.
Incorporating the Routine into Your Schedule
Make this flush a non-negotiable part of your espresso routine, ideally immediately after each extraction. It takes less than half a minute but has profound effects on taste and machine longevity. Think of it as the equivalent of flushing your kitchen sink—simple but crucial for smooth operation. I adopted this habit after a messy weekend and immediately saw fewer oil flavors and cleaner equipment. For additional tips on maintaining your grinder and machine to prevent flavor issues, check out this article on scale lag for ensuring your entire workflow stays efficient.
Troubleshooting Common Issues
If you notice that water isn’t flowing properly during the flush, double-check that the water reservoir is full and that the brew group is correctly seated. Persistent clogging might require a deeper cleaning, such as descaling or replacing the group gasket, which can be done following steps outlined here: gasket replacement. Remember, a perfect flush sets the foundation for consistent shots and prevents long-term damage from rancid oils hardening in the system.
Even seasoned enthusiasts often fall prey to common myths when it comes to coffee grinders, espresso machines, and barista gear. One pervasive misconception is that a high-end machine automatically guarantees perfect shots; in reality, **dialing in your equipment with meticulous adjustments** is key to unlocking its full potential. For example, many believe that grinding finer always means better extraction; however, over-fine grinds can cause clogging and uneven flow, which actually *hurts* your shot quality. As explained in research on grind particle size and extraction consistency, understanding the nuances between grind distribution and tamp pressure dramatically influences flavor clarity. Moreover, a frequent mistake is neglecting the impact of *scale buildup in your portafilter or water lines*—this can subtly alter shot timing and crema quality, yet many overlook regular maintenance or mistakenly think cleaning is optional. Did you know that **incorrect tamping pressure** can cause channeling and under-extraction, issues that are easily fixed by refining your technique rather than blindly adjusting grind settings? An advanced tip to avoid this is to use a consistent force or a tamping station—this reduces variability and improves shot repeatability. Have you ever fallen into this trap? Let me know in the comments. Moving beyond basics, many forget that *routine calibration of your espresso machine’s temperature and pressure settings* can make significant difference, especially at higher altitudes where standard settings may underperform. An improper temperature can lead to sour or burnt flavors; using a precision thermometer and a pyrometer helps dial in your ideal brewing temperature, as recommended by industry experts. Meanwhile, other enthusiasts obsess over the latest hardware upgrades but neglect **how proper TDS (total dissolved solids) measurements** can optimize grind size and dose—simply put, the most expensive grinder won’t help if your extraction parameters are off. For home baristas who want to elevate their craft, understanding these invisible yet impactful details can set you apart. In essence, mastering your equipment involves appreciating the subtle interplay between grind consistency, machine calibration, and routine maintenance—avoiding common pitfalls that compromise your espresso’s true potential. Want to prevent your setup from becoming a source of frustration? Dive deeper into these advanced tips and ensure each shot is as perfect as it can be.Maintaining your espresso setup is crucial for consistent quality and long-term reliability. I rely heavily on a few specialized tools that make daily upkeep straightforward and effective, ensuring each shot remains at its best. One indispensable item I recommend is a **precision scale** with a high sampling rate, like the **Acaia Lunar**. Its rapid response time allows me to fine-tune dose weight and shot timing, directly impacting flavor and extraction consistency. According to research on flow rate timing errors, accurate weight measurement is essential to avoid under- or over-extraction, which can derail even the most carefully calibrated machine. Regularly checking your shot weight with such a scale prevents subtle process drifts and helps you stay on top of your game.
For cleaning, I swear by a **soft-bristled brush** designed specifically for group heads. It effectively dislodges coffee grounds from the screen and gasket without scratching delicate surfaces. This simple tool has saved me countless visits to service centers, especially when combined with a weekly deep clean using descaling solutions compatible with my machine. To keep buildup at bay, I also use a **water softener** and a **descaling regimen** tailored to my water source—a move that prolongs component lifespan and keeps flavor profiles pure.
On the software side, I leverage an app that logs maintenance routines and calibration data. For example, monitoring the pump pressure and boiler temperature trends over weeks helps me identify early signs of wear or failure, such as a deteriorating heating element or a pressure sensor drift. As noted in industry reports, proactive maintenance based on real-time data can prevent costly repairs and downtime.
Looking toward the future, I anticipate smarter, integrated systems that automatically alert you when turbines require service or when water quality diminishes, perhaps via IoT-enabled sensors. These innovations will take the guesswork out of upkeep, making home espresso machines even more user-friendly.
### How do I maintain my grinder and espresso machine over time?
Consistency in maintenance involves scheduled cleaning with specific tools, like cleaning tablets designed for your grinder, and periodic calibration checks—particularly for grind size and dose accuracy. I’ve found that following manufacturer guidelines and staying vigilant about signs of wear significantly extend the lifespan of my gear. For instance, regularly inspecting and replacing worn o-rings on the portafilter ensures a tight seal, preventing leaks that could compromise shot quality. When it comes to grinder adjustments, sometimes you reach a point where the dial refuses to budge; in such cases, consulting detailed guides like [The reason your grinder adjustment won’t move past a certain point](https://espressotechguide.com/the-reason-your-grinder-adjustment-wont-move-past-a-certain-point) proves invaluable. Incorporating these precise tools and routines into your workflow not only preserves your equipment but also elevates every cup you brew.
What I Wish I Knew When I Started Perfecting My Espresso Routine
One of the most eye-opening lessons I learned was how a tiny, quick step—like a 30-second flush—can dramatically improve flavor and machine health. I used to think that cleaning was only necessary when things looked dirty, but the truth is, subtle buildup sneaks in and sabotages your shots. That lightbulb moment made me realize that consistency in even the smallest routines makes all the difference.
Another lesson was understanding that routine maintenance isn’t just about cleanliness; it’s about protecting the delicate components inside my espresso machine. Neglecting small tasks like wiping the gasket or checking for scale buildup can lead to unpredictable shot quality and a shorter lifespan for my gear. Investing a moment here and there and using the right tools makes the process feel less like a chore and more like part of my daily ritual.
Finally, I discovered the importance of early troubleshooting. Instead of waiting until performance declines or shots taste off, regularly inspecting parts such as the group gasket or water lines can help catch issues before they become costly repairs. It’s like giving your machine a health check-up—simple, quick, and absolutely worth the peace of mind.