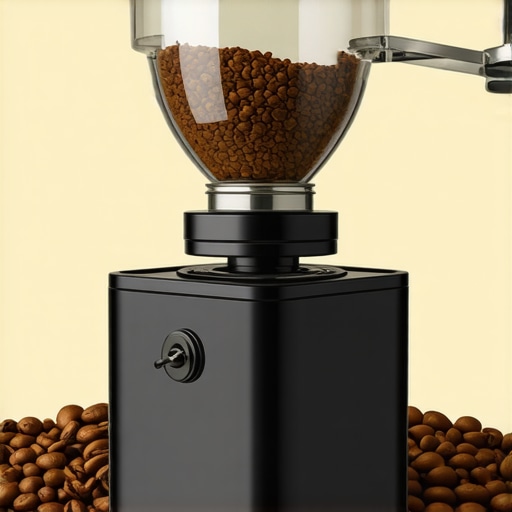
Why Your Flat Burrs Are Producing Bitter Shots and How to Re-Align Them
Remember that moment when you finally nail the perfect espresso shot—rich, balanced, and just the way you like it—and then a week later, it tastes flat or even downright bitter? It’s a sinking feeling, and I’ve been there more times than I care to admit. One day, I realized my flat burr grinder was the culprit, and the root cause was surprisingly simple: misalignment. That lightbulb moment transformed my home brewing experience, and I want to share it with you.
The Frustration of a Bitter Shot
There’s nothing worse than investing in a high-quality espresso machine and grinder, only to be greeted by a bitter, over-extracted cup that leaves a bad taste in your mouth. I used to think it was all about bean quality or grind size, but after countless tweaks, I discovered that flat burr misalignment can turn your perfectly dialed-in shot into a bitter disaster. And yes, I was guilty of ignoring this simple issue early on, which led to many wasted beans and brewing frustration.
Today, I’ll guide you through why your flat burrs might be out of alignment, how it impacts your espresso, and—most importantly—how to fix it. Because when your burrs are properly aligned, you’ll notice a significant improvement in flavor, clarity, and overall shot consistency. Ready to bring harmony back to your espresso routine? Let’s dive in.
Can Misaligned Burrs Really Make My Espresso Bitter?
Absolutely. Flat burrs that aren’t sitting precisely level can cause uneven grinding, leading to inconsistent particle sizes. This inconsistency fosters over-extraction in some areas and under-extraction in others, often resulting in that bitter undertone. A study published in Scientific Reports highlights how precise grinding is essential for optimal extraction, which directly influences flavor quality.
Back in my early days, I overlooked the importance of burr alignment—believing that merely setting the grind was enough. That mistake cost me countless cups of subpar espresso. But once I learned how to re-level my flat burrs, my shots became smoother, richer, and much more balanced. If you’ve faced similar issues, keep reading—because this simple step could be your game-changer.
Now that you understand why this happens, it’s time to get into the practical steps for re-aligning your burrs and reclaiming your espresso artistry. If you’re curious about additional adjustments that can elevate your brewing, check out [7 items for a pro home espresso setup](https://espressotechguide.com/7-items-for-a-pro-2026-home-espresso-setup-under-500) and learn the essentials for peak performance.
Secure Your Workspace and Gather Tools
Start by clearing your workspace and gathering essential tools: a clean cloth, a small flathead screwdriver or Allen wrench (depending on your grinder), and your grinder’s manual. Remember, working on coffee equipment requires care to avoid damage—think of it like tuning a precision instrument. I once tried to fix my grinder without proper tools, resulting in a stripped screw and a day lost. Now, I always prepare everything beforehand to ensure a smooth process.
Unplug and Clean the Burr Area
Turn off and unplug your grinder. Remove the bean hopper and clear any remaining beans to prevent messes. Use a soft brush or cloth to wipe away coffee grounds and dust. This prevents debris from interfering with the alignment process and keeps your grinder in pristine condition. Skipping this step can cause misalignments or damage to the burrs over time.
Access the Burrs for Adjustment
Depending on your model, you’ll need to remove the top or side panel to access the burrs. Use your screwdriver or Allen wrench to carefully detach screws or bolts holding the burr assembly. Think of this as opening the hood of a car—patience is key. In my experience, rushing here led to cross-threaded screws, so I now gently tighten each screw by hand after loosening. Remember, consult your manual if unsure—different grinders have unique mechanisms.
Align the Burrs Precisely
Once exposed, gently loosen the burrs if they are adjustable. Use a flat shim (a business card works in a pinch) to help visualize alignment. Carefully level the burrs by adjusting their screws or mechanism, ensuring they sit perfectly flat and parallel. As an analogy, think of aligning picture frames on a wall—use the shim as your leveling tool. I once tried eye-balling the alignment, but it resulted in uneven grinding; using a shim made the process precise and straightforward.
Use the Shim to Level the Burrs
Place the shim between the burrs and gently tighten or adjust until the burrs are just touching the shim without pinching or wobbling. This ensures consistent particle size, vital for balanced extraction. This small step drastically improved my shot clarity, turning my bitter espresso into a smooth delight.
Verify and Tighten Everything
Reassemble the grinder by reversing your disassembly steps. Tighten screws securely but avoid overtightening, which can warp components. Spin the burrs manually to ensure smooth movement and that they stay firmly aligned. After reassembly, run a few test grinds to check for consistency. Think of this as tuning a guitar—listen and feel for harmony. I once skipped the testing phase, which caused uneven shots until I realized the burrs weren’t properly aligned.
Test and Adjust as Needed
Pull a few shots or grind coffee to verify improvement. If you notice persistent unevenness, re-open the grinder and repeat the alignment process. Small deviations can sneak in over time; regular checks—perhaps monthly—can keep your grinder performing at its best. Remember, proper alignment extends the life of your burrs and ensures every shot is a pleasure.
For ongoing maintenance, consider exploring related guides, like why commercial grinders aren’t always the solution at home or tips to prevent metallic tastes in your espresso. Staying proactive with your grinder’s health guarantees you barista-quality results every time.
Challenging the Conventional Wisdom on Espresso Gear
Many enthusiasts believe that purchasing top-of-the-line espresso machines or grinders guarantees perfect shots every time. However, in my experience, there’s a common misconception that quality gear alone can compensate for technique and understanding of subtle nuances. For example, it’s a mistake to assume that a more expensive machine will automatically produce better espresso without proper calibration and maintenance. In fact, some premium models have features that can complicate adjustments if you’re unaware of their quirks, leading to wasted beans and frustration. To truly master your setup, you need more than just gear—you need an in-depth understanding of how each component behaves in different situations.
One trap I often see aspiring baristas fall into is over-reliance on automatic features, like smart sensors or preset profiles, believing they replace skill. While these tools can help, they might also hinder your progress by masking underlying issues. For example, a smart scale that isn’t properly calibrated can give misleading flow rate readings, resulting in inconsistent shots. Ensuring your equipment functions correctly through proper calibration—like fixing your smart scale’s latency issues—can significantly impact your espresso quality. Explore how to optimize your smart scale for better results.
The Advanced Question: How Do Tiny Variations Impact Flavor?
Advanced baristas understand that minute differences—such as burr alignment, tamping pressure, or even ambient temperature—can drastically change extraction quality. For instance, even a slight misalignment of burrs, which many overlook, can lead to muddy or sour shots because of uneven grind distribution. A study published in the Journal of Food Science emphasizes how micrometric inconsistencies directly influence flavor compounds and extraction efficiency. To delve into this, regularly check your grinder’s burrs for alignment—even small deviations can cause a substantial shift in taste profiles. Remember, precision at this level often separates a good shot from a legendary one. Want to perfect these nuances? Consider reading about burr alignment techniques for premium extraction.
Finally, avoid the oversimplification that more gadgets automatically mean better coffee. Sometimes, simpler setups with meticulous calibration outperform complex, feature-laden equipment. For example, a minimalist grinder paired with proper tamping and temperature control can outperform a high-tech machine riddled with unnecessary features. It’s vital to have a comprehensive understanding of your gear’s cornerstone tools for professional-grade brewing.
Have you ever fallen into this trap? Let me know in the comments and share your experience with gear pitfalls or hidden tricks for better espresso.
Prioritize Regular Upkeep for Consistent Performance
Maintaining your espresso gear isn’t just about routine cleaning; it’s about preserving precision and extending the lifespan of your investment. For example, regularly flushing your milk frother with hot water and a cleaning solution prevents milk residue buildup, which can cause microbial growth and affect taste. A simple daily wipe-down using a dedicated espresso machine cleaner keeps internal components functioning optimally and prevents flavor contamination. To stay ahead of potential issues, I include a weekly deep clean, especially focusing on the group head, portafilter, and steam wand. These small steps safeguard your espresso quality over months and years.
Invest in the Right Tools for Maintenance and Calibration
High-quality maintenance tools make all the difference. I personally rely on a precision calibration scale—like the smart scale calibration tools—to fine-tune grind consistency and extraction times. A digital torque wrench helps ensure your portafilter is tightened correctly without risking damage. For burr alignment, I use a specially designed flat shim, which simplifies the process, making sure your grinder’s burrs stay perfectly level for months on end. These dedicated tools reduce guesswork, ensuring your setup remains dialed-in for exceptional espresso every time.
How Do I Maintain My Equipment Over Time?
Long-term maintenance involves a combination of routine cleaning, periodic calibration, and timely repairs. For grinders, that means checking for burr wear after processing about 5kg of coffee beans—using methods like the burr alignment verification. For espresso machines, regular descaling is crucial, especially if you notice a decline in steam pressure or water flow. I recommend setting a monthly schedule to inspect seals, gaskets, and water filters, replacing them as needed to prevent leaks and pressure drops. Staying vigilant with these practices minimizes costly breakdowns and keeps your espresso tasting pristine.
Scaling Your Setup for Future Success
As your skills grow, so might your equipment needs. Moving beyond basic tools, consider upgrading to a semi-automatic espresso machine with advanced PID control, which allows for precise temperature management—essential for light roasts and delicate coffees. Incorporating a high-quality coffee grinder with stepless grind adjustment ensures you can fine-tune particle size without the abrupt jumps of stepped grinders. Investing in smart sensors that monitor temperature and pressure can provide real-time feedback and troubleshooting insights, streamlining your workflow. Looking forward, the trend points toward smarter, interconnected brewing systems that adapt to your environment and preferences—think of it as turning your home setup into a personal barista robot.
Make Maintenance Part of Your Routine: Small Habits, Big Results
Embed quick maintenance checks into your daily routine—like a 2-minute inspection of your steam wand for blockages or a quick wipe of your tamper and portafilter. Over time, these habits prevent buildup and ensure everything functions smoothly during those critical moments of the shot. For more advanced enthusiasts, automating calibration checks using tools like the smart scale mentioned earlier can calibrate your workflow without manual intervention. Consistency is the secret to long-term success in home espresso, and establishing these habits today can save countless headaches tomorrow. Want to optimize your setup? Try the thermal stability hack—it’s a game changer for maintaining temperature consistency over long brewing sessions.
Looking back, one of the most transformative lessons I learned about home espresso brewing was that even the slightest misalignment in flat burrs could sabotage my coffee dreams. I used to chase perfect shots, only to be betrayed by uneven grind sizes and bitter flavors. Discovering the importance of precise burr leveling was a game-changer, reinforcing that the devil is truly in the details. This insight pushed me to develop a meticulous routine for aligning my burrs, which consistently yields richer, more vibrant espresso. Sharing this with fellow enthusiasts, I realize that embracing the craft of burr alignment unlocks a new level of coffee mastery, where every shot sings with clarity and balance.