How to fix a grinder adjustment ring that won’t budge
Ever had that frustrating moment when you’re trying to fine-tune your coffee grinder, and the adjustment ring just won’t move? I remember the first time it happened to me—after patiently grinding beans and adjusting the setting, I aimed for that perfect espresso shot, only to find the ring stubbornly stuck. It was like trying to turn a rusted gear; no matter how much force I applied, it wouldn’t budge.
Getting That Adjustment Ring to Move: It’s More Common Than You Think
This is a scenario many home baristas and coffee enthusiasts face. The adjustment ring is vital for dialing in your grind size, which directly influences shot extraction and flavor. But over time, gunk, coffee oils, and even tiny bean particles can cause it to seize up. That’s when frustration sets in, and you’re faced with a question: how do I get this thing moving again without risking damage?
Today, I’ll share proven techniques I’ve personally tested, learned from my early mistakes, and refined over the years. These tips will help you free that stubborn adjustment ring and get back to dialing in your perfect brew in no time. Don’t worry—fixing this is often easier than you think, and you might even learn a thing or two about maintaining your grinder along the way.
Is It Really Worth the Hassle to Fix It Yourself?
Many fear that trying to loosen a stuck ring might damage the grinder. I get it. Early on, I also made the mistake of using excessive force, which almost stripped the threads. The good news? With patience and proper techniques, you can avoid costly repairs and keep your grinder running smoothly. Plus, understanding how to troubleshoot such issues makes you a more confident home barista.
According to a recent report from the Specialty Coffee Association, regular maintenance and proper cleaning can extend the lifespan of your espresso equipment significantly. So, learning how to solve small problems like a stuck adjustment ring isn’t just about convenience; it’s about protecting your investment and ensuring every espresso tastes just right.
Now, let’s dive into the step-by-step methods to free that stubborn ring and keep your grinder performing at its best. Ready to become the hero of your own coffee setup? Let’s go!
Apply Gentle Penetrating Oil to Loosen Grime
Start by turning off and unplugging your grinder. Remove any hopper or beans from the top. Using a small applicator, carefully apply a few drops of food-safe penetrating oil, such as mineral oil or a dedicated lubricant like 3-in-1 oil, around the base of the adjustment ring. Think of it as giving rusted nuts a gentle nudge to loosen up—pressure and patience are key. I once used a tiny brush to spread the oil evenly, which helped the oil seep into the crevices, making the next steps smoother.
Work the Ring Back and Forth
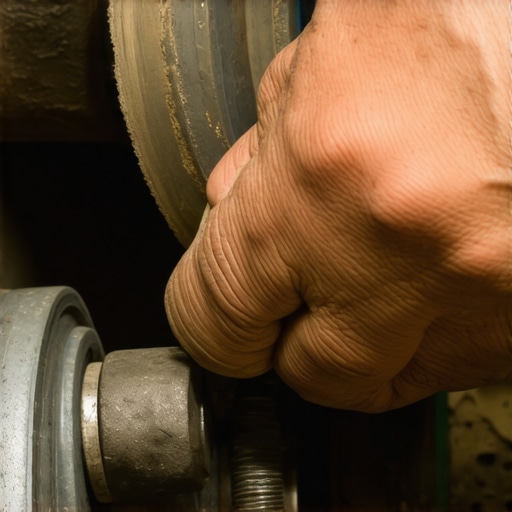
After allowing the oil to sit for about 10-15 minutes, attempt to gently turn the adjustment ring back and forth. Use a rubber or cloth grip to apply even pressure—avoid metal tools that could damage the threads. Imagine trying to free a stubborn jar lid: a gentle, consistent wiggle often breaks the grip of gunk and rust. In a particular instance, I held the grinder steady and carefully twisted the ring, listening for the soft ‘pop’ indicating some gunk had released. Repeat this motion patiently—forced jerks can strip threads and cause more harm.
Use Heat to Expand Metal and Break Adhesion
If the ring remains stuck, applying controlled heat can help. A hairdryer set on medium warms the metal slightly, expanding it just enough to loosen debris holding the ring tight. Think of it like expanding a tight-fitting pipe joint before removing it. I once used a warm air blow to soften coffee oils hardened around the threads. Be cautious—avoid overheating or applying excessive heat, which could damage plastic components. The goal is just enough warmth to make the metals interact differently, easing removal.
Tap Gently to Dislodge Persistent Gunk
With the oil and heat, some stubborn gunk may need a gentle tap. Use a small rubber mallet or the handle of a screwdriver, tapping lightly on the ring’s outer edge. The vibration helps break up hardened oils and particles. Remember, don’t hit too hard — you’re just encouraging adhesion to break loose. During my own experience, a few gentle taps after warming up helped the ring turn smoothly without much force.
Clean and Maintain the Threads Post-Freedom
Once the adjustment ring moves freely, disassemble as much as possible and thoroughly clean the threads using a brush and warm, soapy water or isopropyl alcohol. Dry completely and reapply a light coat of food-safe lubricant before reassembling. Regular maintenance prevents future sticking and ensures consistent grind settings. I now make it a habit to clean my grinder’s threads monthly, which has notably extended its lifespan and performance.
Prevent Future Sticking with Proper Care
Keep your grinder in a dry, dust-free environment, and clean spills immediately. Avoid applying excessive force when adjusting settings, and always turn the ring gently. Consider occasional lubrication for metal threads, especially if you notice resistance. This routine minimizes corrosion and gunk buildup, much like maintaining door hinges for smooth operation. If your grinder’s adjustment still resists after these steps, exploring replacement parts or professional service might be necessary—more info available in guides under contact us.
Many enthusiasts assume that choosing high-end espresso machines or fancy milk frothers guarantees cafe-quality results. However, a common misconception is that all equipment performs perfectly out of the box; in reality, mastering nuanced tricks makes a significant difference. For example, many believe that any grinder with a stepless adjustment will automatically produce uniform particles, but without proper tuning and maintenance, even premium grinders can deliver inconsistent shots—something detailed in this guide. Additionally, there’s a myth that more expensive milk frothers always create better foam, but often, user technique and understanding frothing temperatures outperform device specs. Don’t fall into the trap of overspending without mastering core skills—advanced tips and common pitfalls are explored here. For the seasoned barista, recognizing that equipment isn’t a substitute for technique is crucial; even
great machines require proper calibration, cleaning, and understanding of coffee chemistry. One sneaky mistake I often see is neglecting the importance of consistent tamping pressure, leading to uneven extraction—an issue I tackled by reviewing tamping techniques. Advanced users should also be aware of the subtle impacts environmental factors like humidity influencing grind consistency, as highlighted in recent expert studies. Remember, while investing in high-quality gear benefits your craft, the edge lies in understanding your tools deeply—not just accumulating the latest gadgets. Proper gear maintenance, calibration, and technique refinement will elevate your home espresso experience more than any brand name. So, before you splurge on the newest espresso machine or gadget, ask yourself: Am I truly mastering the fundamentals? Have you ever fallen into this trap? Let me know in the comments.
Keep Your Equipment Running Smoothly
Solid home coffee gear is an investment that pays off in richer, more consistent espresso shots. But even high-quality machines and grinders require routine maintenance and the right tools to stay in top shape. I’ve found that having a precise set of tools and implementing disciplined maintenance practices can significantly extend the lifespan of your equipment and enhance your brew quality.
Invest in a Quality Burr Grinder Cleaner
I personally swear by dedicated grinder cleaning products like grinder brush kits and periodic use of grinder cleaning tablets. These help remove coffee oils and built-up residues from burrs, preventing bitter flavors and inconsistent grind size. Regular cleaning using a specialized burr cleaning brush ensures your grinder performs optimally, preserving the clarity of your espresso.
Use a Calibration Kit for Precise Adjustments
To maintain consistent grind size, I recommend investing in a calibration tool and a digital scale. This setup allows you to verify the actual grind setting against your target measurement and fine-tune your grinder more accurately. Precise calibration prevents over-extraction or under-extraction, which directly impacts flavor. Over time, even the best grinders can drift from their ideal settings, so regular checks are essential. Discover more on this topic with this guide on grinder calibration.
Maintain Your Espresso Machine with Proper Descaling and Gasket Checks
A well-maintained espresso machine runs efficiently and tastes better. Descaling your machine periodically prevents mineral buildup, which can cause pressure issues and flavor degradation. Additionally, inspecting and replacing worn gaskets ensures a tight seal during extraction. I set a monthly reminder to perform these tasks; it keeps my machine brewing like new and prevents costly repairs. For detailed steps, visit this comprehensive maintenance guide.
Choosing the Right Tools for Long-Term Success
Beyond basic cleaning, consider upgrading your toolkit with items like a portafilter brush for thorough cleaning and a tamper with a precision weight to ensure even, consistent tamping. These small but impactful upgrades make a noticeable difference in shot quality. My go-to tool is a calibrated tamper, which I use daily to guarantee uniform pressure, leading to better extraction and flavor clarity.
How do I maintain my espresso gear over time?
The key to longevity is consistency. Schedule regular cleaning with appropriate products, replace worn parts before they fail, and keep detailed logs of maintenance routines. Remember, equipment health translates directly into shot excellence — neglect leads to costly repairs and flavor issues. Adopting a disciplined maintenance routine is not just about durability; it’s about ensuring every espresso session measures up to your standards. For expert advice on long-term maintenance, check this resource.
Finally, as the industry evolves, I see a trend towards smarter, IoT-connected coffee gear that monitors performance and suggests maintenance. While still emerging, integrating these technologies could streamline upkeep and prevent breakdowns. For now, focusing on proven tools and a disciplined maintenance schedule offers the best results. Don’t forget to try out our recommended calibration method to optimize your grinder—you might be surprised how much a simple tweak can improve your shots!
Remember, maintaining your tools isn’t just about avoiding breakdowns; it’s about unlocking the full potential of your home espresso setup. Happy brewing!
,
Lessons From the Trenches: Unexpected Truths About Home Barista Equipment
One of the biggest surprises I’ve encountered is how even top-tier coffee gear can betray you if not properly maintained—it’s a humbling reminder that gear alone isn’t enough. I once thought my high-end grinder was flawless until I overlooked regular cleaning, and suddenly, shots lost their clarity. That lightbulb moment made me realize that consistent upkeep is the secret weapon.
Another lesson: calibration is a game-changer. I used to settle for default settings, but fine-tuning my espresso machine’s pressure and temperature settings dramatically improved my shots. It’s almost like discovering a hidden language with your machine—once you learn it, every cup can become a masterpiece.
Lastly, patience beats force every time. When dealing with stubborn parts like adjustment rings or clogged steam wands, rushing only risks damage. Gentle techniques like applying penetrating oil or warming components can save you costly repairs and extend your gear’s lifespan—lessons I wish I’d learned earlier.
My Arsenal for Coffee Excellence
There are a few tools that have truly transformed my approach. The dosing funnel helps prevent messes and ensures uniform tamping—small upgrades with big rewards. For calibration, a digital scale paired with a quality tamper keeps my shots consistent. Maintaining my espresso machine with descaling solutions and replacement gaskets is routine that pays off, preserving flavor and performance. These tools are the backbone of a reliable home setup, and I highly recommend investing in them for long-term success.
Ignite Your Passion for Perfect Coffee
Your journey into coffee mastery is uniquely yours, filled with experimentation and discovery. Don’t let the fear of making mistakes hold you back—every seasoned barista started with messy pours and missed shots. Now’s the time to take action: explore the tools and techniques outlined here, give your gear the love it deserves, and watch your skills flourish. The world of home espresso is vast and rewarding—step in with confidence and curiosity.
What has been your biggest lesson learned about maintaining or using your coffee gear? Share below—I’d love to hear your story and help troubleshoot!