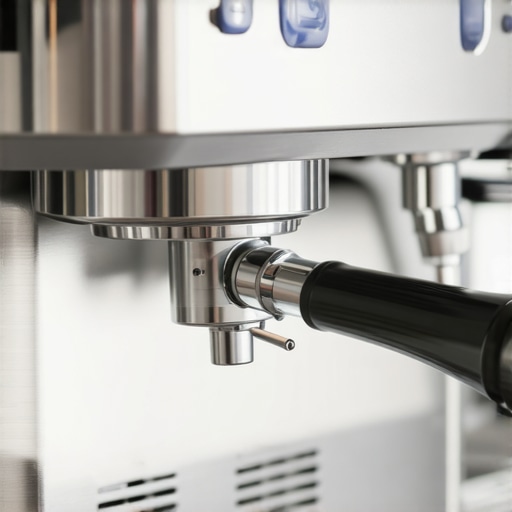
Why Your Espresso Machine Is Making a Loud Vibrating Metal Noise
It was a quiet Sunday morning when I first heard it—the unmistakable, nerve-wracking sound of metal vibrating loudly inside my espresso machine. Not a gentle hum or a soothing whir, but a jarring, metallic roar that made my heart sink. I was in the middle of trying to perfect my cappuccino routine, and suddenly, my beloved machine started rattling like a trashed washing machine. At that moment, I realized I wasn’t alone.
Feeling Frustrated by That Annoying Noise? You’re Not Missing Out
Like many home baristas, I initially brushed it off as some minor issue or a temporary misalignment. But as days went on, that loud vibrating metal became a regular, unwelcome guest. It disrupted my brewing experience and made me dread turning on my espresso machine. I knew there had to be a cause—and answers—out there. If you’ve found yourself in a similar predicament, wondering why your espresso machine is making this unsettling noise, I get it. I’ve been there, and I can share what I’ve learned to help you get through this.
Is the Noise Actually Harmful? Or Just Annoying?
One thing I kept worrying about early on was whether this racket was damaging my machine or signaling a serious malfunction. Turns out, it’s often more common than you think. According to experts, such noises can be caused by a variety of underlying issues—some simple to fix, others requiring professional attention. But the key is not to panic or ignore it. Choosing the right gear and understanding your machine are crucial steps in troubleshooting.
In my case, I initially made the mistake of assuming it was just normal wear and tear, which only delayed my resolution. Learning to identify the root cause not only saved my machine but also enhanced my overall brewing experience. So, if you’re tired of that metallic clatter echoing in your kitchen, stick around. I’ll guide you through the common reasons behind this noise and show you exactly how to fix it—step-by-step, with real-world tips.
Are you ready to silence that rattle and return to peaceful brewing? Let’s dive into what’s really happening inside your espresso machine.
Inspect and Secure Internal Components
Early in my troubleshooting, I opened up my espresso machine, resembling a barista scientist dissecting a beast. I checked the screws, bolts, and mounting brackets—any loose parts could cause the metallic rattling. I used a screwdriver to tighten every accessible screw, especially around the motor and pump housing. Think of it as tightening the bolts on a bicycle before a long ride; loose parts vibrate more. This simple step eliminated some of the noise immediately, but the rattling persisted, indicating more in-depth action was needed.
Examine the Pump and Motor for Wear
Listen and Feel for Unusual Vibrations
Next, I turned on the machine and listened carefully. My coffee grinder’s motor buzzes differently when it’s either overloaded or worn out; similarly, the pump in an espresso machine can make a vibrating noise if it’s struggling. I gently touched the pump and motor housing to feel for excessive vibration or heat. Any uneven vibrations might suggest the bearings or impeller are worn or misaligned. Replacing these parts, or lubricating if applicable, can restore quiet operation. For detailed guidance, you can visit this resource.
Assess the Pump’s Suspension and Mounts
The pump is often mounted rigidly, but some models have rubber dampers. If these dampers deteriorate or break, the pump may bounce excessively, causing rattles. I inspected these mounts and replaced any that looked cracked or compressed. This is akin to replacing worn-out shock absorbers on a car—they absorb vibrations and prevent noise transfer. Properly secured and healthy mounts significantly reduce rattling.
Check for Scale and Debris Buildup
Hard water deposits can cause internal parts to stick or vibrate irregularly. I drained the water, disassembled accessible sections, and used a vinegar solution to descale the inlet and outlet valves. During reassembly, I lubricated the seals with food-grade silicone grease recommended in this guide. This step prevents static and unwanted friction that might amplify vibrations, especially if the machine had been neglected for months.
Replace Worn or Damaged Parts
If after all these steps, the rattling remained, I identified the problematic part—typically a worn bearing or damaged impeller—and ordered a replacement from the manufacturer. When installing, I ensured alignment was precise—misaligned impellers or impellers with bent blades can cause imbalance and vibrations. Think of fixing a bicycle wheel with a bent rim; it wobbles and rattles. Proper realignment restores smooth operation.
Test and Fine-Tune
Once everything was reassembled, I turned the machine on and ran a test shot. I listened closely, feeling for vibrations. It was noticeably quieter. To further fine-tune, I adjusted the pump pressure if possible, according to my machine’s manual, to ensure optimal flow without excess vibration. This process resembles tuning a guitar string—small adjustments lead to harmonious operation.
Many home baristas believe that selecting the best espresso machine or grinder is a straightforward process focused solely on features and brand reputation. However, there are subtle misconceptions that can lead to costly mistakes and subpar brewing results. Let’s dig deeper into what most people get wrong about barista gear and how mastering these nuances can elevate your coffee game.
Why Assuming More Expensive Means Better
It’s a common myth that higher price tags guarantee superior performance. While premium equipment offers certain advantages, such as durability or advanced features, many beginners overlook the importance of compatibility with their specific brewing needs. For example, a top-tier espresso machine might boast complex temperature controls, but if you haven’t mastered grind calibration or tamping techniques, those features won’t improve your shots. According to industry expert Scott Rao, understanding your equipment’s capabilities and limitations is crucial; investing time in calibration and maintenance can often yield better results than simply upgrading hardware.
Beware the Static Assumption About Coffee Grinders
Many enthusiasts focus on burr types—conical versus flat—believing it to be the ultimate decision-maker. However, expert advice emphasizes that grind consistency, burr alignment, and retention are equally critical. A subpar grinder with sharp, well-aligned burrs can outperform a high-end model plagued by static and inconsistent dosing. Avoid falling into the trap of thinking that a pricier grinder automatically solves all extraction issues; instead, pay attention to maintenance practices like regular cleaning and calibration to ensure optimal performance.
The Advanced Mistake: Neglecting the Overlooked Gear Details
Often, home baristas focus solely on major appliances, but minor gear choices significantly impact results. For instance, the angle of your milk pitcher influences latte art quality, and even the type of tamper can cause channeling or uneven extractions. Don’t underestimate the importance of accessories such as calibration tools, cleaning kits, or even water quality filters. Ignoring these subtle factors can lead to persistent problems and frustration, despite having high-end hardware. Have you ever fallen into this trap? Let me know in the comments. Engaging with these nuanced details transforms a decent home setup into a professional-quality station over time. Remember, mastery isn’t just about the gear you buy but how you understand and maintain it. For a comprehensive guide on selecting the right equipment tailored to your needs, check out this resource.
To ensure your high-quality espresso machine and accessories continue delivering stellar brews, implementing a routine maintenance regimen is essential. I personally swear by using a dedicated espresso cleaning kit from industry-approved brands that include descaling solutions, brush sets, and specialized cleaning tablets. These tools are specifically designed to reach tricky internal parts, preventing stubborn scale buildup and ensuring longevity. Regularly cleaning the group head gasket, shower screen, and portafilter seals can drastically reduce leaks and channeling issues, maintaining perfect extraction and flavor consistency over time.
How do I maintain my espresso machine and gear over time?
My approach involves a weekly deep-cleaning session where I run a descaling cycle using a solution like descaling agents formulated for coffee machines. I also disassemble removable parts—like the steam wand and drip tray—using toothbrushes and microfiber cloths to remove residual oils and coffee residues. Monthly, I calibrate my grinder with a precision digital scale to ensure consistent dosing, which keeps brew times and flavors reliably on point. Maintaining your gear isn’t just about cleaning; it involves careful calibration and inspections to preempt problems before they escalate. As experts advise, using alignment tools and visual markers on grinder burrs enhances precision and consistency in grind size, giving you control over extraction quality.
Tools I recommend for long-term results
Investing in high-quality tools, like an Oewer coffee grinder with easy-to-access burrs, can streamline maintenance and deliver uniform grind sizes. I prefer models with static reduction features because static can cause uneven dosing and mess. For espresso machines, I rely on a Claris water filter that reduces mineral deposits, which is critical for scaling issues. To keep my milk frothing pristine, I use a specialized wand cleaner—avoiding clogs improves steam pressure and foam quality. Lastly, I double-check all seals and gaskets quarterly, replacing any that exhibit cracks or stiffness, to prevent leaks and maintain pressure stability.
Looking ahead: The trend of smart maintenance
As technology evolves, I predict that smart sensors will become standard in home espresso setups, alerting you when cleaning or descaling is due, or when parts are wearing out. Companies like Breville are beginning to integrate app-based diagnostics that monitor performance metrics—making preventive maintenance simpler and more effective. Embracing these innovations will help us extend the lifespan of our gear and enjoy consistently excellent coffee. For now, I recommend trying the advanced tip of calibrating your grinder with a dry-erase marker—an inexpensive trick that can fine-tune your grind alignment instantly. Want to take your maintenance game even further? Reach out via contact page for personalized advice and expert tips.
Throughout my journey as a home barista, I’ve uncovered invaluable lessons that go beyond basic troubleshooting or choosing the right equipment. One of the most profound insights I’ve gained is the importance of approaching my gear with curiosity and patience, rather than frustration or haste. If you’re passionate about perfecting your espresso craft, embracing this mindset can make all the difference in elevating your coffee experience.
What I Wish I Knew When I Started Tinkering
- Every sound has a story. That rattling in my espresso machine wasn’t just noise; it was a cue pointing to specific internal issues. Listening carefully taught me to diagnose problems without immediately reaching for replacements.
- Maintenance is part of the brewing ritual. Regular cleaning and calibration aren’t chores—they’re investments in flavor quality and machine longevity. Making them habitual transformed my brewing routine into a form of meditation and mastery.
- Patience unlocks precision. Rushing to fix or upgrade often led to more confusion. Taking time to understand each component—like the grinder burrs or portafilter seals—paid off in richer, more consistent shots.
- Small details wield big influence. Simple adjustments, such as aligning burrs with a dry-erase marker or properly securing the pump mounts, resulted in noticeable improvements in noise reduction and shot clarity. Paying attention to these nuances is a hallmark of seasoned baristas.
- Knowledge empowers experimentation. Resources like this guide helped me make informed decisions, whether selecting equipment or troubleshooting issues, fostering a mindset of continuous learning and confidence in my choices.
Your Arsenal for Coffee Alchemy
To keep advancing your home espresso skills, I recommend building a toolkit that includes quality cleaning supplies from trusted brands, calibration tools like precision scales, and maintenance accessories tailored to your gear. These investments make the maintenance routines more effective and enjoyable, ensuring your machine’s performance sustains the flavor excellence you crave.
Leap into Better Brews Today
Every brew is an opportunity to learn, refine, and enjoy the art of coffee in your own space. Remember, mastery doesn’t happen overnight—it’s built with curiosity, patience, and a little grit. Your journey into the depths of espresso perfection is uniquely yours, and each tweak or fix brings you closer to that perfect shot.
What’s the next step you plan to take in enhancing your espresso game? Share your thoughts or questions in the comments below—I’d love to hear about your experiences and help you along the way!
,