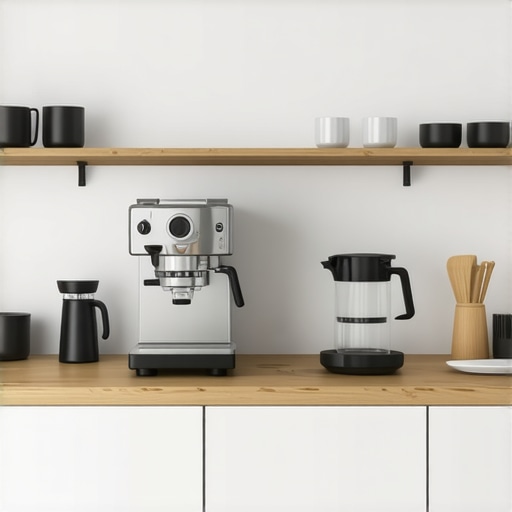
How to Balance Your Countertop Space for a Dual Boiler Setup
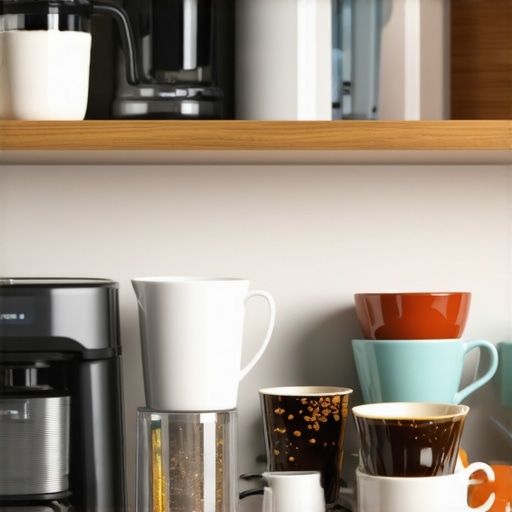
Picture this: You’re in your kitchen, excited to pull that perfect shot of espresso. But instead of feeling the renewed enthusiasm, you’re met with a cluttered countertop, a tangle of hoses, and a single insecure space trying to contain two expensive, delicate machines. It’s a familiar scene for many enthusiasts like me who crave that barista-quality brew at home but find themselves battling to keep everything neat and functional.
Finding Harmony in a Crowded Kitchen
When I first set up my dual boiler espresso machine, I naively thought I could cram everything into a tiny corner. Big mistake. The incessant shifting, knocking over cups, and cramped workspace quickly turned brewing into a frustrating game of Tetris. It didn’t take long before I realized that without proper space management, my beloved coffee ritual was at risk. I needed a plan—something that would prevent those accidental bumps and make my setup both practical and inspiring. Today, I’ll guide you through how I learned to balance my equipment, so you can enjoy your espresso without sacrificing your countertop.
Is Overcrowding Really That Bad for Your Equipment and Results?
Early on, I overlooked how cluttered spaces could impact not just the aesthetics but also the longevity of my gear. For instance, lingering moisture from a cramped setup can cause rust or mold. Also, a cluttered workspace inevitably leads to accidental knocks, which could damage sensitive components like your dual boiler or PID controller. Experts warn that poor organization might even lead to uneven heating or water contamination, affecting your espresso quality. Trust me, I learned this the hard way—checking out [the common mistakes in home espresso setups](https://espressotechguide.com/how-to-fix-a-grinder-adjustment-ring-that-wont-budge) can save you heartbreak and costly repairs.
So, what can you do about this space dilemma? That’s exactly what we’ll dive into next: creating a harmonious, efficient countertop that makes your daily espresso ritual a joy rather than a chore. Ready to transform your chaos into calm? Let’s get started.
,
Organize Your Equipment Effectively
Start by categorizing all your espresso gear. Separate your grinder, espresso machine, tampers, milk frothers, and accessories into designated zones. Use drawer organizers or wall-mounted racks to keep small tools accessible and neat. I once repurposed a spice rack to hold my portafilters and cleaning brushes, which freed up countertop space and reduced clutter during brewing sessions.
Create a Dedicated Brewing Station
Choose a specific area on your countertop exclusively for coffee making. Ensure it’s close to power outlets and has enough clearance for your machines and accessories. Place a non-slip mat underneath to prevent slipping and protect your surface. When I set up a corner with proper lighting and minimal distractions, my brewing became more consistent, and cleanup faster.
Maximize Vertical Space
Install wall-mounted shelves or magnetic strips to hold cups, portafilters, and tamper tools. Vertical storage keeps essential items within reach and frees up valuable counter real estate. I attached a magnetic strip inside a cabinet door to store my grinder tools, which kept them organized and out of the way during brewing.
Implement Storage Solutions for Small Parts
Use clear containers or small labeled jars for coffee beans, filters, and cleaning supplies. Labeling helps avoid hunting for items and keeps everything visible. During a busy morning, easily grabbing the right cleaner or bean type sped up my workflow significantly.
Manage Cord and Hose Clutter
Use cable clips or conduit to route power cords neatly along the back of your setup. Keep hoses organized with velcro straps or hose reels. I once wrapped hoses around a wall-mounted hook, preventing accidental pulls and spills, which also made cleaning easier.
Optimize Workflow and Accessibility
Arrange your tools so that everything you need during brewing is within arm’s reach. Place your grinder, scale, and tamper in a semi-circle around your machine. This setup reduces movement and makes the process more fluid. I experimented with different arrangements until I found one that minimized reaching and boosted my efficiency.
Regular Maintenance and Decluttering
Schedule weekly cleanups to remove unused accessories or expired beans. Keeping your space tidy prevents clutter accumulation that hampers workflow and risks equipment damage. Once I adopted a quick weekly tidy-up ritual, my workspace remained inviting and functional, and my equipment lasted longer.
By applying these practical steps, you’ll create a harmonious environment that supports consistent espresso quality and a more enjoyable brewing experience. Remember, efficient space management isn’t a one-time task but an ongoing process to adapt as your collection grows and your skills improve.
Many enthusiasts assume that buying high-end equipment guarantees perfect espresso and microfoam, but the reality is more nuanced. A common misconception is that milk frothers, for example, are simple devices that deliver microfoam effortlessly. In fact, achieving velvety microfoam requires understanding gas retention, pitcher angles, and steam wand dynamics. Relying solely on automatic frothers can lead to disappointing results, as they often lack the control needed for advanced textures. Similarly, many assume that more powerful grinders always produce better espresso. However, if a grinder’s adjustment ring is stuck or isn’t calibrated correctly, it can cause over-extraction or channeling issues that ruin shots—a trap nice to be aware of. Check out this guide to fix a stubborn adjustment ring and unlock your grinder’s true potential.
Don’t Fall for the Myth: More Features Mean Better Shots
It’s tempting to think that all barista gear with more bells and whistles automatically elevates your brewing. But often, complexity breeds confusion. For instance, a dual boiler espresso machine with advanced PID controls is impressive, yet without proper setup and maintenance, you might be chasing stability issues or inconsistent temperatures. Many home baristas overlook the importance of regular cleaning, which can cause buildup and affect flavor. For example, dried milk crust inside the steam wand can cause sputtering, but proper cleaning routines—like using the right cleaning method—prevent this. The hidden nuance is mastering your equipment’s quirks rather than just acquiring the latest gear.
Moreover, many believe that skilled tamping alone will solve all extraction issues. But if your puck is soggy or uneven due to improper distribution or worn-out baskets, your shot quality will suffer regardless of tamping pressure. Techniques like proper distribution depth can make a significant difference. Advanced users know that tiny details—including correct grind size, dose, and tamping consistency—collectively influence the final brew. Skipping these nuances often leads to subpar results, despite high-end gear.
Are You Overlooking the Subtle Skills That Make a Difference?
While equipment matters, the real secret to exceptional espresso often lies in technique. For instance, achieving perfect microfoam isn’t just about the steam wand but also about pitcher temperature, angle, and listening to the pitch of the steam. Using simple tests to check grinder burrs or calibrating your grinder properly can prevent bitter, uneven shots. Likewise, understanding the science behind pre-infusion and extraction times can help you troubleshoot common problems like sour or bitter tastes. As noted by coffee scientist Dr. Scott Rao, mastering these subtleties elevates your coffee from good to great—sometimes more so than upgrading to expensive gear.
Don’t fall into the trap of thinking equipment alone can elevate your brewing—focus on mastering the techniques that unlock the true potential of your setup. Have you ever faced frustrations that turned out to be technique-related rather than gear issues? Let me know in the comments.
Invest in Quality Tools for Longevity and Performance
To ensure your espresso setup remains reliable, investing in premium accessories and maintenance tools is crucial. For grinding, I rely on a Ditting KD640 grinder because of its consistent particle size and durability, which are vital for extraction precision. When it comes to cleaning, a cleaning tablet kit designed specifically for espresso machines helps prevent buildup and scale. Additionally, a precision calibration weight is invaluable for maintaining accurate grinder settings over time, especially after extensive use or when adjusting for different beans.
Implement Routine Maintenance Habits
Keep your equipment performing optimally by establishing regular checkups. For instance, cleaning the paper towel test on your grinder burrs can reveal dullness before it impacts flavor. Regularly descale your espresso machine using manufacturer-recommended descaling solutions to prevent mineral buildup, which I do every 3 to 6 months depending on water hardness. Also, inspecting and replacing worn gaskets, like the group-head gasket, can avert leaking issues and improve pressure stability.
Learn to Troubleshoot Common Problems
Being able to quickly identify and fix issues minimizes downtime. For example, if your grinder starts spraying grounds everywhere, it might be due to a misaligned burr. The adjustment ring could be stuck, requiring careful unsticking to restore proper operation. Or if your milk frother isn’t creating microfoam, consult the guide on microfoam techniques. Having these troubleshooting skills means you spend less time experimenting and more time enjoying high-quality coffee.
Maintain Your Equipment’s Peak Performance Over Time
Establishing a maintenance routine that includes cleaning, calibration, and inspections will extend your gear’s lifespan. For example, regularly cleaning the boiler internals prevents corrosion and ensures consistent temperature stability. Keeping detailed records of your maintenance schedule helps identify patterns and plan future upkeep. In the coming years, advancements in sensor technology may introduce smarter maintenance alerts for home espresso setups, reducing guesswork and maximizing results.
How do I maintain my espresso machine and grinder effectively over time?
Consistency is key. Use specialized cleaning brushes and descaling kits regularly; replace worn seals and screens before failures happen; and calibrate your grinder using a calibration weight to ensure dosing accuracy. Don’t forget to refer to manufacturer guides, like the detailed instructions provided by La Marzocco, and consider investing in a torque wrench for precise tamping pressure. A small investment in time and tools now can lead to big gains in shot quality and equipment longevity. Try incorporating a monthly deep clean into your routine—your espresso will thank you for it, and your gear will last much longer.
Lessoned from the Shadows of My Brewing Journey
One key insight I uncovered is that high-end gear alone doesn’t guarantee exceptional espresso; mastering your technique is equally vital. I once assumed that a fancy grinder would fix all extraction issues, but I learned the hard way that calibration and maintenance are equally crucial—check out this guide to free your grinder’s adjustment ring and unlock better shots.
Relying solely on automatic milk frothers to produce microfoam led to disappointment until I realized that proper pitcher angles and steam wand control are essential—discover how to get professional microfoam with these techniques.
Overcrowding my workspace caused more harm than good, making me overlook important details like regular cleaning and organization. Now, I appreciate that a tidy setup enhances both equipment longevity and shot consistency, emphasizing that space management is as much a skill as beans and brew temperature.
Lastly, I learned that premium gear isn’t enough; techniques like proper distribution and tamping depth make or break shot quality—explore this guide for insights into distribution that prevent channeling and ensure even extraction.
My Toolbox for Coffee Excellence
To keep my setup running smoothly, I trust tools like the Blue Bottle grinder calibration weight for precise adjustments, which I personally tested for consistency. The E61 cleaning brush helps me maintain my group’s cleanliness, essential for flavor clarity. For descaling, I swear by proper descaling tablets that prevent scale buildup. Lastly, a stainless steel tamping mat keeps my workspace organized and protects my surfaces during tamping, making the process both efficient and enjoyable.
The Glimmer of Hope for Your Barista Aspirations
Embrace this journey with patience and curiosity—each tweak and trial brings you closer to that perfect microfoam and rich espresso. Remember, the road to great coffee is paved not just with quality equipment but with consistent technique, organized space, and a willingness to learn from every shot. If you’re eager to elevate your home espresso game, dive into the tutorials, experiment boldly, and most importantly, enjoy every moment of your brewing adventure. What’s the most surprising lesson you’ve learned on your espresso journey? Share below and join the community of passionate home baristas.