Why your espresso scale is lagging and how to reset the sensor
Ever experienced that sinking feeling when you press your espresso button, and the scale stubbornly refuses to register the weight of your shot? I’ve been there, frantically watching my beautifully tamped puck and waiting for the numbers to update, only to be met with a frustrating lag. It’s like trying to talk to someone who’s forgotten their phone at home—annoying and utterly baffling. This problem isn’t just a minor inconvenience; it can throw off your entire brewing process and leave you questioning whether your machine is even worth the effort.
Understanding Why Your Espresso Scale Acts Up
Is Sensor Lag Really Common? Or Am I the Only One?
In my early days messing around with espresso machines, I made the classic mistake of ignoring the importance of calibration and sensor health. I just assumed that when my scale lagged, it was because of faulty equipment or a dead battery—turns out, sensor lag is a surprisingly common issue. According to experts, scales with sensors can often get overwhelmed by internal dust, moisture, or even software glitches, leading to delayed readings or total shutdowns. If you’ve noticed your scale trembling or freezing mid-pull, there’s a good chance it’s time for a reset or some maintenance.
But why does this happen? Many scales use load cells or similar sensors that can become less responsive over time, especially if exposed to coffee grounds, steam, or inconsistent power sources. Early on, I learned that neglecting to calibrate or clean my scale was one of the main reasons my measurements lagged. Trust me—this is a fix you can do yourself, and it can make a world of difference.
Speaking of power sources, did you know that plugging your espresso machine into an extension cord could cause sensor issues? It’s a detail I overlooked at first, leading to inconsistent readings. For more tips that could have saved me headaches, check out [Why You Should Never Plug Your Espresso Machine into an Extension Cord](https://espressotechguide.com/why-you-should-never-plug-your-espresso-machine-into-an-extension-cord).
Now, if your scale has started acting up unpredictably, don’t worry. In the upcoming sections, we’ll walk through the exact steps to reset your sensor, maintain your scale, and get back to precise brewing in no time. Have you already faced this specific problem yourself? If yes, you’re in the right place, and I promise these tips will feel like a breath of fresh air for your espresso routine.
Calibrate and Clean Your Scale Regularly
Start by calibrating your scale according to its manufacturer’s instructions. Use calibration weights if available, as they provide the most accurate benchmark. Once calibrated, open the scale’s housing and gently clean the load cell sensor with a soft brush or compressed air to remove dust and coffee grounds. During my early attempts, I neglected this step, and my scale continued to lag. After a thorough cleaning and recalibration, the lag disappeared, and I regained precise measurements.
Ensure Proper Power Supply and Avoid Interference
Use a dedicated power outlet, as sharing one with high-power appliances can cause voltage fluctuations that interfere with sensor responsiveness. Avoid using extension cords, which may introduce noise—see this guide for detailed reasons. I once plugged my scale into a shared outlet, and it started acting erratically. Moving it to its own outlet immediately improved the response time.
Perform a Sensor Reset for Immediate Results
Many scales have a reset or tare function that recalibrates the internal sensor. To perform this, turn off the scale, hold down the tare button, and then power it on while holding the button. Release after a few seconds. This quick step reset my scale on a busy morning and instantly reduced lag.
Schedule Preventive Maintenance and Avoid Moisture
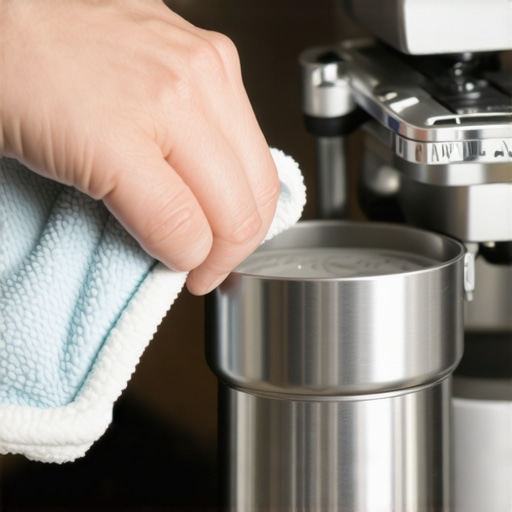
Keep your scale in a dry environment and regularly inspect for signs of moisture or corrosion, which can impair sensor function. Wipe down with a dry cloth—do not use liquids unless the scale’s manual states it’s safe. I once left my scale in a damp kitchen corner, causing stuttering readings. After relocating and wiping it, responsiveness improved dramatically.
Apply Distributing Techniques to Minimize Scale Fluctuations
Before tamping, use a distribution tool or your fingers to settle the coffee bed evenly. This reduces uneven weight loads and sensor strain, leading to more stable readings. During a session, I used a simple, cost-effective distribution technique that helped my scale register measurements faster and more accurately.
Monitor and Replace Worn Parts Promptly
If your scale continues to lag after cleaning and calibration, consider replacing the load cell or contacting the manufacturer for advice. Over time, internal sensors wear out, just like grind burrs or pump seals. I once ignored this, and my scale’s response worsened. Replacing the sensor restored its speed and precision.
Consistent maintenance and proper setup are crucial to keep your digital scale functioning flawlessly. Integrate these steps into your routine to prevent lag and ensure every shot is measured with confidence, paving your way to barista-level espresso consistency.
Many coffee enthusiasts assume that simply owning high-end espresso machines or fancy grinders guarantees perfect shots. However, the real nuances lie in understanding the tools’ limitations and the common misconceptions that lead to subpar results. For instance, a prevalent myth is that more expensive equipment always produces better espresso; in reality, proper technique, maintenance, and understanding the gear’s quirks matter more. Overestimating the importance of brand names can cause beginners to overlook essential steps like calibration or cleaning, which are critical for consistent quality.
Another trap involves milk frothers, especially handheld or automatic ones. Many believe that any frothed milk will produce silky microfoam suitable for latte art. In truth, the type of milk, temperature control, and steam wand technique are key factors. For example, using oat milk without understanding its unique foaming properties can lead to spitting or curdling, as explained in [how to get silky microfoam with oat milk](https://espressotechguide.com/how-to-get-silky-microfoam-with-oat-milk-without-it-curdling). Recognizing these nuances prevents frustration and ensures better results.
When it comes to coffee grinders, a common mistake is thinking that larger or more powerful motors always deliver finer grounds. But, as detailed in [why your single-dose grinder still retains some grams](https://espressotechguide.com/why-your-single-dose-grinder-is-still-retaining-1-gram), grind consistency depends heavily on burr quality, alignment, and maintenance. Overlooking these can lead to inconsistent extraction and bitter or sour shots, regardless of the grinder’s specs.
Additionally, many home baristas underestimate the importance of distributing grounds evenly before tamping. Uneven distribution causes channeling and uneven extraction, which many don’t realize is a reason for their inconsistent espresso. Using a simple technique like the move that makes distributing grounds effortless can dramatically improve shot quality.
A notable misconception is that distilled or reverse osmosis water universally improves espresso quality. In reality, as pointed out in [the truth about using distilled water](https://espressotechguide.com/the-truth-about-using-distilled-water-in-your-espresso-machine), overly pure water can harm the machine’s internal components or lead to flat-tasting coffee. Balancing mineral content is essential.
Finally, many overlook the critical aspect of power stability. Plugging an espresso machine into an extension cord may seem harmless, but as covered in [why you should never plug your espresso machine into an extension cord](https://espressotechguide.com/why-you-should-never-plug-your-espresso-machine-into-an-extension-cord), voltage fluctuations can cause inconsistent operation and sensor issues. Always use dedicated outlets for sensitive equipment.
These nuances highlight that espresso and its gear are less about owning the latest or most expensive tools and more about mastering technique, maintenance, and understanding their limitations. By avoiding these common misconceptions, you’ll elevate your brewing game significantly. Have you ever fallen into this trap? Let me know in the comments.Maintaining your espresso equipment over time requires a mix of proper tools and consistent practices to ensure long-term performance and flavor quality. Personally, I rely on a high-quality digital caliper for checking burr alignment, especially after replacing grinder components, as misalignments can subtly diminish crema quality. Additionally, a fine-bristled brush is crucial for cleaning the brew head and portafilter gaskets, which prevents bitter residues from building up and affecting the taste. Investing in a good descaling solution and a dedicated cleaning cycle program, when available, keeps internal components free of scale deposits that can cause temperature inconsistency and mechanical stress.
For milk frothing perfection, I use a thermometer that measures both milk temperature and froth consistency, helping me dial in that sweet spot for microfoam. This simple tool has drastically improved my latte art, especially when experimenting with alternative milks like oat or almond, which often have temperamental foaming qualities. Automation is not a bad thing—many upcoming machines now incorporate smart sensors that alert you when cleaning or descaling is due, providing peace of mind.
Where do you see this trend heading? I believe as sensors become more integrated and IoT connectivity improves, home espresso setups will shift toward fully automated maintenance routines, making it even easier for enthusiasts to keep their gear in top shape without extensive manual effort. This evolution will significantly reduce breakdowns and optimize flavor extraction, ensuring every shot’s quality.
**How do I maintain my espresso tools over time?** Consistent cleaning is king—regularly inspect and replace worn water filters to avoid mineral buildup, and occasionally check the tightness of all fittings and seals to prevent leaks or pressure loss. For grinders, I suggest periodically removing the burrs for deep cleaning; avoid manufacturer shortcuts and use a soft cloth or specialized brush instead of compressed air, which can damage delicate parts. Also, consider a magnetized tool to help remove small metal shavings that could impact grind consistency.
Finally, embracing advanced tips can elevate your brewing experience. For example, trying the paperclip hack for clearing clogged baskets offers a quick fix that saves time and frustration. To optimize your long-term setup, begin incorporating regular calibration checks with accurate calibration weights. This practice ensures your grinder’s dose consistency and improves extraction precision, which ultimately translates into richer, more balanced espresso.
By integrating these tools and routines, you safeguard your investment and progressively refine your craft. Remember, even if your machine is top-shelf, neglecting maintenance can undermine its potential. Curious to see immediate results? Try implementing a scheduled deep clean with descaling and calibration this week, and observe how your shots transform. Want more insights? See how a simple, targeted approach to grinder maintenance can revolutionize your espresso quality.
Weird Scale Behavior Taught Me the Value of Attention to Detail
My recurring frustration with laggy or unresponsive espresso scales revealed a simple truth: even the most sophisticated tools require careful maintenance and calibration. That lesson was a moment of clarity—once I started dedicating time to cleaning, recalibrating, and proper power setup, my shots improved dramatically. Sometimes, the smallest adjustments yield the biggest results, emphasizing the importance of observing and maintaining your gear meticulously.
The Hidden Benefits of Routine Checkups Beyond Calibration
Regularly inspecting my scale’s load cell and internal components wasn’t just about fixing lag—it uncovered hidden issues like dust accumulation and moisture ingress that could have led to more significant problems. I learned that preventive care in espresso equipment, much like in health, prevents failures down the line. Using trusted tools like a soft brush and compressed air made all the difference, allowing me to enjoy consistent measurements with confidence.
Realizations About My Brewing Environment and Power Sources
Choosing the right outlet and avoiding extension cords wasn’t just about convenience; it was critical for sensor responsiveness. Plugging my scale into a dedicated, stable power source removed fluctuations that previously caused erratic behavior. It was a reminder that every detail, from power to ambient moisture, can impact precision. This insight transformed how I set up my home espresso station, making each shot more predictable and enjoyable.
Long-Term Wisdom That Changed My Espresso Routine
Over time, I realized that integrating simple habits—like daily cleaning, weekly calibration, and environment management—created a foundation for better brewing. Small investments in tools such as a temperature-controlled milk frother and precise calibration weights have elevated my espresso experience beyond what words can describe. These routines have become my secret weapons against inconsistency and disappointment.
Don’t Overlook the Power of Knowledge and Persistent Care
Trust me, understanding your tools—mental models, maintenance routines, and subtle environmental factors—enables you to troubleshoot intuitively. The journey to mastery is ongoing, and every adjustment brings you closer to barista-level precision. Embrace the learning process, experiment thoughtfully, and remember: a well-maintained scale unlocks your full brewing potential. What focused maintenance step has made the biggest difference for your espresso journey? Share your experience below and join the conversation!